How to Track Tools for Maximum Efficiency and Growth
Tracking your tools doesn’t have to be complicated. This guide walks you through simple, proven methods to monitor every tool in your collection. You’ll learn how to set up a tracking system, avoid common mistakes, and scale your approach as your business grows. Whether you run a small workshop or a large job site, these strategies will save you time, money, and headaches.
Key Takeaways
- Tool tracking saves money: Lost tools cost businesses thousands of dollars every year. A solid system prevents waste and replaces guesswork.
- Multiple methods exist: From simple spreadsheets to RFID systems, there’s a tracking solution for every budget and team size.
- Accountability drives efficiency: When everyone knows where tools are, work flows smoother and projects stay on schedule.
- Start simple and scale up: You don’t need expensive software on day one. Begin with basics and grow your system over time.
- Maintenance tracking matters too: Monitoring tool condition and service schedules keeps equipment running longer.
- Team buy-in is essential: The best system fails if people don’t use it. Train your crew and make tracking part of daily habits.
📑 Table of Contents
Why Tracking Your Tools Matters
Running a workshop or job site means juggling a lot of equipment. Drills, saws, compressors, wrenches, and power tools fill up your space fast. Without a clear tool tracking system, things get lost, misplaced, or forgotten. The result? Delays, wasted money, and frustrated workers.
Think about it this way. You wouldn’t run a store without knowing what’s on the shelves. So why run a workshop without knowing what tools you have? Tool tracking gives you real-time visibility into every item in your inventory.
Small businesses lose an average of 15 to 20 percent of their tools each year. That adds up fast. A single misplaced impact driver might not seem like much. But when you multiply that across an entire fleet of equipment, the cost becomes serious. Tracking tools solves this problem at the root.
Beyond just knowing where things are, tool tracking helps you plan maintenance, manage budgets, and keep projects moving. It’s one of the simplest ways to improve operational efficiency in any trade or craft.
The Real Cost of Lost or Untracked Tools
Lost tools hit your bottom line in more ways than one. First, there’s the direct cost of replacing them. A quality angle grinder can cost anywhere from 50 to 200 dollars. Now multiply that by several lost tools per month. The numbers add up quickly.
But there’s a hidden cost too. When a worker can’t find the right tool, productivity drops. They waste time searching or improvise with something less effective. This slows down the entire crew and can push project deadlines past their limits.
Untracked tools also create accountability gaps. When no one knows who checked out a tool or when it was last serviced, maintenance suffers. Equipment breaks down faster. Repairs cost more. And eventually, you’re replacing things that should still have plenty of life left.
Good news? A solid tool tracking system addresses all of these problems. It’s one of the highest-return investments you can make for your business.
Types of Tool Tracking Systems
Not all tracking systems are created equal. The right choice depends on your budget, team size, and the type of tools you manage. Let’s break down the most popular options so you can pick what works best for you.
Manual Tracking with Spreadsheets
The simplest approach is a spreadsheet. You create a list of every tool, its location, and its condition. This works well for small operations with fewer than 50 tools. It’s free, easy to set up, and requires no special training.
Here’s what a basic tracking sheet should include:
- Tool name and model number
- Purchase date and cost
- Current location
- Assigned user or team
- Last maintenance date
- Condition status
The downside? Manual systems rely on people actually updating them. If someone forgets to log a tool return, your data becomes unreliable. It works, but it demands discipline from everyone on the team.
Barcode and QR Code Systems
Barcode and QR code tracking takes the spreadsheet approach up a notch. Each tool gets a label with a scannable code. Workers scan the code when they check a tool in or out. The data feeds into a central database you can access from any device.
This method is affordable and surprisingly effective. A basic QR code system costs just a few dollars per label. Combined with a free or low-cost app, you get a digital tool inventory without a huge investment.
Many contractors love this approach because it’s simple and visual. A quick scan tells you exactly where a tool is and who has it. No guesswork, no confusion.
RFID and GPS Tracking
For larger operations, RFID (Radio Frequency Identification) and GPS tracking offer powerful solutions. Each tool gets a small RFID tag or GPS device attached. A central system monitors every item’s location in real time.
RFID systems work great for indoor tracking. You can scan an entire room of tools in seconds without line-of-sight. GPS tracking is ideal for outdoor job sites and mobile equipment.
The trade-off is cost. RFID and GPS systems require more upfront investment. But for businesses managing hundreds of tools across multiple sites, the return on investment is clear. You save money by reducing losses and improving utilization.
Dedicated Tool Tracking Software
Dedicated software platforms bring everything together. These tools offer check-in/check-out features, maintenance scheduling, reporting, and mobile access. Popular options include ToolSense, EZOfficeInventory, and Asset Panda.
Most software platforms charge a monthly fee per user or per asset. But the time you save and the tools you prevent from being lost more than justify the cost. Many platforms also integrate with accounting and project management tools, making them a natural part of your workflow.
How to Set Up Your Tool Tracking Process
Setting up a tool tracking process doesn’t have to be overwhelming. Follow these steps and you’ll have a working system in less than a week.
Step 1: Take Inventory of Everything
Before you can track tools, you need to know what you have. Pull out every tool from every cabinet, truck, and shelf. Create a master list. Include hand tools, power tools, batteries, and accessories.
This first audit is the foundation of your entire system. Take your time and be thorough. Missing tools during setup means missing them later too.
Step 2: Assign Unique IDs to Each Tool
Give every tool a unique identifier. This could be a barcode, QR code, or even a simple numbering system. The key is consistency. Every tool gets its own ID that stays with it for its entire lifecycle.
For larger items like generators or compressors, the ID should be permanent. For smaller consumables like drill bits, you might track them by batch rather than individual pieces.
Step 3: Choose Your Tracking Method
Pick the system that fits your budget and team. Start with what you can manage today. You can always upgrade later. The important thing is to start. Even a simple spreadsheet beats having no system at all.
If you work with air compressors on site, you might check out our guide on the easy air compressor how to use to make sure your team handles these tools properly while you’re setting up tracking for them.
Step 4: Train Your Team
A tracking system is only as good as the people using it. Hold a brief training session with your entire crew. Walk through the process step by step. Make it clear why tracking matters and how it helps everyone.
Keep the training short and practical. Nobody wants a long lecture. Show them the app, the labels, or the spreadsheet. Let them practice checking tools in and out. Answer questions and address concerns.
Step 5: Review and Adjust Regularly
Once your system is running, don’t just set it and forget it. Review your data weekly at first. Look for patterns. Are certain tools always missing? Is a particular team checking tools out but not returning them? Use this information to make adjustments.
After a month or two, your process should feel natural. At that point, shift to monthly reviews. Keep the system lean and relevant.
Best Practices for Tool Accountability
Tracking tools is one thing. Making sure the system actually works is another. These best practices will help you build a culture of accountability on your team.
Create Clear Check-In and Check-Out Rules
Every tool should have a clear journey. Someone checks it out, uses it, and returns it. Make these rules simple and enforceable. No exceptions.
Post the rules in a visible place. Include them in onboarding for new team members. Consistency is what makes any system reliable.
Assign Tool Owners
For every major piece of equipment, assign a responsible owner. This person is in charge of that tool’s condition, location, and maintenance schedule. It creates a sense of ownership and pride.
Tool owners don’t need to be the only ones who use the equipment. But they’re the go-to person for questions about that tool. This small change dramatically improves accountability.
Schedule Regular Maintenance Checks
Tracking tools isn’t just about location. It’s also about condition. Build maintenance checks into your tracking routine. When a tool comes back in, give it a quick inspection. Note any wear or damage.
For equipment like generators, knowing how big of a backup generator do I need helps you plan for the right power solutions on job sites, and tracking that equipment ensures it’s maintained and ready when needed.
Set up automatic reminders for scheduled maintenance. Many tracking apps support this feature. If you’re using a spreadsheet, set calendar alerts. Staying ahead of maintenance prevents costly breakdowns.
Use Visual Management
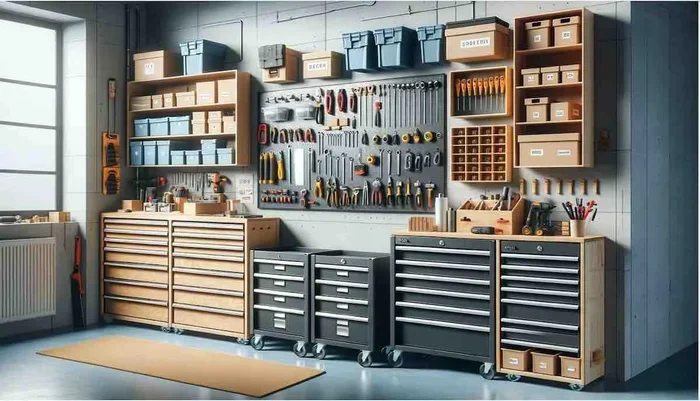
Visual cues make tracking feel natural rather than burdensome. Color-coded labels, shadow boards, and clearly marked storage areas all help. When tools have a designated home, people put them back where they belong.
Shadow boards are especially popular in workshops. Each tool has a cutout shape on the board. When a tool is missing, the empty slot is immediately visible. It’s simple, visual, and effective.
Common Mistakes to Avoid
Even with the best intentions, tool tracking efforts can go wrong. Watch out for these common pitfalls.
Overcomplicating the System
The biggest mistake is building a system too complex for your needs. If you have 30 tools, you don’t need RFID tags and enterprise software. Start simple. Use a spreadsheet or a basic app. Add complexity only when the simpler system can’t handle your volume.
A system that nobody uses is worse than no system at all. Keep it straightforward and user-friendly.
Neglecting Small Tools and Accessories
It’s easy to track the big stuff. But drill bits, sockets, and attachments go missing too. These small items add up in cost and cause delays when they’re not available. Include every item in your tracking system, no matter how small.
Failing to Update the System
A tracking system that hasn’t been updated in three months is useless. People check tools out but forget to log it. Or they return a tool but don’t update the status. Regular audits and reminders keep the data accurate.
Set a weekly 10-minute check-in with your team. Quick and painless. It keeps everyone on the same page.
Ignoring Tool Lifecycle Management
Every tool has a lifespan. Tracking when a tool was purchased helps you plan for replacements before it fails in the middle of a job. Monitor usage hours, maintenance records, and performance over time.
When the time comes to retire a tool, document why. This data helps you make smarter purchasing decisions in the future.
Scaling Your Tool Tracking for Growth
As your business grows, so does your tool collection. What worked for 20 tools won’t work for 200. Plan for growth from the start.
Upgrade as Your Needs Change
Start with a simple system and upgrade when you hit its limits. Maybe that means moving from spreadsheets to dedicated software. Or adding barcode labels to your existing process. The key is to evolve gradually rather than overhaul everything at once.
When you’re managing audio production tools or music equipment, understanding the specific tools matters too. For instance, knowing how does a compressor work audio helps you track and maintain your studio equipment with the right knowledge behind it.
Integrate Tracking with Project Management
The most powerful setups connect tool tracking with project management. When you assign a tool to a project, everyone can see it. When the project ends, the tool comes back. This integration eliminates a lot of the confusion around tool movement.
Many modern platforms support this kind of integration out of the box. Look for features like project tagging, location mapping, and team dashboards when choosing your system.
Track Metrics That Matter
Not all data is equally useful. Focus on metrics that drive decisions:
- Tool utilization rate – How often is each tool actually being used?
- Loss and replacement rate – How many tools do you lose per quarter?
- Maintenance cost per tool – What does each tool cost to maintain over its lifetime?
- Check-out frequency – Which tools are in highest demand?
These metrics help you buy smarter, maintain better, and plan more effectively. They turn raw tracking data into actionable business intelligence.
Build a Culture of Responsibility
The most advanced tracking system in the world won’t work if your team doesn’t care. Build a culture where tool responsibility is part of everyone’s job. Recognize good behavior. Address problems early. Make tracking feel like a team effort rather than a top-down mandate.
When people feel ownership over the process, compliance becomes natural. It stops being a chore and starts being just part of how things work.
Conclusion
How to track tools doesn’t have to be complicated or expensive. The key is to start somewhere and build from there. Whether you use a simple spreadsheet or a full RFID system, the goal is the same: know what you have, where it is, and who’s using it.
Tool tracking pays for itself quickly. Fewer lost tools mean lower replacement costs. Better maintenance means longer equipment life. And improved accountability means smoother projects and happier clients.
Start with inventory. Pick a method that fits your budget. Train your team. Review your data regularly. And as your business grows, scale your system to match. The tools you invest in today will deliver returns for years to come.
Take action now. Pick one corner of your workshop or job site and start tracking. Once you see the difference, you’ll wonder why you didn’t do it sooner.
Frequently Asked Questions
What is the easiest way to track tools for a small team?
A simple spreadsheet or a free app with QR codes is the easiest starting point. List each tool, assign a unique number, and have team members check tools in and out. It takes minutes to set up and works well for teams under 10 people.
How much does a tool tracking system cost?
Costs vary widely. A spreadsheet costs nothing. QR code labels run about 10 to 50 dollars for a full set. Dedicated software platforms typically charge 10 to 50 dollars per month. RFID and GPS systems can run into the hundreds but offer the most powerful tracking capabilities.
Can I track both hand tools and power tools in the same system?
Absolutely. The best systems track all types of tools in one place. Hand tools, power tools, batteries, and accessories can all share the same database. Just make sure each item gets its own unique ID and location record.
How often should I audit my tool inventory?
For most teams, a full audit every quarter works well. In the beginning, do a quick check every week. Once your system is stable and your team is consistent, monthly or quarterly audits are sufficient to keep data accurate.
What should I do if a tool is consistently going missing?
Investigate the pattern first. Is it always the same person? The same location? The same type of tool? Often, the issue is a gap in the check-out process. Tighten your rules, add reminders, and have a direct conversation with the team about accountability.
Is it worth tracking small consumable items like drill bits and blades?
Yes, especially if they’re expensive or frequently used. While you don’t need to track every single screw, keeping tabs on bulk consumables helps you reorder on time and spot unusual usage patterns. It’s a small effort that prevents surprises on the job.