How to Move Tracks in Pro Tools Quickly and Easily
Moving tracks in Pro Tools doesn’t have to be complicated. This guide shows you simple drag-and-drop methods, essential keyboard shortcuts, and advanced organization tricks that will save you hours in any session. Whether you are a beginner or a seasoned audio engineer, you will find practical ways to rearrange your Pro Tools tracks faster and smarter.
Key Takeaways
- Drag and Drop: The simplest way to move tracks up or down in the Pro Tools interface
- Keyboard Shortcuts: Speed up your workflow with essential track movement shortcuts
- Track Folders and Groups: Keep your session organized by grouping related tracks together
- Common Mistakes: Avoid accidental deletions and routing errors when rearranging tracks
- Pro Tips: Use markers, colors, and naming conventions for a cleaner session layout
📑 Table of Contents
- How to Move Tracks in Pro Tools Like a Pro
- Understanding the Pro Tools Interface for Track Movement
- Basic Methods to Move Tracks in Pro Tools
- Keyboard Shortcuts for Faster Track Movement
- Advanced Track Organization Techniques
- Common Mistakes When Moving Tracks in Pro Tools
- Pro Tips for a Smoother Workflow
- How to Choose the Right System for Your Pro Tools Workflow
- Conclusion
How to Move Tracks in Pro Tools Like a Pro
If you have ever worked in a messy Pro Tools session, you know how frustrating it can be to find the right track. Songs grow. Projects pile up. And before you know it, your track list looks like a phone book. Learning how to move tracks in Pro Tools is one of the simplest yet most powerful skills you can build.
This guide walks you through every method you need. From basic drag-and-drop to advanced grouping tricks, you will have everything you need to keep your sessions clean and your workflow fast. We will also cover common mistakes so you do not accidentally mess up your hard work. Let us dive right in.
The good news is that you do not need to be a tech expert. The tools for moving and organizing tracks are built right into Pro Tools. You just need to know where to look and how to use them. By the end of this article, you will move tracks with confidence and speed.
Why Track Organization Matters
Before we get into the how, let us talk about the why. A well-organized session saves time. It reduces errors. It makes mixing easier. When you rearrange tracks in Pro Tools with a clear plan, you can focus on the creative work instead of hunting for the right channel.
Think of it like a kitchen. If your ingredients are scattered everywhere, cooking takes forever. But when everything has a place, you move smoothly from step to step. The same idea applies to your audio sessions.
Understanding the Pro Tools Interface for Track Movement
Before you start moving tracks, you need to know the layout. Pro Tools has several key areas that control how tracks appear and behave. Understanding these basics makes everything else much easier.
The Track List Panel
The Track List Panel sits on the left side of your edit window. This is where you see every track in your session. Each row represents one track. You can see the track name, input/output routing, and mute or solo status here.
To move tracks using the Track List, simply click and drag a track name up or down. The track will shift position in the session. This is the most straightforward method for reordering tracks in Pro Tools. It works for audio tracks, MIDI tracks, and auxiliary tracks alike.
The Edit Window and Its Controls
The Edit Window is the main workspace where you see your waveforms and MIDI data. The track lanes in this window also respond to movement commands. When you drag a track in the Edit Window, you are changing its vertical position in the session hierarchy.
Keep in mind that moving a track in the Edit Window also affects how it appears in the Mix Window. Both windows stay in sync. So any change you make in one place updates the other automatically.
Basic Methods to Move Tracks in Pro Tools
Now that you understand the interface, let us look at the basic methods for moving tracks. There are several approaches, and each has its own use case.
Method 1: Drag and Drop in the Track List
This is the most common way to reorder tracks in Pro Tools. Here is how it works:
- Open your session in the Edit Window
- Locate the Track List on the left side
- Click on the track name you want to move
- Hold and drag the track to its new position
- Release the mouse button to drop it in place
That is it. The track moves, and everything below it shifts to make room. This method is simple and visual. It is perfect for quick rearrangements during the early stages of a session.
Method 2: Using the Track Selector
The Track Selector is a small dropdown menu at the top of each track lane. While it does not move tracks directly, it helps you quickly select the track you want to move. Once selected, you can use keyboard shortcuts or drag methods to reposition it.
Pro Tip: Use the Track Selector along with the Command key (Mac) or Control key (Windows) to select multiple tracks at once. This lets you move several tracks together as a group.
Method 3: Moving Tracks in the Mix Window
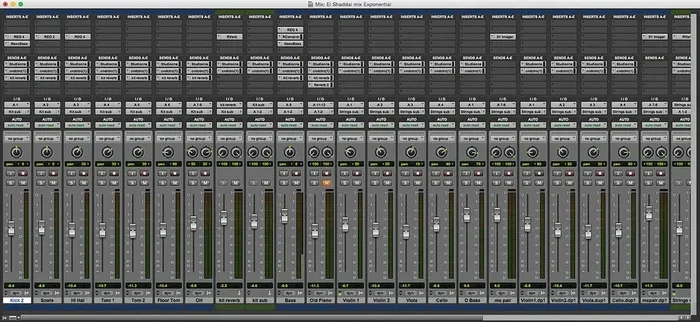
You can also move tracks from the Mix Window. The process is similar to the Edit Window. Click and drag a track strip up or down in the Mix Window. The change reflects in both windows simultaneously.
Some engineers prefer the Mix Window for track movement because it gives them a better view of levels and routing at the same time. It is especially helpful when you are adjusting track order for a mix session.
Keyboard Shortcuts for Faster Track Movement
Using your mouse is fine. But if you want to move tracks quickly, keyboard shortcuts are the way to go. They keep your hands on the keyboard and your workflow uninterrupted.
Essential Shortcuts for Moving Tracks
Here are the most useful shortcuts for moving tracks in Pro Tools:
- Cmd + Up/Down Arrow (Mac): Move the selected track up or down one position
- Ctrl + Up/Down Arrow (Windows): Same function for Windows users
- Shift + Cmd + Up/Down Arrow (Mac): Move the track to the top or bottom of the session
- Shift + Ctrl + Up/Down Arrow (Windows): Same quick jump for Windows
These shortcuts are fast and precise. Once you build the muscle memory, you will wonder how you ever worked without them. Practice them a few times, and they will become second nature.
Customizing Your Shortcuts
Pro Tools lets you customize keyboard shortcuts to fit your workflow. Go to the Setup menu, choose Keyboard Shortcuts, and search for track movement commands. You can assign keys that feel natural to you.
This is a great way to speed up your session. If you use certain movement commands often, give them a dedicated shortcut. It is a small change that makes a big difference over time.
Advanced Track Organization Techniques
Once you have the basics down, you can level up your organization game. Advanced techniques help you manage large sessions with dozens or even hundreds of tracks.
Using Track Folders
Track Folders are a powerful feature in Pro Tools. They let you group related tracks together under one collapsible header. For example, you can create a folder for all drums, another for vocals, and another for synths.
To create a Track Folder, select the tracks you want to group, right-click, and choose Make Folder. You can then move the entire folder up or down in the session. This keeps related tracks together and makes navigation much easier.
Track Folders are especially useful for long sessions where moving tracks manually would take too much time. They also help when you are bouncing or printing tracks for export.
Grouping Tracks for Simultaneous Movement
Grouping tracks is another excellent technique. When you group tracks, any movement or edit you apply to one track applies to all tracks in the group.
To group tracks, select them and press Cmd + G (Mac) or Ctrl + G (Windows). You can then move the entire group up or down with a single drag or shortcut. This is perfect for keeping instrument groups in the right order.
Remember to ungroup tracks when you are done. Ungrouping is just as simple: select the group and press Cmd + Shift + G (Mac) or Ctrl + Shift + G (Windows).
Color Coding and Naming Conventions
Color coding is a simple trick that makes a huge difference. Assign colors to different track types. For example, make all drum tracks blue, all vocal tracks green, and all bass tracks red. When you need to find and move specific tracks, the colors guide you instantly.
Combine color coding with clear naming conventions. Name tracks like “Lead Vocal,” “Kick Drum,” or “Synth Pad” instead of generic labels. A clean naming system saves you time and keeps your session professional.
Common Mistakes When Moving Tracks in Pro Tools
Even experienced users make mistakes when moving tracks. Knowing what to avoid saves you from headaches and wasted time.
Accidentally Deleting Tracks
One of the biggest risks is accidentally deleting a track while trying to move it. Always double-check that you are dragging, not deleting. If you are unsure, use the undo command (Cmd + Z or Ctrl + Z) right away.
It is also smart to save your session frequently. This way, if something goes wrong, you can always go back to a previous version. Think of saving like how long you can run a session without saving. The longer you go without a backup, the more you risk losing your work.
Breaking Routing and Connections
When you move tracks, you need to be careful about routing. Some tracks are connected to buses, sends, and effects chains. Moving a track without checking its routing can break those connections.
Always review the input and output routing after moving tracks. You can check this in the Track List Panel or the Mix Window. If something sounds off after a move, check the routing first. This is similar to making sure all your connections are secure, much like how to wire a setup properly to avoid signal loss.
Moving Tracks Without Updating Markers
Pro Tools markers help you navigate your session. If you move tracks around without updating your markers, you might lose your place. Always update markers after major track rearrangements.
Markers are especially important in long sessions. They act as bookmarks that help you jump to specific sections. Keeping them updated ensures your session navigation stays smooth even after heavy editing.
Pro Tips for a Smoother Workflow
Here are some expert-level tips that will take your track movement skills to the next level.
- Use the Region List: The Region List shows all clips and regions in your session. You can drag regions between tracks quickly for rearranging without moving entire tracks.
- Lock Tracks Before Moving: If you do not want certain tracks to move accidentally, lock them. Go to the Track menu and choose Lock.
- Use Memory Locations: Save different versions of your track layout as Memory Locations. This lets you switch between arrangements easily.
- Zoom While Moving: Hold the Option key (Mac) or Alt key (Windows) while scrolling to zoom horizontally. This helps you see more tracks when rearranging large sessions.
- Keep a Clean Template: Start each new session with a pre-organized template. This saves you setup time and keeps your workflow consistent.
These tips come from years of experience. They might seem small, but they add up to a much faster and more enjoyable editing experience. The goal is to make moving tracks in Pro Tools feel effortless so you can focus on making great music.
How to Choose the Right System for Your Pro Tools Workflow
Your computer setup plays a big role in how smoothly you can move and organize tracks. A slow system will hold you back no matter how good your workflow is.
Think about it this way. If your computer cannot keep up with your session demands, even simple tasks like dragging tracks become laggy and frustrating. You need a system that can handle the workload without choking.
For most Pro Tools users, a machine with a decent processor, at least 16GB of RAM, and a fast SSD storage drive will do the job. But if you are working with large orchestral sessions or hundreds of tracks, you might need more power. The key is matching your system size to your project demands. Just like choosing the right size power source for a home setup, you need the right setup for your specific needs.
Also consider how much fuel your system burns during long sessions. Some setups use more resources than others. Monitoring your system usage helps you avoid crashes and dropouts. Keeping your system optimized ensures that moving tracks and editing audio stays smooth from start to finish.
Conclusion
Moving tracks in Pro Tools is a fundamental skill that every user should master. Whether you use drag and drop, keyboard shortcuts, or advanced grouping techniques, the right method can transform your workflow. Keep your sessions organized, use color coding and naming conventions, and avoid the common mistakes we covered.
The more you practice these methods, the faster and more natural they become. Start with the basics, add shortcuts, and gradually incorporate advanced techniques into your routine. Before long, you will move tracks in Pro Tools without even thinking about it.
Remember, a clean session is a happy session. Take the time to organize your tracks, and your future self will thank you during mixing and editing. Now go open Pro Tools and put these tips into action.
Frequently Asked Questions
Can I move multiple tracks at once in Pro Tools?
Yes, you can. Simply select multiple tracks by holding the Shift or Command key and clicking on each track name. Then drag them all together or use the keyboard shortcuts to move the group up or down in the session.
Does moving tracks in Pro Tools affect the audio files on disk?
No, moving tracks within Pro Tools only changes their position in the session. The actual audio files remain untouched on your hard drive. However, always save your session before making major changes as a safety precaution.
What is the fastest way to move tracks in Pro Tools?
Keyboard shortcuts are the fastest method. Use Cmd + Up or Down Arrow on Mac, or Ctrl + Up or Down Arrow on Windows, to move tracks one position at a time without taking your hands off the keyboard.
Can I move tracks between different Pro Tools sessions?
You cannot directly drag tracks between open sessions. However, you can export tracks from one session and import them into another. Use the Workspace or File menu options to handle cross-session transfers efficiently.
How do I keep my tracks organized in long Pro Tools sessions?
Use Track Folders to group related tracks, apply color coding for different track types, and follow consistent naming conventions. These habits keep even the largest sessions manageable and easy to navigate.
Will moving tracks mess up my mix or automation?
Moving tracks should not affect your mix or automation settings. Pro Tools keeps all track-specific settings attached to the track. However, always review your routing and automation after major rearrangements to be safe.