How to Record Vocals in Pro Tools From Start to Finish
Recording vocals in Pro Tools starts with the right setup and ends with a polished track. This guide walks you through every step, from choosing your microphone and setting gain levels to comping your best takes and applying basic processing. Whether you are a beginner or a seasoned engineer, you will find practical tips to improve your vocal recordings in Pro Tools today.
Key Takeaways
- Proper setup matters: A good audio interface, condenser mic, and quiet room make all the difference.
- Gain staging is critical: Setting the right input level prevents distortion and keeps your vocal track clean.
- Mic placement affects tone: Small changes in distance and angle can dramatically improve vocal clarity.
- Use playlist comping: Record multiple takes and comp the best parts for a flawless final vocal.
- Monitor with headphones: Always use closed-back headphones to avoid bleed and keep your recordings isolated.
- Basic processing helps: EQ, compression, and de-essing shape your vocal sound before mixing.
📑 Table of Contents
- How to Record Vocals in Pro Tools From Start to Finish
- Step 1: Set Up Your Recording Space
- Step 2: Choose the Right Microphone
- Step 3: Set Up Your Audio Interface
- Step 4: Configure Pro Tools for Vocal Recording
- Step 5: Position Your Microphone Correctly
- Step 6: Set Your Gain Levels
- Step 7: Record Your Vocal Takes
- Step 8: Basic Vocal Processing in Pro Tools
- Step 9: Save and Export Your Vocal Track
- Common Mistakes to Avoid When Recording Vocals
- Final Thoughts
How to Record Vocals in Pro Tools From Start to Finish
Recording vocals in Pro Tools can feel intimidating at first. There are so many buttons, settings, and options. But the truth is, the process is simpler than it looks. Once you understand the basics, you will be able to capture professional-sounding vocal tracks right from your home studio.
This guide covers everything you need to know. We will walk through room setup, microphone choice, Pro Tools configuration, tracking techniques, and basic vocal processing. By the end, you will have a clear roadmap to follow every time you sit down to record vocals in Pro Tools.
Good vocal production starts before you ever press record. It starts with preparation. Let us dive in.
Step 1: Set Up Your Recording Space
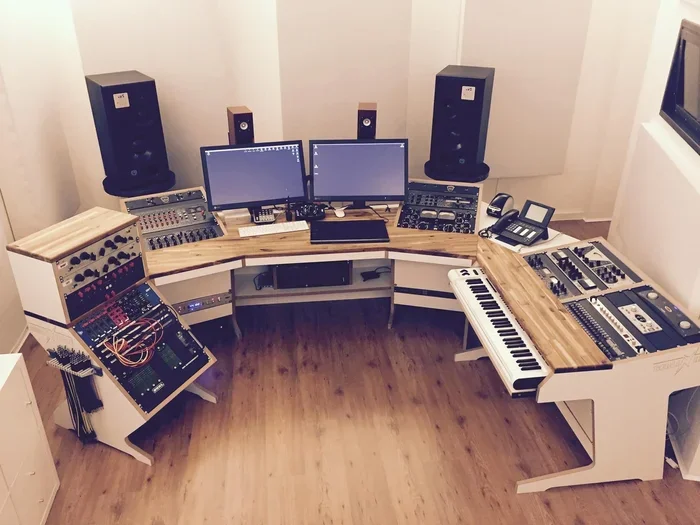
The room you record in matters more than you might think. A bad room will ruin even the best microphone. So before you touch Pro Tools, take care of your space.
Choose a Quiet Room
Pick a room with minimal outside noise. Close windows. Turn off fans and air conditioners. Avoid rooms with lots of hard surfaces that create echo. A bedroom with carpet and curtains often works well for home studios.
Reduce Reflections
Hard walls bounce sound around and create unwanted reverb. You can hang blankets on the walls or use foam panels behind the microphone. Even a closet full of clothes can work as a makeshift vocal booth.
Position Your Mic Stand
Place your microphone away from walls and corners. Stand in the center of the room if possible. This reduces standing waves and room resonances that color your voice.
Quick Tip: Clap your hands in the room. If you hear a loud ring or flutter echo, you need more treatment. Soft materials absorb sound and keep your recordings clean.
Step 2: Choose the Right Microphone
Not all microphones are created equal for vocal recording. The type of mic you choose shapes the tone and quality of your vocal track.
Condenser vs. Dynamic Microphones
Condenser microphones are the go-to choice for most vocal recordings. They capture detail and nuance beautifully. They respond well to the human voice and pick up subtle tonal changes.
Dynamic microphones are more forgiving with room noise. They work well in untreated spaces. Many famous vocalists use dynamic mics for a warmer, thicker sound.
Popular Choices for Vocal Recording
- Audio-Technica AT2020: Affordable condenser great for beginners.
- Shure SM7B: Classic dynamic mic used in countless studios.
- Rode NT1-A: Low-noise condenser with a smooth, detailed sound.
- AKG C414: Versatile large-diaphragm condenser for studio work.
You do not need an expensive mic to get great results. A budget condenser paired with good technique will outperform a pricey mic in a bad room.
Step 3: Set Up Your Audio Interface
Your audio interface connects your microphone to your computer. It converts analog sound into digital audio that Pro Tools can record.
Connect Your Mic to the Interface
Plug your microphone into the interface using an XLR cable. Make sure the connection is tight. A loose cable introduces noise and crackling into your signal.
Set the Input on Pro Tools
Open Pro Tools and go to the I/O settings. Assign your input to the correct channel. Create a new mono audio track and select that input. This tells Pro Tools where to listen.
Enable 48V Phantom Power
If you are using a condenser microphone, you need to turn on phantom power. Most interfaces have a +48V button. This provides the power the mic needs to operate.
Quick Tip: Always turn phantom power off before unplugging your mic. Doing it the other way around can cause a loud pop that damages your equipment.
Step 4: Configure Pro Tools for Vocal Recording
Now that your hardware is connected, it is time to set up Pro Tools properly. Good configuration prevents problems later.
Create a New Session
Open Pro Tools and create a new session. Set your sample rate to 44.1 kHz or 48 kHz. Set your bit depth to 24-bit. These settings give you high-quality audio with plenty of headroom.
Set Up Your Track
Create a new mono audio track. Name it something clear like “Lead Vocal” or “Vox 1.” This keeps your session organized, especially when you have multiple tracks.
Adjust the Buffer Size
Go to Setup > Playback Engine. Set your buffer size low for recording. A buffer of 128 or 256 samples reduces latency. This means you hear yourself in real time without delay.
Enable Low Latency Monitoring
Pro Tools has a low latency monitoring feature. Turn this on so you can hear yourself with minimal delay while recording. This makes it much easier to perform naturally.
Expert Insight: Latency is the enemy of good vocal takes. If you hear a delay between your voice and what comes through the headphones, you will struggle to stay in time. Fix this before you start recording.
Step 5: Position Your Microphone Correctly
Mic placement is one of the most important parts of recording vocals in Pro Tools. Small adjustments can change the entire sound of your take.
Distance Matters
Stand about 6 to 8 inches from the microphone. This is the sweet spot for most vocal recordings. Too close creates a boomy, muddy sound. Too far picks up more room noise and reflections.
Angle the Mic Slightly
Point the microphone slightly off-axis from your mouth. This reduces harsh sibilant sounds like “S” and “T.” It also softens plosive sounds like “P” and “B.”
Use a Pop Filter
A pop filter sits between your mouth and the mic. It stops bursts of air from hitting the diaphragm. This keeps your recordings clean and prevents distortion from plosive sounds.
Use a Shock Mount
A shock mount holds the mic and absorbs vibrations. It stops low-frequency rumble from footsteps or table bumps. This keeps your vocal track clean and professional.
Quick Tip: Record a few test takes and listen back. Adjust your distance and angle until the sound feels right. Trust your ears.
Step 6: Set Your Gain Levels
Gain staging is the process of setting the right input level. If your level is too high, your recording will distort. If it is too low, you will hear more noise when you boost the volume later.
Check Your Meter
Sing at your loudest natural volume. Watch the meter in Pro Tools. You want the signal to peak around negative 12 to negative 6 decibels. This gives you plenty of headroom.
Avoid Clipping
Clipping happens when the signal goes into the red. Once it clips, the distortion is permanent. You cannot fix it in post-production. Always keep your levels safely below zero.
Adjust the Interface Gain
Use the gain knob on your audio interface to set the level. Start low and slowly increase it until your loudest parts hit the target range. Then do a test recording to confirm.
Common Mistake: Many beginners set their gain too high because they want a loud signal. Resist this urge. A clean, low-level recording is always better than a distorted, loud one.
Step 7: Record Your Vocal Takes
Now comes the fun part. You are ready to hit record and lay down your vocal track. But how you approach this step matters a lot.
Warm Up First
Sing a few scales before you record. Warm up your voice to avoid strain. This also helps you find your pitch and tone more easily.
Record Multiple Takes
Do not rely on a single take. Record several passes. Sing the song through completely each time. Some takes will be better than others. That is the whole point.
Use Playlist Comping
Pro Tools has a powerful playlist feature. Each time you record, it creates a new playlist on the same track. You can then listen to all your takes and pick the best parts from each one.
Here is how to do it:
- Record your first vocal take.
- Record a second take on the same track.
- Use the playlist view to see both takes side by side.
- Listen to each take and highlight the best phrases.
- Create a composite take by combining the best parts.
Use Punch and Roll
Punch and roll lets you re-record a specific section without stopping the session. Set a locator around the section you want to fix. When you hit record, Pro Tools records only that section. This saves tons of time.
Stay Relaxed and Natural
Tension in your body affects your voice. Relax your shoulders. Breathe deeply. Sing with emotion, not just technique. The best vocal takes come from a natural, relaxed performance.
Quick Tip: Take short breaks between takes. Your voice is a muscle, and it gets fatigued. Resting between takes keeps your performance consistent.
Step 8: Basic Vocal Processing in Pro Tools
Once you have your best takes comped together, it is time to add some basic processing. This is where your vocal track starts to sound polished and professional.
Clean Up the Recording
First, remove any unwanted noise, breaths, or mistakes. Use the strip silence tool or manually cut out bad sections. Keep the timing tight and the track clean.
Apply EQ
Use an EQ plugin to shape the tonal balance of your vocal. A common approach is:
- High-pass filter: Roll off frequencies below 80 Hz to remove rumble.
- Cut muddiness: Reduce around 200-400 Hz slightly for clarity.
- Boost presence: Add a gentle boost around 3-5 kHz for clarity and intelligibility.
- Add air: A subtle boost above 10 kHz gives a bright, open feel.
Add Compression
Compression evens out the volume of your vocal. It makes quiet parts louder and loud parts quieter. Start with a ratio of 3:1 or 4:1. Set the threshold so the compressor is working on the loudest parts of your performance.
Use De-Essing
A de-esser reduces harsh sibilant sounds. It targets the frequencies around 5-8 kHz where “S” and “Sh” sounds live. Use it gently to avoid making your vocal sound dull.
Add Reverb (Optional)
A touch of reverb can add space and depth to your vocal. Use a short plate or room reverb for a natural feel. Too much reverb muddies the vocal and makes it sound distant.
Expert Insight: Less is more when processing vocals. You can always add more later. Start subtle and build up. It is much harder to remove processing once it is baked in.
Step 9: Save and Export Your Vocal Track
Once you are happy with your vocal recording and processing, it is time to save your work and export the final track.
Save Your Session
Save your Pro Tools session with a clear file name. Include the date or version number. This keeps your project files organized and easy to find later.
Export a Mix
Go to File > Export > Audio. Choose your desired format. WAV is the standard for high-quality exports. Set the bit depth to 24-bit and the sample rate to match your session.
Back Up Your Files
Always back up your project. Copy the session file and all audio files to an external drive or cloud storage. Losing a hard-earned vocal recording is every musician’s nightmare.
Quick Tip: Label your exported files clearly. Include the song title, version, and date. This saves confusion when you are working on multiple projects.
Common Mistakes to Avoid When Recording Vocals
Even experienced engineers make mistakes. Here are some common pitfalls to watch out for.
- Recording too hot: High input levels cause distortion that you cannot undo.
- Ignoring room acoustics: A bad room ruins a good microphone. Treat your space first.
- Skipping warm-ups: Cold vocals lack energy and consistency.
- Using only one take: Comping multiple takes always produces a better result.
- Over-processing: Too much EQ or compression strips the natural character from your voice.
- Forgetting to monitor with headphones: Speakers cause bleed and ruin your isolation.
Avoiding these mistakes alone will put you ahead of many home recording enthusiasts. Small details make a big difference.
Final Thoughts
Recording vocals in Pro Tools is a skill that improves with practice. Every session teaches you something new. The more you do it, the better your results will be.
Start with the basics. Set up a clean room. Choose the right microphone. Configure Pro Tools correctly. Record multiple takes and comp the best parts. Add light processing to shape your sound. Follow these steps every time, and you will be amazed at how quickly your vocal recordings improve.
Do not let perfectionism hold you back. The goal is progress, not perfection. Your unique voice is what makes your music special. Let it shine through every take. Now open Pro Tools, press record, and let your voice be heard.
Frequently Asked Questions
What microphone is best for recording vocals in Pro Tools?
A large-diaphragm condenser microphone is the most popular choice for vocal recording. It captures detail and warmth beautifully. However, a dynamic microphone like the Shure SM7B also works great, especially in untreated rooms. The best mic is the one that fits your space and budget.
Do I need an audio interface to record vocals in Pro Tools?
Yes, you need an audio interface. Your computer’s built-in sound card is not designed for quality vocal recording. An interface provides better preamps, lower noise, and proper phantom power for condenser microphones. It is an essential piece of gear for any home studio.
What is the best way to comp vocals in Pro Tools?
The best way is to use Pro Tools playlists. Record multiple takes on the same track, then use the playlist view to listen to all of them. Highlight the best phrases from each take and create a composite. This gives you a flawless final vocal without leaving the session.
How can I reduce room echo when recording vocals?
Add soft materials around your recording space. Blankets, foam panels, and even a closet full of clothes help absorb reflections. Position yourself away from walls. The more absorption you add, the drier and cleaner your vocal recording will sound.
Should I record vocals in mono or stereo in Pro Tools?
Record vocals in mono. The human voice comes from a single point, so a mono track is more accurate and efficient. Stereo vocals only make sense in special cases, like recording two microphones for a wider effect. For standard vocal recording, always use mono.
How do I avoid plosive sounds when recording vocals?
Use a pop filter positioned about 2 inches from the microphone. Angle the mic slightly off-axis from your mouth. Sing slightly past the mic rather than directly into it. These simple techniques eliminate most plosive sounds without sacrificing vocal quality.
=== CONCLUSION ===
Recording vocals in Pro Tools does not have to be complicated. With the right room, microphone, and setup, you can capture professional-quality vocals at home. Follow the steps in this guide, avoid common mistakes, and always comp your best takes. Your vocal recordings will improve fast, and you will build confidence with every session. Now it is your turn. Fire up Pro Tools and start recording.