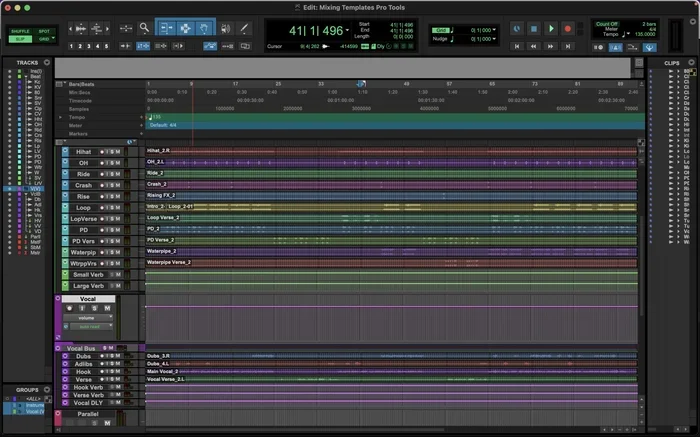
How to Side Chain in Pro Tools for Professional Mixes
Side chaining in Pro Tools is a powerful mixing technique that lets one audio signal control the compression of another. In this guide, you will learn exactly how to set up side chain compression, choose the right compressor plugins, and apply ducking techniques for professional-sounding mixes. Whether you are mixing vocals, bass, or electronic music, mastering side chaining will elevate your production quality.
Side chain compression is one of the most useful tools in any mixing engineer’s toolkit. If you have ever wondered how professional producers get that pumping, clean sound where the bass ducks every time the kick drum hits, side chaining is the answer. This technique is everywhere in modern music production, from EDM to hip hop to pop.
In this guide, we will walk you through exactly how to side chain in Pro Tools step by step. You do not need fancy gear or expensive plugins to get great results. Pro Tools comes with everything you need to start side chaining today. We will cover the basics, the setup, advanced techniques, and common mistakes so you can mix like a pro.
By the end of this article, you will understand side chain compression inside and out. You will know how to route signals, set the right parameters, and apply ducking effects that make your mixes sound polished and professional. Let us dive in.
Key Takeaways
- Side chaining basics: Understand what side chain compression does and why it matters in modern mixing.
- Step-by-step setup: Learn the exact steps to route side chain signals in Pro Tools.
- Compressor plugin choices: Discover the best compressor plugins for side chain work in Pro Tools.
- Ducking techniques: Apply vocal ducking and kick-bass side chaining for cleaner mixes.
- Common mistakes to avoid: Steer clear of over-compression and incorrect routing.
- Advanced tips: Push your mixes further with creative side chain applications.
📑 Table of Contents
What Is Side Chain Compression?
Side chain compression is a technique where one audio signal controls the compression of another signal. Think of it like a volume gate. When the side chain signal gets louder, the compressor reduces the volume of the target signal. When the side chain signal gets quieter, the target signal comes back up.
The most common example is kick and bass mixing. The kick drum triggers the compressor, which ducks the bass guitar or synthesizer. This creates space in the mix so both elements can be heard clearly. Without side chaining, the kick and bass can clash and muddy up the low end.
But side chaining is not just for kick and bass. You can use it for vocal ducking, where background music lowers in volume whenever someone speaks. You can also use it for creative pump effects in electronic dance music. The possibilities are wide open once you understand the core concept.
Why Side Chain Compression Matters
Side chaining solves a big problem in mixing: frequency masking. When two instruments occupy the same frequency range, they compete for attention. Side chain compression gives each instrument its own space in the mix. The result is a cleaner, more balanced sound.
Here are some key reasons why side chain compression is essential:
- Clarity: It removes muddiness from your mix by carving out space for important elements.
- Energy: It adds a rhythmic pumping effect that makes mixes feel more dynamic and alive.
- Professional sound: Most commercial tracks use side chaining to some degree. It is a standard mixing technique.
- Control: It gives you precise control over how instruments interact with each other.
Setting Up Side Chain in Pro Tools
Now let us get into the hands-on part. Setting up side chain compression in Pro Tools is straightforward once you know the steps. Pro Tools offers built-in compressor plugins with side chain inputs, so you do not need third-party plugins to start.
Step-by-Step Routing
Follow these steps to set up side chain compression in Pro Tools:
- Create your tracks: Set up the track you want to compress (the target track) and the track that will trigger the compression (the side chain source).
- Insert a compressor: On the target track, insert a compressor plugin that supports side chain input. Pro Tools has several built-in options like the Compressor/Limiter and the Dyn3 plugin.
- Open the compressor: Click on the compressor plugin to open its interface.
- Find the side chain input: Look for a side chain or key input section in the compressor. This is where you route the triggering signal.
- Route the side chain: In Pro Tools, you can route the side chain signal using the I/O settings. Go to the compressor plugin settings and select the side chain input source.
- Adjust the parameters: Set the threshold, ratio, attack, release, and gain reduction to taste.
Pro Tools Built-In Compressor Plugins
Pro Tools comes with several compressor plugins that support side chaining. Here are the most commonly used ones:
- Compressor/Limiter: A simple, clean compressor that is great for basic side chain tasks.
- Dyn3: This is a more advanced dynamics plugin with multiple compression modes and excellent side chain routing options.
- Avid Compressor: A versatile compressor that works well for both subtle and aggressive side chaining.
- dbx 160: A classic compressor emulation that sounds great for vocal ducking and creative effects.
Each plugin has its own interface, but the side chain routing process is similar across all of them. The key is finding the side chain or key input section and connecting your source track.
Best Side Chain Compressor Settings
Getting the right settings is what separates a good side chain from a great one. The settings you choose depend on the genre, the instruments involved, and the sound you are going for. Here are some general guidelines to help you get started.
Threshold and Ratio
The threshold determines how loud the side chain signal needs to be before the compressor kicks in. Set the threshold so that the compressor activates only when the trigger signal hits. For kick and bass, this usually means the threshold is set fairly low so the compressor responds to every kick hit.
The ratio controls how much compression happens. A ratio of 4:1 to 6:1 works well for most side chain applications. For more aggressive ducking, you can go higher. For subtle mixing, a 2:1 or 3:1 ratio is often enough.
Attack and Release
The attack time determines how fast the compressor responds to the side chain signal. For kick and bass ducking, a fast attack (around 1-10 milliseconds) works well. This ensures the bass drops out quickly when the kick hits.
The release time controls how fast the compressor lets the signal come back up. A medium release (around 50-150 milliseconds) creates a natural pumping feel. Too fast and the compression sounds choppy. Too slow and the bass stays ducked too long.
Gain Reduction
Watch the gain reduction meter on your compressor. For side chaining, you typically want around 3 to 6 dB of gain reduction. More than that can sound unnatural and squash the life out of your mix. Less than that might not create enough space between the instruments.
Common Side Chain Applications
Side chain compression is used in many different scenarios. Here are the most common applications you will encounter in mixing and production.
Kick and Bass Side Chaining
This is the most classic use of side chain compression. The kick drum triggers the compressor on the bass track. Every time the kick hits, the bass volume drops slightly, creating a clean, punchy low end. This technique is essential in EDM, hip hop, pop, and rock music.
To set this up in Pro Tools, route the kick drum track as the side chain input on the bass compressor. Adjust the threshold and ratio until the bass ducks just enough to let the kick punch through without disappearing entirely.
Vocal Ducking
Vocal ducking is when background music or instruments lower in volume whenever someone speaks or sings. This is extremely common in podcasts, voiceovers, and broadcast audio. It keeps the vocals front and center without having to manually ride the volume fader.
In Pro Tools, route the vocal track as the side chain source on the music or background track compressor. Set a gentle ratio (2:1 or 3:1) and a moderate gain reduction (2 to 4 dB). The music will automatically dip whenever the vocal is active and return to full level during pauses.
Creative Pump Effects
In electronic dance music, side chain compression is used as a creative effect. The pumping rhythm adds energy and drive to the mix. To achieve this, use a fast attack and a medium release with a higher ratio. The result is a rhythmic volume pumping that syncs with the beat.
You can apply this effect to entire drum buses, synth pads, or even the master bus for a full mix pump. Just be careful not to overdo it. A little goes a long way with creative pumping effects.
Pro Tips for Better Side Chain Mixes
Once you understand the basics of how to side chain in Pro Tools, you can start refining your technique. Here are some expert tips that will take your side chain mixes to the next level.
Use a High-Pass Filter on the Side Chain
Sometimes the side chain signal contains low-frequency rumble that triggers the compressor too aggressively. Adding a high-pass filter to the side chain input can solve this problem. This way, only the important mid and high frequencies trigger the compression, giving you more precise control.
Layer Multiple Compressors
For more complex side chain setups, try using two compressors in series. The first compressor handles the heavy ducking, while the second compressor adds subtle leveling. This approach gives you more control over the shape and feel of the side chain effect.
Automate for Fine-Tuning
Even with side chain compression set up, you may want to automate certain parameters. For example, you can automate the threshold or ratio during different sections of a song. This lets you adjust the side chain intensity to match the energy of each part of the track.
Watch Your Studio Power Setup
When you are deep in a long mixing session, keeping your equipment running smoothly matters. If you work in a studio that relies on backup power, knowing how long can a generator run during extended sessions helps you plan uninterrupted work. A stable power supply keeps your Pro Tools system running without crashes or interruptions, which is essential when fine-tuning side chain settings that require close listening.
Compare Before and After
Always A/B compare your side chain effect with the unprocessed signal. Bypass the compressor and listen carefully. Then turn it back on and compare. This simple habit helps you avoid over-compression and ensures your side chain is actually improving the mix.
Common Side Chain Mistakes to Avoid
Even experienced mixers make mistakes with side chain compression. Here are the most common pitfalls and how to avoid them.
Over-Compressing
The biggest mistake is using too much compression. When the gain reduction is too heavy, the mix sounds unnatural and lifeless. The side chain effect should be subtle enough that it is not distracting but noticeable enough to create space. If you can clearly hear the volume pumping in and out, you probably need to reduce the ratio or raise the threshold.
Incorrect Routing
If your side chain is not working, the first thing to check is the routing. Make sure the side chain input is connected to the correct source track. In Pro Tools, this is often the most overlooked step. Double-check your I/O settings and plugin routing to make sure everything is connected properly.
Ignoring the Release Time
The release time has a huge impact on how the side chain sounds. Too fast and the compression sounds choppy and unnatural. Too slow and the bass never fully comes back. Spend time experimenting with different release times until you find the sweet spot for your mix.
Forgetting About the Makeup Gain
Compression reduces the overall volume of the signal. If you do not add makeup gain, your compressed track will be quieter than before. Always check the output level after applying side chain compression and adjust the makeup gain to match the original volume.
Final Thoughts
Learning how to side chain in Pro Tools is a game-changer for any mixer or producer. It gives you the power to create space, add energy, and achieve a professional sound that stands out. Whether you are ducking a bass behind a kick, lowering music under vocals, or adding creative pump effects, side chain compression is an essential skill to master.
Start with the basics covered in this guide. Set up your routing, choose the right compressor plugin, and experiment with different settings. As you grow more comfortable, explore advanced techniques and creative applications. The more you practice side chaining in Pro Tools, the more natural and intuitive it becomes.
Remember, the best mixes come from understanding your tools and using them with intention. Side chain compression is not about following rules. It is about making creative decisions that serve your music. So plug in, dial in your settings, and let your mixes breathe.
With the techniques in this guide, you are well on your way to producing professional-quality mixes that sound clean, punchy, and polished. Happy mixing.
Frequently Asked Questions
What is side chain compression used for?
Side chain compression is used to create space in a mix by having one audio signal control the volume of another. The most common uses are kick and bass ducking, vocal ducking for podcasts, and creative pump effects in electronic music. It helps prevent frequency masking and keeps important elements clear.
Can you side chain without a dedicated side chain input?
Yes, you can. In Pro Tools, you can route the side chain signal using bus sends and inputs. You can also use external hardware compressors with side chain inputs. However, using a plugin with a dedicated side chain input is the easiest and most flexible method.
What is the best compressor plugin for side chaining in Pro Tools?
The Dyn3 plugin is one of the best options because it offers flexible side chain routing and multiple compression modes. The Compressor/Limiter is great for simple tasks, and the dbx 160 is a popular choice for vocal ducking. Each plugin has its strengths depending on the application.
How do I know if my side chain settings are correct?
A good side chain setting creates space without sounding unnatural. Listen for the target instrument dipping slightly when the trigger signal hits and returning smoothly afterward. If you hear more than 3 to 6 dB of gain reduction and the effect sounds smooth, your settings are likely correct.
Is side chaining only for electronic music?
No, side chaining is used across all genres. While it is very popular in EDM and hip hop, it is also used in pop, rock, podcasts, broadcast audio, and film scoring. Any time you need to create space between two instruments or control volume dynamically, side chain compression is a valuable tool.
Can side chain compression damage my audio quality?
Over-compression can make your mix sound flat and lifeless. But when used correctly, side chain compression actually improves audio quality by reducing frequency clashes and adding clarity. The key is using subtle settings and always A/B comparing your processed and unprocessed signals.