How to Consolidate Tracks in Pro Tools Made Simple
Consolidating tracks in Pro Tools is one of the smartest moves you can make for cleaner sessions and faster workflow. This guide walks you through every step, from basic consolidation to batch processing and common mistakes to avoid. Whether you are a beginner or a seasoned editor, you will find practical tips to keep your Pro Tools sessions organized and running smoothly.
Key Takeaways
- Consolidation merges audio regions into single files: This keeps your session tidy and easy to manage.
- It frees up memory and disk space: Cleaner sessions mean smoother playback and faster processing.
- Batch consolidation saves tons of time: You can process multiple tracks at once without repeating steps.
- Always back up before consolidating: This protects your original edits in case you need them later.
- Consolidation is essential before mixing or exporting: It prevents errors and keeps your timeline stable.
- Use the right settings for your project: Choosing the correct format and location matters for long-term organization.
📑 Table of Contents
- What Does It Mean to Consolidate Tracks in Pro Tools?
- Why You Should Consolidate Your Tracks
- Step-by-Step: How to Consolidate Tracks in Pro Tools
- Batch Consolidation: The Fast Way to Clean Up
- Common Mistakes When Consolidating Tracks
- Tips for Better Session Management After Consolidation
- When Should You Consolidate Tracks?
- Consolidation vs. Render in Place
- Final Thoughts on Consolidating Tracks in Pro Tools
What Does It Mean to Consolidate Tracks in Pro Tools?
When you work in Pro Tools, your session is full of individual audio regions. These are small pieces of sound that sit on your timeline. Over time, a session can get messy. You might have dozens of regions stacked on a single track. That is where consolidation comes in.
Consolidating tracks means merging all those small regions into one single audio file. Think of it like folding a blanket. You take all the loose pieces and make them neat and compact. The result is a cleaner timeline and a simpler session.
This process is very common in music production. Engineers and producers consolidate tracks before mixing. It helps keep things organized. It also reduces the chance of playback errors. If you have ever experienced glitches or lag during a session, consolidation might be the fix you need.
In simple terms, consolidation takes all the audio on a track and bounces it into one continuous file. The original regions are still saved, but the timeline now uses one streamlined file instead of many small ones. This is a key part of good session management.
Why You Should Consolidate Your Tracks
You might wonder why consolidation matters so much. There are several strong reasons. Let us break them down.
It Keeps Your Session Clean
A messy session is hard to navigate. When you have hundreds of tiny regions, finding what you need takes time. Consolidation removes the clutter. Your timeline becomes easier to read. You can focus on the music instead of searching for files.
It Frees Up System Resources
Every region in Pro Tools uses processing power. The more regions you have, the harder your computer has to work. Consolidation reduces that load. It is similar to how conserving resources helps any system run better. Just like making sure equipment runs efficiently, consolidation helps your session run longer and smoother without slowdowns. Your CPU and disk can breathe a little easier.
It Saves Disk Space
Small audio regions create duplicate data. When you consolidate, you remove that redundancy. Your session takes up less space on your hard drive. This is especially important if you work with large projects that have dozens of tracks.
It Prepares Your Session for Mixing
Before you send a session to a mixer or start your final mix, consolidation is a best practice. It ensures that every track is stable. You avoid surprises like missing regions or broken playback. A consolidated session is a reliable session.
It Makes Backups Easier
When your session is clean, backing it up is faster. You have fewer files to copy and manage. Consolidated sessions are easier to archive and share with collaborators.
Step-by-Step: How to Consolidate Tracks in Pro Tools
Now let us get into the practical steps. Follow along and you will have your tracks consolidated in no time.
Step 1: Open Your Session
Start by opening the Pro Tools session you want to work on. Make sure all your audio files are online and accessible. Check that you can play back every track without issues. If something sounds wrong, fix it before consolidating.
Step 2: Select the Tracks You Want to Consolidate
You do not have to consolidate everything at once. Choose the tracks you want to work on. You can select one track or multiple tracks. To select multiple tracks, hold down the Shift key and click each track header. This highlights them all at once.
Step 3: Go to the Edit Menu
With your tracks selected, look at the top menu bar. Click on Edit. A dropdown menu will appear. You will see an option that says Consolidate. Click on it.
Step 4: Choose Your Consolidation Settings
A dialog box will pop up. This is where you choose how you want to consolidate. You can pick the format for the new audio files. Common choices include WAV and AIFF. WAV is widely used and works well for most projects. AIFF is also a solid choice, especially on Mac systems.
You will also see options for handling existing files. You can choose to replace them or keep them separate. For most sessions, replacing is the safest choice. It keeps your file folder clean and organized.
Step 5: Choose the Save Location
Pick a location on your hard drive where the new consolidated files will be saved. It is best to use your session folder or a dedicated audio folder. Keeping files in one place makes future management much easier. A good file setup is like keeping your workspace tidy. It saves you time and headaches later.
Step 6: Click Consolidate
Once you have your settings ready, click the Consolidate button. Pro Tools will process the selected tracks. Depending on how many tracks you chose, this might take a few seconds or a few minutes. Wait for it to finish. Do not close Pro Tools while it is working.
Step 7: Verify the Results
After consolidation, check your tracks. Play them back to make sure everything sounds correct. Look at the timeline. You should see one continuous region per track instead of many small ones. If something looks off, you can always undo and try again.
Batch Consolidation: The Fast Way to Clean Up
If you have a large session with many tracks, consolidating one by one takes too long. That is where batch consolidation comes in. This method lets you process multiple tracks at the same time. It is a huge time saver.
To use batch consolidation, select all the tracks you want to process. Then go to the Edit menu and choose Consolidate. The same settings dialog will appear. Set your preferences and hit Consolidate. Pro Tools will handle all the selected tracks in one go.
Batch consolidation is perfect for session cleanup. Many producers use it at the end of a recording day. It is also great before you start mixing or before you hand a session off to someone else. Think of it as a way to make your session run efficiently without wasting effort.
Here are some quick tips for batch consolidation:
- Select only the tracks you need. Do not consolidate tracks you might still want to edit.
- Check for missing files first. Make sure all regions are online before you start.
- Use consistent file naming. This keeps your project folder organized.
- Save a backup copy first. Always have a safety net before making big changes.
Common Mistakes When Consolidating Tracks
Consolidation is straightforward, but mistakes can happen. Here are the most common ones and how to avoid them.
Forgetting to Back Up
This is the number one mistake. Always save a copy of your session before consolidating. If something goes wrong, you need a way to get back to the original. A good backup habit is like keeping your fuel tank full. You never know when you will need it. Just as you would manage resources carefully, manage your session files carefully too.
Consolidating Too Early
If you consolidate before you are done editing, you lose flexibility. Small regions are easier to move and adjust. Wait until you are happy with your edits before merging everything together. Think of consolidation as the final step in your editing process.
Choosing the Wrong File Format
Not all file formats are the same. WAV and AIFF are lossless and work great for mixing. Avoid using compressed formats like MP3 for consolidated tracks. They reduce audio quality and can cause problems during mixing.
Ignoring the Save Location
Saving consolidated files to the wrong folder creates confusion. Always use your session folder or a clearly labeled audio directory. A disorganized file structure will slow you down in the long run.
Skipping the Playback Check
After consolidation, always listen back. A quick check can catch issues early. You do not want to discover a problem after you have already moved on to mixing.
Tips for Better Session Management After Consolidation
Consolidation is just one part of keeping your sessions in good shape. Here are some tips to help you stay organized.
Name Your Tracks Clearly
Use descriptive names for every track. Instead of “Audio 1,” call it “Lead Vocal” or “Kick Drum.” Clear naming makes it easy to find what you need. It also helps when you share sessions with other people.
Color Code Your Tracks
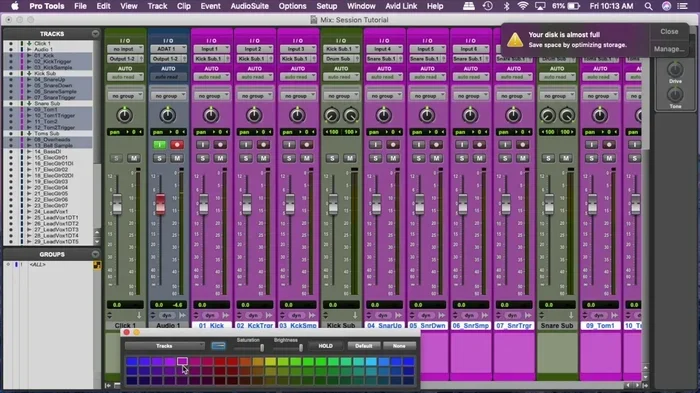
Pro Tools lets you assign colors to tracks. Use this feature to group similar tracks. For example, make all vocal tracks blue and all drum tracks red. This visual organization saves time when you are scrolling through a large session.
Keep Your Session Folder Clean
Delete unused audio files regularly. Remove old takes you no longer need. A clean session folder means faster backups and easier file sharing. Think of it as keeping your workspace free of clutter, much like how you would keep your digital tools organized so everything runs smoothly and stays accessible.
Save Multiple Versions
Before making big changes, save a copy of your session with a new name. This way, you always have a previous version to go back to. It is a simple habit that saves hours of work.
Organize Your Region List
The Region List in Pro Tools is a powerful tool. Use it to find and manage audio files quickly. After consolidation, your Region List will be shorter and easier to navigate.
When Should You Consolidate Tracks?
Timing matters when it comes to consolidation. Here are the best moments to consolidate your tracks.
- Before mixing: A clean session makes mixing faster and more reliable.
- Before exporting: Consolidated tracks reduce the risk of export errors.
- After finishing edits: Once you are done with all your cutting and arranging, consolidate to lock everything in place.
- Before sharing a session: If you are sending files to a collaborator, consolidation keeps everything tidy and complete.
- At the end of a project: Archive your session in its cleanest form for future reference.
Think of consolidation as the finishing touch on your editing process. It is not something you need to do in the middle of creative work. Wait until you are ready to move to the next phase of your project.
Consolidation vs. Render in Place
Some people confuse consolidation with the Render in Place feature. They are related but different. Consolidation merges regions on a track into one file. Render in Place bounces a track with effects and plugins applied.
Use consolidation when you want a clean, unprocessed audio file. Use Render in Place when you want to freeze the sound of your effects. Both tools are valuable. Understanding the difference helps you choose the right one for the job.
For most session cleanup tasks, consolidation is the go-to method. It keeps your audio pure and your session light. Reserve Render in Place for situations where you need to commit to a specific sound.
Final Thoughts on Consolidating Tracks in Pro Tools
Consolidating tracks in Pro Tools is a simple yet powerful habit. It keeps your sessions clean, your computer running fast, and your workflow efficient. Whether you are working on a small podcast or a full album, consolidation deserves a place in your regular routine.
The steps are easy to follow. The benefits are real. You save time, save disk space, and avoid playback headaches. Start consolidating your tracks today and feel the difference in your sessions.
Remember to always back up first. Choose the right settings. And make consolidation part of your end-of-session checklist. With these habits in place, your Pro Tools workflow will feel smoother and more professional than ever before.
Frequently Asked Questions
What happens when you consolidate tracks in Pro Tools?
Consolidation merges all the small audio regions on a track into one single file. The timeline becomes cleaner and easier to manage. Your session uses fewer resources and plays back more smoothly.
Can you undo a consolidation in Pro Tools?
Yes, you can undo consolidation if you act quickly. Use the Undo command right after consolidating. However, if you have saved and closed the session, undo may no longer be available. That is why backing up before consolidating is so important.
Does consolidating tracks delete the original files?
No, consolidation does not delete your original files. It creates new consolidated audio files and links them to the timeline. The original regions are still stored in your session folder, so nothing is lost.
What is the best file format for consolidated tracks?
WAV and AIFF are the best formats for consolidated tracks. Both are lossless and preserve full audio quality. WAV works well across all platforms, while AIFF is a great choice for Mac-based workflows.
Should I consolidate before or after mixing?
Consolidate before mixing. This ensures a clean, stable session. It reduces the chance of playback issues during your mix. Think of it as preparing your workspace so you can focus on the creative part.
Can you consolidate only one track at a time?
Yes, you can consolidate a single track or multiple tracks at once. Select the track or tracks you want to consolidate, go to the Edit menu, and choose Consolidate. Batch consolidation is faster when you need to process many tracks.
=== CONCLUSION ===
Consolidating tracks in Pro Tools is one of the simplest ways to improve your workflow. It takes just a few minutes and makes a big difference. Clean sessions mean faster playback, easier navigation, and smoother mixing sessions. Whether you are a beginner just learning the ropes or a seasoned producer looking to stay organized, consolidation should be part of your regular process.
Follow the steps in this guide. Avoid the common mistakes. And make session cleanup a habit. Your future self will thank you when you sit down for a mix and everything runs like clockwork. Start consolidating today and take your Pro Tools sessions to the next level.