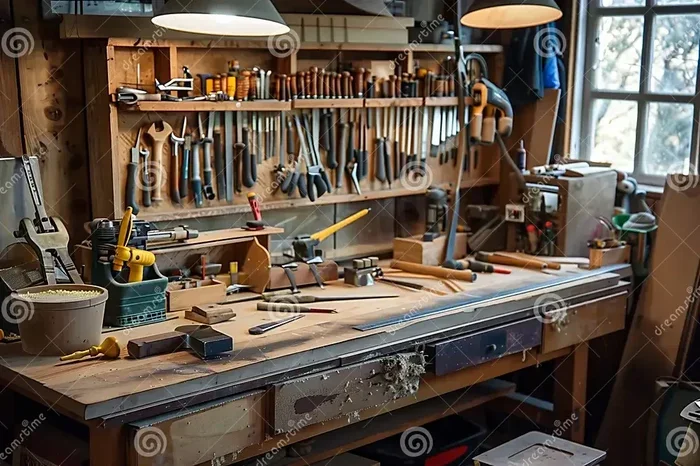
How to Cut Tiles Without Tools Easy DIY Tips Inside
Cutting tiles without tools is easier than most homeowners think. You can score, snap, and shape tiles using household items like glass cutters, nail files, and even pencils. These DIY tile cutting methods save money, time, and effort for any home improvement project.
Tiles are one of the most durable and beautiful materials you can use in any home. Whether you are renovating a kitchen backsplash or updating a bathroom floor, cutting tiles is often part of the job. But here is the thing. You do not always need fancy power tools to get the job done.
How to cut tiles without tools is a skill that every DIY enthusiast should know. With a few simple household items and some basic techniques, you can achieve clean, precise cuts in no time. This guide walks you through every method, tip, and trick you need to tackle tile cutting like a pro. Let us get started.
Key Takeaways
- No special equipment needed: Common household items work surprisingly well for cutting tiles.
- Multiple methods work: Score-and-snap, glass cutter, nail file, and pencil methods all deliver clean cuts.
- Safety comes first: Always wear gloves and eye protection, even with manual methods.
- Practice on scraps first: Test your technique on leftover tiles before cutting your final pieces.
- Different tile types need different approaches: Ceramic, porcelain, and glass each respond best to specific techniques.
- Clean edges matter: Finishing touches like sanding smooth out rough cut edges.
📑 Table of Contents
- Why Cut Tiles Without Tools?
- Understanding Tile Types and Their Cutting Needs
- Essential Household Items for Cutting Tiles
- Step-by-Step Methods to Cut Tiles Without Tools
- Tips for Clean, Precise Cuts
- Common Mistakes to Avoid
- Safety Tips for Manual Tile Cutting
- Comparing Hand-Cutting Methods
- Final Thoughts and Next Steps
Why Cut Tiles Without Tools?
You might wonder why anyone would want to cut tiles without proper tools. There are actually many good reasons. Maybe your power tools broke down right before a weekend project. Perhaps you are working in a tight space where large equipment will not fit. Or maybe you simply want a budget-friendly approach to a home improvement task.
No matter the reason, knowing how to cut tiles by hand gives you flexibility. You can work anytime, anywhere, without waiting for tool rentals or trips to the hardware store. It also means less noise, less dust, and fewer safety concerns for beginners.
Another big advantage is control. Manual cutting methods let you take your time and make precise adjustments. Unlike rushing through a job with a wet tile saw, hand methods give you a tactile feel for the material. You can sense where the tile is about to break and guide the cut exactly where you want it.
When You Might Need to Cut Tiles Without Tools
- Emergency repairs: A broken tile needs quick replacement and you do not have access to power tools.
- Small touch-up jobs: Trimming a single tile for a tight corner or edge.
- Travel or remote projects: Working in a location without electricity or tool access.
- Budget constraints: Saving money by avoiding tool purchases or rentals.
- Learning the basics: Beginners wanting to understand tile behavior before investing in equipment.
Understanding Tile Types and Their Cutting Needs
Not all tiles are created equal. The type of tile you are working with determines which tile cutting methods will work best. Let us break down the most common types and what you need to know about each one.
Ceramic Tiles
Ceramic tiles are the most common and the easiest to cut by hand. They are made from clay and fired at high temperatures. The result is a relatively soft, porous material that responds well to scoring techniques. You can cut ceramic tiles using a glass cutter, a nail file, or even a sharp pencil with a little patience.
Ceramic tiles come in many thicknesses. Thinner tiles (under 6mm) are the easiest to cut without any tools. Thicker ceramic tiles may require more effort but still respond well to manual methods. The key is to apply even pressure and avoid rushing the process.
Porcelain Tiles
Porcelain tiles are denser and harder than ceramic. They absorb less water and are fired at higher temperatures. This makes them more durable but also more challenging to cut by hand. Cutting porcelain tiles without tools requires a sharper scoring tool and more careful pressure application.
If you are working with porcelain, use a carbide-tipped glass cutter or a diamond-tipped pencil. These harder materials can create a deeper score line. Go slowly and apply consistent pressure. Porcelain can crack unevenly if you rush, so take your time with each pass.
Glass Tiles
Glass tiles add a beautiful, reflective touch to any space. But they are tricky to cut. Glass can shatter unpredictably if you apply too much pressure. For cutting glass tiles without tools, the score-and-snap method works best. Use a glass cutter to make a shallow, even score line, then apply gentle, steady pressure to snap the piece along the line.
Always wear thick gloves and safety glasses when working with glass tiles. Small shards can cause serious injuries. Work on a stable surface and keep your hands well away from the scoring point.
Natural Stone Tiles
Natural stone tiles like marble, slate, and travertine have unique textures and densities. They are generally harder to cut without proper tools. However, thinner stone tiles can sometimes be scored with a carbide glass cutter and snapped carefully. Thicker stones may crack unpredictably, so exercise extra caution.
Essential Household Items for Cutting Tiles
You do not need a workshop full of equipment. Many common household items can serve as effective tile-cutting tools. Here is a list of what you likely already have at home.
| Household Item | Best For | Difficulty Level |
|---|---|---|
| Glass cutter | Ceramic, porcelain, glass tiles | Easy |
| Nail file (emery board) | Thin ceramic tiles, edge smoothing | Very Easy |
| Pencil or marker | Scoring thin tiles | Easy |
| Carbide-tipped pencil | Porcelain and thicker tiles | Medium |
| Ruler or straight edge | Guiding straight cuts | Very Easy |
| Utility knife | Thin ceramic and mosaic tiles | Easy |
| Sandpaper (medium grit) | Smoothing cut edges | Very Easy |
| Duct tape | Preventing cracks from spreading | Easy |
Each of these items plays a specific role in the DIY tile cutting process. The glass cutter is your best friend for most tile types. A nail file works great for quick, small adjustments on thin ceramic. And sandpaper is essential for finishing any cut edge, no matter which method you use.
Step-by-Step Methods to Cut Tiles Without Tools
Now let us get into the actual techniques. Each method below is simple, effective, and requires no power tools or specialized equipment. You can start with whichever method suits your tile type and project needs.
Method 1: The Score-and-Snap Technique
The score-and-snap method is the most popular hand-cutting technique. It works on ceramic, porcelain, and glass tiles. Here is how to do it step by step.
- Measure and mark: Use a ruler and marker to draw a straight line on the tile where you want to cut.
- Position the tile: Place the tile on a flat, stable surface. You can lay it on a piece of cardboard for cushioning.
- Score the surface: Hold a glass cutter or carbide pencil along the marked line. Apply firm, even pressure and draw the cutter along the line in one smooth motion. Do not go over the same line twice.
- Align the edge: Place the scored tile over the edge of a table or board. Position the score line directly on the edge.
- Snap the tile: Apply gentle, even downward pressure on the smaller piece. The tile should break cleanly along the score line.
- Smooth the edge: Use medium-grit sandpaper to smooth any rough edges on the cut side.
This method gives you surprisingly clean results. The key is making one deep, even score. Multiple light passes work better than one heavy pass that could crack the tile unevenly.
Method 2: Using a Nail File for Small Adjustments
A nail file is perfect for small trimming jobs. This works best on thin ceramic tiles and mosaic pieces. Simply place the tile on a flat surface and rub the nail file along the edge where you want to remove material. Go slowly and check your progress frequently.
This method is not ideal for full straight cuts, but it excels at shaping curves and removing small amounts of material. It is also great for smoothing edges after a score-and-snap cut. Keep a medium-grit emery board on hand for the best results.
Method 3: The Pencil Scoring Method
For very thin ceramic tiles, a regular pencil can work as a scoring tool. The graphite creates a shallow groove that weakens the tile along the line. Here is how it works.
- Draw your cut line with a ruler.
- Hold the pencil at a 30-degree angle against the tile surface.
- Apply steady pressure and drag the pencil along the line several times.
- Flip the tile over and repeat on the back side.
- Place the score line over a table edge and snap gently.
This method is not as precise as using a glass cutter, but it works in a pinch. The thinner the tile, the better the results. For anything thicker than 8mm, consider using a proper glass cutter instead.
Method 4: The Utility Knife Approach
A sharp utility knife can score thin ceramic and mosaic tiles effectively. The blade creates a fine, controlled groove. This method is especially useful for mosaic tiles where you need to make small, precise cuts.
Always use a fresh, sharp blade for the cleanest score. Dull blades slip and can damage the tile surface. Cut in multiple light passes rather than trying to go through in one deep pass.
Tips for Clean, Precise Cuts
Getting a clean cut is all about technique and preparation. Here are some professional tips that make a huge difference in your results.
Always Measure Twice, Cut Once
This old carpenter saying is especially true with tiles. Tiles are not cheap, and mistakes are hard to hide. Double-check your measurements before making any score marks. Use a pencil for easy corrections and a marker only for final cut lines.
Use Duct Tape to Prevent Cracks
Place a strip of duct tape along the score line before snapping. The tape helps distribute pressure evenly and prevents cracks from spreading past your intended cut line. This simple trick can save you from ruining a perfectly good tile.
Work on a Stable Surface
A wobbly surface leads to uneven cuts. Always work on a sturdy table or workbench. Place a piece of wood or cardboard underneath to cushion the tile and prevent it from sliding during scoring.
Keep Your Tools Sharp
A dull glass cutter will not score properly. It will skip across the surface and create uneven grooves. Replace or sharpen your scoring tools regularly for the best results.
Practice on Scrap Tiles First
Before cutting your final pieces, practice on leftover tiles or scraps. This helps you get a feel for the right amount of pressure and the proper technique. Once you are confident, move on to your actual project pieces.
Control the Temperature
Hot tiles are more brittle and prone to cracking. If you are working in direct sunlight or a warm room, let the tiles cool down before cutting. Conversely, very cold tiles can also be brittle. Room temperature is ideal for hand cutting.
Finish Every Edge
Even the best hand-cut edge will be slightly rough. Always sand the cut edge with medium-grit sandpaper (around 120 to 150 grit). This smooths out any sharp edges and gives a professional finish. For glass tiles, use fine-grit sandpaper to avoid scratching the surface.
Common Mistakes to Avoid
Even experienced DIYers make mistakes when cutting tiles by hand. Here are the most common errors and how to avoid them.
- Applying too much pressure: Forcing the snap can cause the tile to break unpredictably. Let the score line do the work.
- Going over the score line multiple times: This weakens the tile unevenly and can cause jagged breaks.
- Using the wrong tool for the tile type: A pencil will not work well on thick porcelain. Match your tool to the tile material.
- Skipping the edge finish: Rough edges can cut your hands and look unprofessional. Always sand your cuts.
- Cutting without a straight edge: Freehand cuts rarely look clean. Always use a ruler or straight edge for guidance.
- Ignoring tile thickness: Thicker tiles need sharper tools and more patience. Do not expect the same results on a 10mm tile as on a 4mm tile.
What to Do When a Tile Cracks Wrong
Sometimes a tile cracks in an unexpected direction despite your best efforts. Do not throw it away just yet. Small cracks can sometimes be hidden behind fixtures or in less visible areas. If the piece is truly unusable, mark the mistake and move on to your next tile. Every DIYer has experienced this. It is all part of the learning process.
Safety Tips for Manual Tile Cutting
Cutting tiles by hand is generally safe, but you still need to take precautions. Tile shards and dust can cause injuries if you are not careful.
- Wear safety glasses: Small pieces can fly off during scoring and snapping.
- Use thick work gloves: Protect your hands from sharp edges and ceramic dust.
- Wear a dust mask: Ceramic and porcelain dust is harmful when inhaled.
- Keep your workspace clean: Sweep up small shards immediately to prevent accidental cuts.
- Store tools safely: Glass cutters and carbide pencils have sharp points. Keep them in a protective case when not in use.
Compared to using power tools like a tile saw or a setup involving an air compressor for pneumatic cutting tools, manual methods are much safer. There are no spinning blades, no kickback risks, and no electrical hazards. This makes hand cutting an excellent choice for beginners and homeowners working alone.
Comparing Hand-Cutting Methods
Each method has its strengths. Here is a quick comparison to help you choose the right approach for your project.
| Method | Best Tile Type | Precision | Speed | Tool Needed |
|---|---|---|---|---|
| Score-and-Snap | Ceramic, porcelain, glass | High | Medium | Glass cutter |
| Nail File Trimming | Thin ceramic, mosaic | Medium | Slow | Nail file |
| Pencil Scoring | Thin ceramic | Low to Medium | Medium | Pencil |
| Utility Knife | Mosaic, thin ceramic | Medium | Fast | Utility knife |
For most DIY projects, the score-and-snap method is the go-to choice. It offers the best balance of precision, speed, and simplicity. If you are working with mosaic tiles or need to make small adjustments, the utility knife or nail file methods work well as complements.
Remember that how to cut tiles without tools is not about replacing professional equipment. It is about having the knowledge and confidence to handle unexpected situations. Whether you are on a tight deadline, working with a limited budget, or simply enjoying the satisfaction of a hands-on project, these methods serve you well.
Final Thoughts and Next Steps
Cutting tiles without tools is a practical skill that every homeowner should have in their toolkit. The methods in this guide give you everything you need to tackle most tile cutting projects with confidence. From score-and-snap to pencil scoring, each technique has its place in your DIY arsenal.
Start with simple projects to build your skills. A small bathroom backsplash or a kitchen accent wall is the perfect place to practice. As you gain experience, you will develop an intuition for how different tiles respond to each method. This hands-on knowledge is invaluable and cannot be replaced by any power tool.
Always prioritize safety. Wear your protective gear, work on stable surfaces, and take your time. Rushing through a cut is the fastest way to ruin a tile or injure yourself. Patience and precision will always win out over speed.
If you find yourself needing more advanced cutting capabilities in the future, consider investing in a manual tile cutter or learning about how to get more CFM from an air compressor if you plan to use pneumatic tools for larger projects. But for now, these simple methods will handle just about anything you throw at them.
The beauty of DIY is that you learn as you go. Each cut you make builds your skill and confidence. So grab your glass cutter, find some scrap tiles, and start practicing. You will be surprised at how easy and satisfying manual tile cutting can be.
Frequently Asked Questions
Can I cut porcelain tiles without any tools at all?
Yes, but porcelain is harder than ceramic. Use a carbide-tipped glass cutter for the best results. Score the tile deeply in one pass and snap it carefully over a table edge. It takes more patience than cutting ceramic, but it is absolutely doable by hand.
What is the easiest tile to cut by hand?
Thin ceramic tiles are the easiest to cut without tools. They respond well to scoring with a glass cutter, pencil, or even a nail file. The thinner the tile, the cleaner the cut will be. Mosaic tiles are also very easy to trim by hand.
Do I need to wet the tile when cutting by hand?
Wetting the tile is not necessary for hand scoring and snapping. However, dampening the tile can reduce dust and help the score line stay clean. For porcelain tiles, a slightly wet surface can prevent cracking along unintended lines.
How do I make curved cuts without power tools?
For curved cuts, use a utility knife to score multiple parallel lines close together. Then carefully chip away the small pieces between the lines using the tip of the knife or small pliers. This method takes time but gives you good control over the curve shape.
Is it safe to cut tiles indoors without tools?
Yes, hand-cutting tiles indoors is safe as long as you take basic precautions. Wear safety glasses and a dust mask to protect from small shards and ceramic dust. Lay down a drop cloth to catch debris and make cleanup easier.
Can I use these methods on wall tiles and floor tiles?
Absolutely. The same methods work for both wall and floor tiles. The only difference is that floor tiles are often thicker and may require a sharper scoring tool. Always check the tile thickness and adjust your technique accordingly.