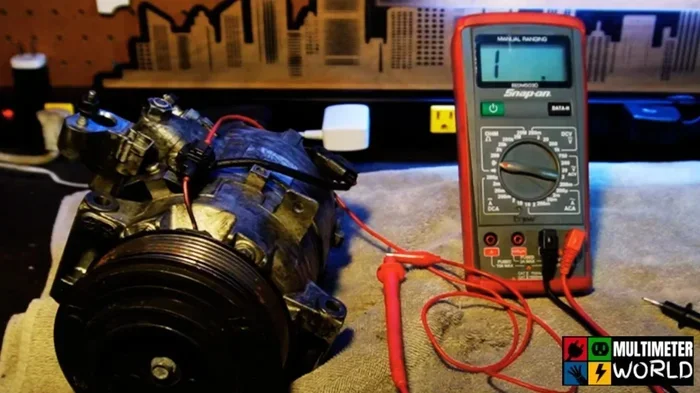
How to Test a Compressor With a Multimeter Like a Pro
Testing a compressor with a multimeter is a essential skill for any DIYer or HVAC tech. You will learn how to check winding resistance, test capacitors, and diagnose common compressor failures safely. This guide walks you through every step with clear instructions, practical examples, and expert tips so you can troubleshoot like a seasoned professional.
Compressors are the heart of so many systems, from your home air conditioner to a shop air compressor. When one stops working, it can throw a real wrench into your plans. The good news is that you do not need to be a master electrician to figure out what is going wrong. A simple multimeter can reveal a lot about the health of your compressor. In this guide, I will walk you through exactly how to test a compressor with a multimeter step by step. By the end, you will have the confidence to tackle basic diagnostics on your own.
Whether you are dealing with an HVAC unit, a refrigerant compressor, or a shop air compressor, the testing process is very similar. You will check winding resistance, test capacitors, and look for short circuits or ground faults. I will also share common mistakes to avoid and tell you when it is time to call in a professional. Think of this as your go-to reference guide for compressor diagnostics.
Before you grab your multimeter, make sure you understand the basics of how a compressor works. A compressor has three main terminals: the common terminal, the start terminal, and the run terminal. These connect to the compressor windings inside. Your multimeter will help you measure resistance across these windings and check for continuity. It will also help you test the start capacitor and run capacitor, which are essential for compressor operation. Let us dive in.
Key Takeaways
- Multimeter testing saves money: You can diagnose compressor problems without hiring an expensive technician.
- Resistance readings tell the story: Normal winding resistance values help you spot open or shorted coils fast.
- Safety comes first: Always disconnect power and discharge capacitors before testing anything.
- Capacitor testing is critical: A failed run or start capacitor is one of the most common compressor issues.
- Know when to call a pro: Some compressor faults require professional diagnosis and replacement.
📑 Table of Contents
- Understanding Your Compressor and Multimeter Basics
- Safety First: Preparing for Compressor Testing
- How to Test Compressor Windings With a Multimeter
- Testing the Compressor Capacitor and Relay
- Common Compressor Problems and What Your Readings Mean
- When to Call a Professional
- Quick Tips for Accurate Multimeter Testing
- Common Mistakes to Avoid
- Expert Insights on Compressor Diagnostics
- Final Thoughts
Understanding Your Compressor and Multimeter Basics
What Makes a Compressor Tick
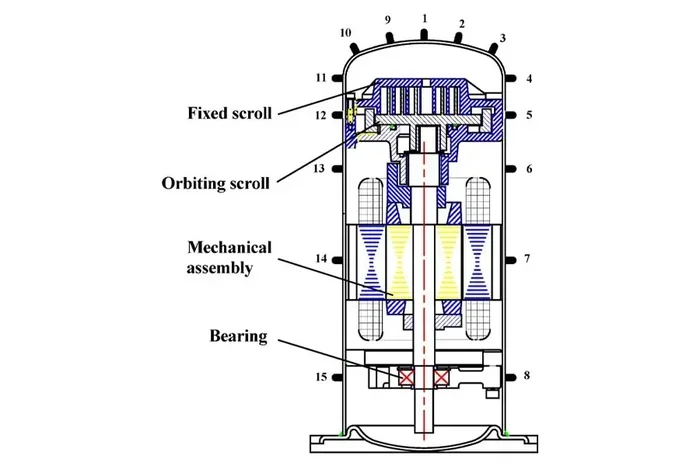
A compressor works by compressing refrigerant gas in an HVAC system or powering pneumatic tools in a shop setup. Inside, you will find copper windings wrapped around a motor. These windings create the electromagnetic field that drives the compressor. Over time, heat, moisture, and electrical surges can damage these windings. That is where your multimeter comes in handy.
The three terminals on most compressors are labeled C (common), S (start), and R (run). Some compressors use a pin connector system instead of labeled terminals. In that case, you will need to refer to the wiring diagram on the unit. Understanding these terminals is the first step in any compressor test.
Choosing the Right Multimeter
You do not need an expensive digital multimeter to get good results. A basic digital multimeter with resistance (ohms), voltage, and capacitance modes will do the job. Make sure your meter has a decent range for reading low ohms, since compressor windings typically show very low resistance values. If you are in the market for a new meter, check out what size generator to run power tools for a related guide on power tool electrical needs.
Here are the key multimeter functions you will use:
- Ohms (Ω): Measures resistance across compressor windings.
- Voltage (V): Checks for live voltage during power tests.
- Capacitance (F): Tests the start and run capacitors.
- Continuity (beep mode): Quickly checks if a circuit is complete.
Safety First: Preparing for Compressor Testing
Disconnect All Power Sources
This cannot be stressed enough. Before you touch anything, turn off the power to the compressor at the breaker box. If you are working on a unit connected to the main electrical panel, flip the correct breaker. For extra safety, lock the breaker panel so nobody accidentally turns the power back on while you are working.
If your compressor is part of an HVAC system, you may also want to check the how to wire a generator to a breaker box guide for general electrical safety tips. Proper wiring and disconnection procedures protect you from electrical shock.
Discharge the Capacitors
Capacitors store electrical energy even when the power is off. If you do not discharge them first, they can deliver a painful or even dangerous shock. Use an insulated screwdriver with a resistor across the terminals to safely discharge the capacitor. Never short the terminals directly with a metal tool.
Wear the Right Protective Gear
Wear insulated gloves and safety glasses. Make sure your work area is dry and well-lit. Avoid testing compressors in wet conditions, just as you should never expose electrical equipment to moisture. For more on electrical safety around wet environments, see our guide on can a generator get wet.
How to Test Compressor Windings With a Multimeter
Step 1: Locate the Compressor Terminals
Find the access panel on your compressor. You should see three terminals labeled C, S, and R. If the labels are worn off, look for a wiring diagram on the compressor nameplate or in the owner manual. Take a photo of the wiring before you disconnect anything so you can reconnect it correctly later.
Step 2: Set Your Multimeter to Ohms
Turn your multimeter to the resistance or ohms setting. If your meter has multiple ranges, start on the lowest range. Touch the red probe to one terminal and the black probe to another. Record each reading. You will need to test three pairs of terminals.
Step 3: Read the Resistance Values
Here is what you are looking for:
- C to R (Common to Run): This should show the lowest resistance, typically between 1 and 3 ohms for most compressors.
- C to S (Common to Start): This reading will be slightly higher, usually between 3 and 5 ohms.
- S to R (Start to Run): This should equal the sum of the C-to-R and C-to-S readings.
If any reading shows zero ohms, you have a short circuit. If any reading shows infinite ohms (no change on the display), you have an open winding. Both conditions mean the compressor is damaged and needs replacement.
Step 4: Check for Ground Faults
Set your multimeter to the highest ohms range. Touch one probe to a terminal and the other probe to the compressor body or ground wire. You should read infinite ohms or OL (over limit). If you get any reading at all, the compressor has a ground fault. This means the winding is touching the metal housing, and the compressor is unsafe to operate.
Testing the Compressor Capacitor and Relay
Why Capacitors Matter
The start capacitor gives the compressor motor a boost to get running, while the run capacitor keeps the motor running smoothly. A failing capacitor is one of the most common reasons a compressor won work properly. Testing the capacitor with your multimeter is quick and easy.
How to Test a Capacitor
First, make sure the capacitor is fully discharged. Then, set your multimeter to capacitance mode. Touch the probes to the capacitor terminals and read the value. Compare it to the rating printed on the capacitor. If the reading is more than 10% below the rated value, the capacitor is bad and needs replacement.
You can also test the capacitor in resistance mode. A good capacitor will show low resistance at first and then climb toward infinity as it charges. If the reading stays at zero or shows no change, the capacitor is shorted or open and must be replaced.
Testing the Start Relay
The start relay sends power to the start winding during startup. To test it, disconnect the relay and set your multimeter to continuity mode. Touch the probes to the relay terminals. You should get a beep if the relay is good. No beep means the relay is open and needs replacement. If you get a continuous beep with no interruption, the relay is shorted.
Common Compressor Problems and What Your Readings Mean
Open Winding
An open winding means there is a break in the copper coil inside the compressor. Your multimeter will show infinite resistance or OL on all terminal pairs. This usually happens from overheating or age. The fix is compressor replacement.
Shorted Winding
A shorted winding means the insulation between coil turns has broken down. Your multimeter will show zero or very low resistance. Shorted windings cause excessive current draw and can trip breakers or blow fuses. This compressor needs to be replaced.
Ground Fault
A ground fault means the winding has made contact with the compressor housing. You will get a resistance reading when testing from a terminal to ground. This is dangerous and can cause electrical shock. Replace the compressor immediately.
Bad Capacitor Symptoms
If your compressor hums but does not start, or starts and then trips the overload protector, a bad capacitor could be the culprit. Test the capacitor with your multimeter and compare the reading to the rated value. A weak capacitor often causes the compressor to draw too much amperage on the start winding.
When to Call a Professional
Not every compressor problem is a DIY fix. If you have tested the windings and capacitors and everything looks normal, the problem might be inside the compressor itself, such as a mechanical failure. You should also call a professional if you are uncomfortable working with electrical components.
Refrigerant handling requires EPA certification in the United States. If you suspect a refrigerant leak, do not attempt to repair it yourself. A licensed HVAC technician can handle refrigerant safely and legally. Similarly, if you are testing a compressor that is part of a larger electrical system, make sure you understand the full electrical setup. For general guidance on home electrical systems, you can read about how to wire a generator to a breaker box for safe connection practices.
Also, keep in mind that some compressors are sealed and non-serviceable. These compressors cannot be repaired internally. If the winding or capacitor tests come back normal but the compressor still does not work, the entire unit will need to be replaced.
Quick Tips for Accurate Multimeter Testing
- Always zero out your multimeter before taking resistance readings. Touch the probes together and adjust to zero.
- Wait for the compressor to cool down before testing. Hot components can give false readings.
- Clean the terminal connections with a wire brush before testing. Corrosion can cause inaccurate readings.
- Take multiple readings and compare them. A single reading can be misleading.
- Keep your multimeter calibrated. An uncalibrated meter will give you unreliable data.
- Document your readings. Write down every measurement so you can compare them over time.
Common Mistakes to Avoid
- Testing without disconnecting power: This is dangerous and can damage your multimeter.
- Forgetting to discharge capacitors: A charged capacitor can deliver a serious shock.
- Misreading the terminal labels: Always double-check which terminal is C, S, and R before testing.
- Ignoring ambient temperature: Cold temperatures can affect resistance readings. Test at room temperature whenever possible.
- Relying on only one test: Always perform winding, capacitor, and ground tests together for a complete picture.
Expert Insights on Compressor Diagnostics
Experienced HVAC technicians often say that the multimeter is your best friend when diagnosing compressor issues. The key is to be methodical. Start with the simplest tests first, like resistance and continuity checks, before moving on to more advanced diagnostics like capacitance and voltage testing. This saves time and prevents unnecessary part replacements.
One pro tip is to compare your readings to the compressor nameplate data. Most compressors list the rated resistance values and capacitance ratings right on the data plate. If your readings are close to those values, the compressor is likely in good shape. If they deviate significantly, you have found your problem.
Another thing to keep in mind is that compressor failures are rarely random. They usually result from a cause, such as power surges, refrigerant leaks, or lack of maintenance. If you replace a compressor, it is worth investigating the root cause so the new unit does not fail prematurely.
Final Thoughts
Learning how to test a compressor with a multimeter is a valuable skill that can save you time and money. You do not need advanced electrical knowledge to perform basic winding and capacitor tests. With a decent multimeter and a little patience, you can diagnose most common compressor problems in under an hour.
Remember to always prioritize safety. Disconnect power, discharge capacitors, and wear protective gear. If your readings are inconclusive or you are unsure about anything, do not hesitate to call a qualified technician. A compressor test is only as good as the person performing it, so take your time and be thorough.
Whether you are troubleshooting a home HVAC system or a shop air compressor, the steps in this guide will help you get to the bottom of the problem. Now grab your multimeter and get to work. Your compressor will thank you for it.
Frequently Asked Questions
Can I test a compressor with a multimeter without disconnecting it from the system?
You can perform some basic continuity and resistance tests without fully disconnecting the compressor, but for accurate readings, you should disconnect the wires from the terminals. This eliminates interference from other components in the circuit and gives you clean, reliable data. Always make sure the power is completely off before you start.
What should the resistance be on a compressor with a multimeter?
Most compressors show between 1 and 5 ohms across the windings. The common-to-run winding typically has the lowest resistance, around 1 to 3 ohms. The common-to-start winding is slightly higher, around 3 to 5 ohms. The start-to-run reading should equal the sum of the other two. If you see zero or infinite ohms, the compressor has a fault.
How do I know if my compressor capacitor is bad?
Use your multimeter in capacitance mode to measure the capacitor value. If the reading is more than 10% below the rated capacitance on the capacitor label, it is bad. You can also test it in resistance mode. A good capacitor will initially show low resistance and then climb toward infinity. If it stays at zero or shows no change, the capacitor has failed.
What causes a compressor to fail electrically?
The most common causes are overheating, power surges, refrigerant leaks, and lack of maintenance. Over time, heat breaks down the insulation on the windings, causing shorts or opens. Voltage spikes can damage the windings and capacitors instantly. A refrigerant leak causes the compressor to work harder and overheat, eventually leading to electrical failure.
Is it safe to test a compressor outdoors in wet conditions?
No. Always test a compressor in a dry, well-ventilated area. Water and electricity are a dangerous combination. If your compressor has been exposed to moisture, dry it thoroughly before testing. For more on electrical safety around wet conditions, check out our guide on can a generator get wet.
Do I need any special tools besides a multimeter to test a compressor?
A basic digital multimeter is all you need for most compressor tests. You may also want an insulated screwdriver for discharging capacitors, wire brushes for cleaning terminals, and gloves for safety. A flashlight can help you see small labels and wiring in tight spaces. That is it, no special tools required.