How to Organize Power Tools and Transform Your Garage
Organizing your power tools doesn’t have to be overwhelming. This guide walks you through simple, proven methods to store, label, and arrange every tool in your garage. You’ll learn how to create a tool storage system that saves time, protects your gear, and makes your workshop feel like a dream. Whether you have a few basic power tools or a full collection, these strategies work for any space.
A messy garage can kill your motivation before you even pick up a power tool. You want to start that DIY project, but you can’t find the drill, the batteries are dead, and the saw is buried under old boxes. Sound familiar? You’re not alone. Most garage owners struggle with power tool storage at some point.
The good news is that getting organized doesn’t require a huge budget or a weekend of hard labor. With a clear plan and a few smart storage solutions, you can turn even the smallest garage into a functional workshop. This guide will show you exactly how to do it, step by step.
We’ll cover everything from taking stock of what you own to setting up zones that make sense. You’ll learn practical garage organization tips that real people use every day. By the end, you’ll have a system that keeps your tools safe, your workspace clean, and your projects moving forward without frustration.
Key Takeaways
- Start with a full inventory: Knowing what you own is the first step to organizing power tools like a pro.
- Use vertical wall storage: Pegboards, hooks, and wall-mounted racks free up floor space instantly.
- Group tools by use: Cutting, drilling, and sanding tools each get their own zone for fast access.
- Invest in a quality tool chest or cabinet: This keeps small accessories and bits safe and tidy.
- Label everything clearly: A simple labeling system prevents clutter from creeping back in.
- Maintain your tools regularly: Clean and stored tools last longer and perform better every time.
- Plan your garage layout first: A thoughtful layout makes the whole workspace more efficient and enjoyable.
📑 Table of Contents
Why Organizing Power Tools Matters
Some people see tool organization as a nice-to-have. But once you experience a clean, well-arranged garage, you’ll wonder how you ever worked without it. Here’s why putting in the effort really pays off.
Save Time on Every Project
Think about how much time you waste looking for a tool. Five minutes here, ten minutes there. Over a year, that adds up to hours of lost productivity. When every tool has a designated spot, you grab it and go. Your workshop layout should support quick, easy access to the tools you use most often.
Protect Your Investment
Power tools aren’t cheap. A good cordless drill or a quality circular saw can cost several hundred dollars. When tools sit loose in a drawer or get tossed on a dirty floor, they get damaged. Dull blades, corroded contacts, and cracked housings all come from poor storage. Proper power tool storage keeps your gear in top shape for years.
Stay Safe
Loose tools on the floor are a tripping hazard. Extension cords tangled in a pile can cause sparks or trips. A clean, organized garage reduces accidents and makes it easier to work safely. You’ll also spot damaged cords or worn bits faster when everything is visible and in its place.
Step 1: Take a Complete Inventory
Before you buy any storage bins or install a pegboard, you need to know exactly what you have. This step is boring but essential. Skip it, and you’ll end up buying duplicate tools or missing storage for something important.
Gather Everything in One Spot
Pull out every power tool from your garage, shed, and anywhere else they’ve been hiding. Lay them all out on a clean floor or workbench. Include batteries, chargers, attachments, and accessories. You want the full picture of your tool collection.
Sort and Categorize
Now group your tools by type. Here’s a simple way to sort them:
- Drilling tools: drills, drivers, impact drivers
- Cutting tools: circular saws, jigsaws, miter saws
- Sanding tools: sanders, rotary tools
- Measuring and marking: levels, squares, laser measures
- Fastening tools: nail guns, staple guns, pin nailers
- Air-powered tools: impact wrenches, finish nailers (paired with your air compressor)
This sorting process reveals what you actually use and what just takes up space. You might find old tools you forgot about or ones that are better off donated.
Create a Simple Tool List
Write down every tool and its condition. Note any missing batteries, cracked casings, or dull blades. This list becomes your personal tool inventory system. You can keep it on your phone or taped inside a cabinet door. When a battery dies or a bit wears out, you’ll know exactly what needs replacing.
Step 2: Design Your Garage Layout
A great garage organization plan starts with layout. Think about how you move through your workspace. Where do you park your car? Where do you work on projects? Your layout should support both.
Zones Make Everything Easier
Divide your garage into functional zones. Each zone serves a specific purpose. Here’s a common setup that works well:
- Storage Zone: Wall-mounted racks, cabinets, and shelves along the main wall.
- Work Zone: A sturdy workbench in the center or against a side wall.
- Project Zone: An open floor area for larger projects like cutting or assembly.
- Vehicle Zone: Parking space for your car or bike.
Your power tools should live closest to the work zone. Frequently used items go at arm’s height on the wall. Less-used tools can sit on higher shelves or in lower cabinets.
Think About Traffic Flow
Walk through your garage and imagine moving around with a large piece of plywood. Can you open the garage door fully? Is there enough room to maneuver? A good layout leaves clear paths between zones. Avoid blocking doors, windows, or outlets with storage units.
Consider Electrical Needs
Your workshop needs enough outlets for all your tools. Extension cords across walkways are dangerous and annoying. If possible, install a few dedicated outlets on the walls near your work zone. This is especially important if you use an air compressor or other high-draw tools regularly.
Step 3: Choose the Right Storage Solutions
Now comes the fun part: picking out storage that fits your space and your tools. There are many options, and the best choice depends on your budget, garage size, and collection.
Wall-Mounted Pegboards
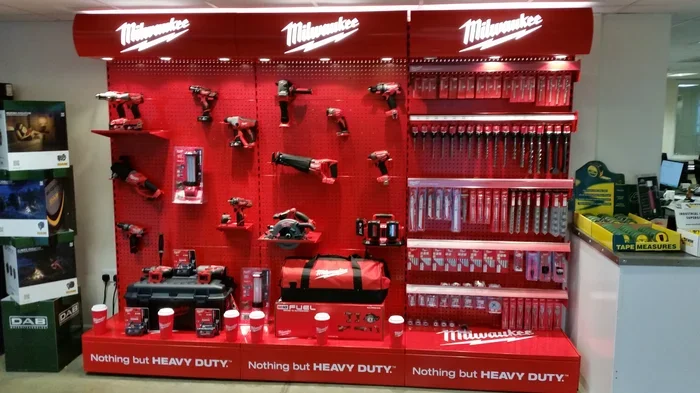
A pegboard is one of the most versatile and affordable tool storage solutions available. You can hang drills, sanders, hammers, and even small air compressors on hooks and brackets. The best part? Everything is visible at a glance. You can rearrange hooks anytime you add a new tool.
For the best setup, mount the pegboard at a comfortable working height. Most people find waist height ideal. Add a lower shelf beneath the pegboard to store larger items or tool boxes. A wall-mounted tool organizer like this can transform a blank wall into a highly functional workspace.
Tool Chests and Cabinets
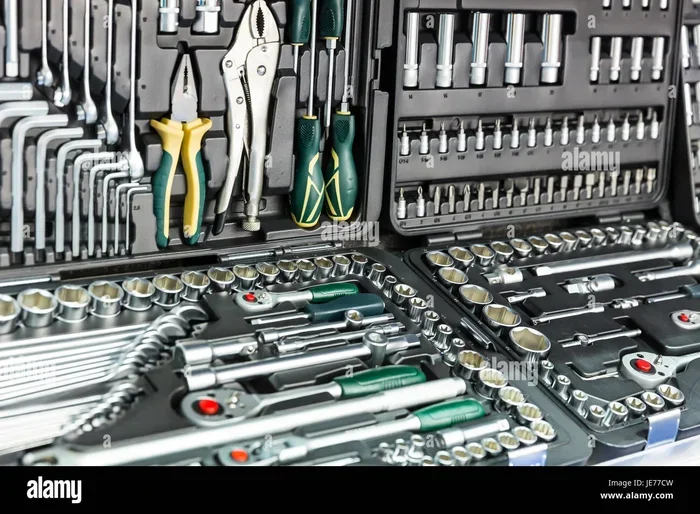
If you have a lot of small accessories, drill bits, and fasteners, a tool chest is a must. Rolling cabinets with deep drawers keep everything sorted and protected. You can label each drawer with its contents. Some tool chests even have a built-in workspace on top.
For larger collections, consider a power tool cabinet with doors and lockable drawers. This keeps dust out and curious hands out of the way. A cabinet also gives your garage a cleaner, more organized look.
Tool Carts and Portable Racks
A mobile power tool cart is perfect for people who move between the garage and the backyard. You can load up your most-used tools and roll them right to your work area. Many carts also include built-in compartments for batteries and chargers, which keeps everything in one place.
When choosing a cart, look for sturdy wheels and a stable frame. You want it to handle the weight of your heaviest tools without tipping over.
Vertical Storage Racks
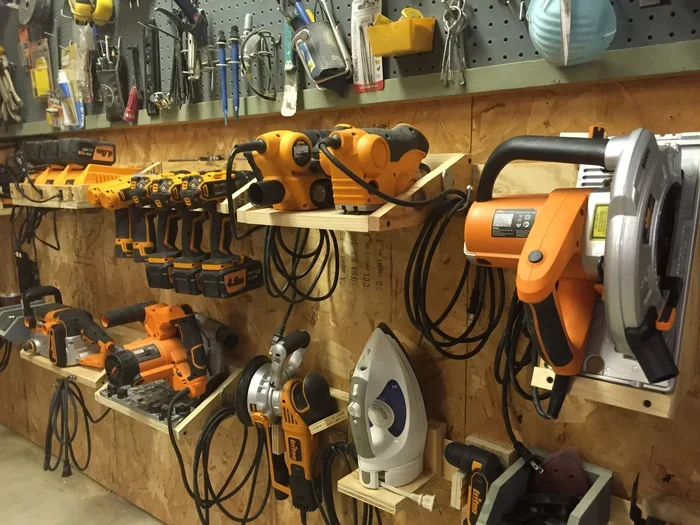
For long tools like saws, levels, and extension cords, vertical storage racks are a game-changer. These wall-mounted systems hold tools upright, saving floor space and keeping everything organized. A dedicated tool rack system can hold everything from a circular saw to a two-stage compressor without taking up much room.
Check out how a two-stage compressor fits into a vertical rack setup for maximum space savings.
Step 4: Organize by Frequency of Use
Not all tools get used equally. Your most-used tools should be the easiest to reach. This simple principle makes a huge difference in daily workflow.
Daily-Use Tools
These are the tools you grab almost every time you work. Keep them on the pegboard or in a drawer right at arm’s height. Common daily-use tools include:
- Cordless drill and driver
- Impact driver
- Flashlight or headlamp
- Battery charger
- Utility knife
Weekly-Use Tools
Tools you use once or twice a week should sit on mid-level shelves or in easy-access cabinets. Examples include a jigsaw, a random-orbit sander, or a compressor pedal for smaller pneumatic tasks.
If you regularly use an air compressor, consider how much space it needs and where it fits best. A dedicated spot near an outlet with room for the hose to reach your work area is ideal. Learn more about getting the most from your setup with tips on improving air compressor CFM output.
Seasonal and Rare-Use Tools
Tools you only use a few times a year can go on high shelves, in the back of a cabinet, or even in a separate storage area. Pressure washers, floor sanders, and tile saws often fall into this category. Store them with protective covers to keep dust and moisture away.
Step 5: Label, Maintain, and Keep It Clean
Organization isn’t a one-time event. It’s an ongoing habit. The tools and systems you set up today will stay effective only if you maintain them.
Label Everything
A label maker is one of the cheapest and most powerful organization tools you can buy. Label every drawer, shelf, bin, and hook. When someone else uses your garage, they’ll know exactly where things go. Labeling also helps you remember where you put things after a late-night project.
Use clear, simple labels. “Drill Bits,” “Sandpaper,” “Cordless Drills,” and “Fasteners” are all great examples. Color-coded labels add an extra layer of clarity if you have a large collection.
Clean Your Tools After Each Use
Take two minutes after every project to wipe down your tools. Remove dust, debris, and sawdust from blades and vents. Check cords for damage. This simple habit prevents buildup that can damage tools over time. Clean tools also store more neatly and are ready to go the next time you need them.
Do a Monthly Check-Up
Set a reminder to do a quick monthly review of your garage. Look for tools that are out of place, supplies running low, or items that need repair. A 15-minute check-up keeps your garage organization system running smoothly all year long.
Store Batteries Properly
Lithium-ion batteries degrade faster when stored in extreme heat or cold. Keep them in a cool, dry spot away from direct sunlight. Remove batteries from tools if you won’t use them for a while. This small step extends battery life significantly and keeps your cordless tools ready to go.
Common Mistakes to Avoid
Even with the best intentions, it’s easy to make organizing mistakes. Here are the most common ones and how to avoid them.
- Buying storage before knowing what you own: Always inventory first. Otherwise, you’ll buy the wrong sizes or miss something important.
- Overloading a pegboard: Too many hooks make it hard to see what you have. Keep only the tools you use regularly on the wall.
- Ignoring small accessories: Drill bits, screws, and fasteners create the most clutter. Give them dedicated drawers or containers.
- Storing tools on the floor: Floor storage traps dust, creates trip hazards, and wastes valuable space. Always go vertical when possible.
- Skipping maintenance: Even the best storage system fails if tools aren’t cleaned and cared for regularly.
Expert Tips for a Pro-Level Garage
Want to take your garage workshop to the next level? These expert tips make a real difference.
Use a Shadow Board
A shadow board is a outline of each tool painted or taped onto the wall or pegboard. When a tool is missing, the empty shadow reminds you instantly. It’s a simple visual system that works incredibly well for shared garages and family workshops.
Add a Charging Station
Dedicate one spot on your wall or cabinet for battery charging. Mount a small shelf with a power strip and label it “Battery Charging.” This keeps cords tidy and ensures batteries are always ready when you need them.
Invest in a Good Workbench
Your workbench is the heart of any workshop. Choose one with built-in drawers and shelves for the tools you use most. A sturdy bench also provides a stable surface for cutting, assembly, and repairs.
Consider a Generator for Backup Power
If you run power tools in a detached garage or on job sites, a backup generator keeps your work going during outages. The right size depends on your tool wattage and how many tools you run at once. Check out guidance on sizing a backup generator to match your power tool needs.
Conclusion
Learning how to organize power tools is one of the best investments you can make for your garage and your projects. A clean, well-arranged workspace saves time, protects your tools, and makes every project more enjoyable. You don’t need expensive solutions or a massive garage to get started. Just follow the steps in this guide: inventory your tools, design a layout, choose smart storage, organize by use, and maintain your system.
Start small if you need to. Even one organized wall or one tidy cabinet makes a big difference. As you build the habit, you’ll naturally expand your system and refine it over time. The goal isn’t perfection. The goal is a workspace that works for you and makes your DIY dreams easier to achieve.
Your transformed garage is just a few steps away. Grab a marker, pull out those tools, and start organizing today. You’ll be glad you did.
Frequently Asked Questions
What is the best way to store power tools in a small garage?
Wall-mounted pegboards and vertical racks work best in small garages because they use vertical space instead of floor space. A compact tool chest on wheels also saves room while keeping accessories organized. Focus on keeping daily-use tools at arm’s height for quick access.
How do I organize power tools by frequency of use?
Group your tools into three categories: daily, weekly, and rare use. Store daily tools on the pegboard or top drawers, weekly tools on mid-level shelves, and seasonal tools on high shelves or in cabinets. This system ensures the tools you need most are always within easy reach.
Can I use a pegboard for heavy power tools?
Yes, but make sure your pegboard is mounted securely into wall studs with sturdy brackets. Heavy tools like circular saws and compressors need strong anchors. For very heavy tools, consider a dedicated tool rack or floor-standing cabinet instead.
What should I include in a tool inventory list?
List each tool by name, model, condition, and location. Note any missing batteries, damaged cords, or dull blades. A digital list on your phone works well, but a simple paper list taped inside a cabinet door is just as effective.
How often should I clean and maintain my power tools?
Wipe down tools after every use to remove dust and debris. Do a deeper cleaning and inspection once a month. Check cords, blades, and moving parts for wear. Proper maintenance keeps tools running smoothly and extends their lifespan significantly.
Do I need a special storage system for air-powered tools?
Air-powered tools need a clean, dry storage spot near your air compressor. Store hoses coiled and off the floor to prevent kinks and trips. Keep fittings and attachments in a labeled container so they’re easy to find. If you use an air compressor pedal frequently, keep it within arm’s reach of your workbench.