How to Pack Tools for Moving Without Damaging Them
Packing tools for a move doesn’t have to be stressful. This guide shows you exactly how to pack tools for moving without damage, from disassembly and labeling to choosing the right packing supplies. Whether you have hand tools, power tools, or heavy equipment, you’ll find practical steps to protect every item. Follow our expert tips to save time, money, and frustration on moving day.
Moving can be a real headache. And when you add tools into the mix, things get even trickier. Tools are heavy, sharp, and often oddly shaped. They need special care to survive a move without scratches, dents, or worse.
Whether you’re relocating your home or your workshop, how to pack tools for moving is a question you need answered. A bad packing job can lead to broken blades, damaged motors, and lost parts. Nobody wants that kind of stress on an already overwhelming day.
This guide walks you through every step. We cover cleaning, disassembly, packing materials, box selection, and labeling. By the end, you’ll know exactly how to pack tools for moving like a pro. Let’s get started.
Key Takeaways
- Clean and disassemble tools first: This prevents damage and makes packing more manageable.
- Use the right packing materials: Bubble wrap, foam, and sturdy boxes keep tools safe during transit.
- Label every box clearly: Proper labeling saves time and helps you find tools quickly after the move.
- Wrap sharp edges carefully: Protecting blades and points prevents injuries and box damage.
- Create a tool inventory list: Tracking your tools ensures nothing gets lost during the move.
- Secure heavy tools separately: Proper weight distribution keeps your moving truck safe and organized.
📑 Table of Contents
Why Proper Tool Packing Matters
Tools aren’t like books or clothes. They have edges, moving parts, and delicate components. Tossing them into a box without care is a recipe for disaster. Here’s why taking the time to pack correctly makes all the difference.
Preventing Damage During Transit
Boxes shift during a move. They bump, slide, and get stacked on. Without proper protection, metal tools can scratch each other. Sharp edges can puncture cardboard and tear through other items. Power tools with exposed cords or switches can suffer internal damage from impact.
Proper packing creates a buffer between your tools and the chaos of transit. Bubble wrap, foam inserts, and tight-fitting boxes all work together to absorb shocks. This simple step can save you hundreds of dollars in replacements.
Saving Time on Unpacking
Nobody wants to spend hours digging through boxes after a move. When you pack tools for moving the right way, you set yourself up for a smooth unpacking process. Labeled boxes go straight to their new location. Organized sets are ready to use immediately.
Think of it this way. The extra 30 minutes you spend packing carefully now saves you hours of frustration later. It’s one of the best returns on investment you’ll ever get.
Protecting Yourself and Others
Sharp tools and heavy equipment can cause injuries during a move. A loose wrench rolling around in a truck bed is a safety hazard. Proper packing keeps everything secure and prevents accidents. It also protects the people helping you move from cuts, bruises, or crushed fingers.
Gathering Your Packing Supplies
Before you touch a single tool, gather everything you need. Having all your supplies ready makes the process faster and smoother. Here’s what you’ll want to have on hand.
Essential Packing Materials
- Sturdy cardboard boxes in various sizes – small boxes work best for heavy tools
- Bubble wrap – the gold standard for protecting tool edges and surfaces
- Foam sheets or foam inserts – great for lining boxes and cradling delicate items
- Packing tape – a good quality tape keeps boxes sealed under pressure
- Markers and labels – for clear, visible identification of each box
- Furniture blankets or moving pads – perfect for wrapping large and heavy tools
- Ziplock bags or small containers – ideal for screws, bolts, and small parts
- Plastic stretch wrap – excellent for securing moving parts on power tools
Optional but Helpful Extras
Consider adding a few extra items to your packing station. Zip ties work wonders for keeping cords tidy. Silica gel packets help prevent rust on metal surfaces during long moves. A tool roll or tool bag is great for hand tools you’ll need access to during the move itself.
Step-by-Step: How to Pack Tools for Moving
Now for the main event. Follow these steps in order, and your tools will arrive at your new place in perfect condition.
Step 1: Take Inventory of All Your Tools
Start by gathering all your tools in one place. Go through your tool chest, garage shelves, and workshop bins. Make a list of everything you own. This serves two purposes. First, it helps you know exactly what needs packing. Second, it becomes your moving checklist to ensure nothing gets left behind.
Sort your tools into categories. Group hand tools together. Put power tools in their own pile. Separate accessories, attachments, and small parts. This organization makes the packing process much more efficient.
Step 2: Clean Every Tool Thoroughly
This step surprises people, but it’s critical. Dirt, grease, and debris can cause problems during a move. Metal tools covered in oil can stain your boxes and other belongings. Sawdust in power tools can attract pests during storage.
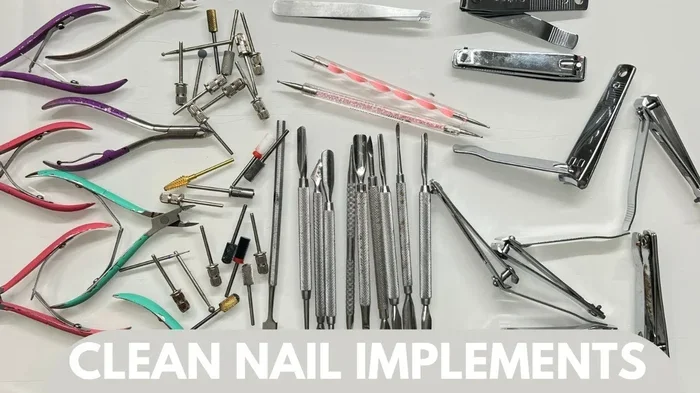
Use a wire brush or cloth to wipe down all metal surfaces. For power tools, use compressed air to blow out dust from vents and crevices. Let everything dry completely before packing. This simple step prevents rust and keeps your tools in top shape.
Step 3: Disassemble What You Can
Many tools can be broken down into smaller, more manageable pieces. Remove detachable handles from wrenches and hammers. Take saw blades out of saws. Remove drill bits and attachments from their sets.
Disassembly does two things. It makes tools smaller and easier to pack. It also reduces the risk of damage to delicate parts. Just be sure to keep all screws, bolts, and small parts together. Use labeled ziplock bags and tape each bag to its corresponding tool.
Step 4: Wrap Each Tool Individually
This is where the real protection happens. No tool should touch another tool without a buffer between them.
Start with bubble wrap. Wrap each tool in at least two layers. Pay extra attention to sharp edges. Use foam tubing for items like wrenches and pipes with protruding ends. For very delicate tools, add a layer of foam sheeting over the bubble wrap.
For large power tools, use plastic stretch wrap to secure any moving parts. This prevents switches from being accidentally turned on during transit. It also keeps cords tidy and protected.
Step 5: Choose the Right Boxes
Not all boxes are created equal. Small, heavy-duty boxes work best for tools. They’re easier to carry and less likely to collapse under weight.
Avoid oversized boxes. A box that’s too big will allow tools to shift around inside. This creates room for impact damage. Fill any empty space with crumpled newspaper, packing peanuts, or foam sheets. Everything inside the box should fit snugly with no room to move.
If you have an air compressor or similar heavy equipment, refer to guides on how to handle and transport air compressors safely for additional advice on securing these larger items during a move.
Step 6: Label Boxes Clearly and Thoroughly
Labeling is not optional. It’s essential. Use a bold marker and write clearly on at least two sides of every box.
Include the room or area the box belongs to. Note if the contents are fragile or heavy. You might also add a brief list of what’s inside. For example, “Kitchen – Wrench Set, Screwdrivers, Pliers” tells you exactly what to expect when you open that box.
Use color-coded stickers if you want to get really organized. Red for kitchen tools, blue for workshop tools, green for garage tools. This visual system makes unloading and unpacking much faster.
Step 7: Pack Boxes Strategically
Place the heaviest boxes on the bottom of your moving truck. Lighter boxes go on top. This prevents crushing and keeps everything stable during transport.
Fill gaps with soft materials to prevent shifting. Furniture blankets work great for this purpose. They cushion tools and fill awkward spaces at the same time.
If you’re using a generator for electricity at either your old or new location during the move, make sure to properly secure it in the truck following best practices for heavy equipment transport.
Packing Different Types of Tools
Not all tools are the same. Different types need different packing approaches. Here’s how to handle the most common tool categories.
Hand Tools
Hammers, wrenches, screwdrivers, pliers, and tape measures are your everyday essentials. These tools are durable but still need protection.
Wrap each tool individually in bubble wrap. Group similar tools together in the same box. Use foam sheets to line the bottom of the box. Place heavier items like hammers at the bottom of the box and lighter items like screwdrivers on top.
For tool sets with many small pieces, use a tool bag or roll-up organizer. This keeps everything contained and easy to carry.
Power Tools
Drills, saws, sanders, and routers need extra care. They have motors, cords, and moving parts that can be damaged during a move.
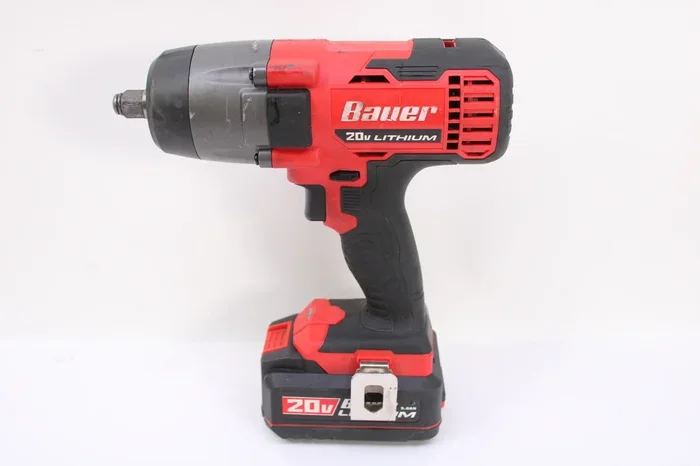
Remove batteries and store them separately. Wrap the power tool body in bubble wrap. Use stretch wrap to secure the cord and prevent it from snagging. If the tool came with a original case, use it. Original cases are designed for exactly this purpose.
For complex power tools, check the manufacturer’s guidelines for transport. Some tools have specific requirements to protect internal components.
Heavy and Large Tools
Items like bench grinders, large compressors, and table saws need special attention. These tools are heavy and bulky, which makes them harder to pack and transport.
Use furniture blankets to wrap large tools. Secure the blankets with straps or tape. For extremely heavy items, consider hiring professional movers. They have the equipment and experience to handle big, awkward tools safely.
If you’re moving a two-stage compressor or similar heavy equipment, understanding how it works can help you identify which parts need extra protection. Learning how a two-stage compressor works helps you know which components are most vulnerable during transport.
Common Mistakes to Avoid When Packing Tools
Even with the best intentions, people make mistakes when packing tools. Here are the most common ones and how to avoid them.
Skipping the Inventory
Without a list, it’s easy to lose track of small parts and accessories. A simple inventory saves you from wondering where that missing drill bit went. Take five minutes to write everything down before you start packing.
Using Boxes That Are Too Big
Big boxes with small tools inside lead to shifting and impact damage. Choose boxes that fit your tools snugly. If there’s empty space, fill it with packing material.
Forgetting to Remove Batteries
Batteries can leak during a move. They can also cause power tools to turn on accidentally. Always remove batteries and pack them separately in a cool, dry place.
Not Labeling Sharp Tools
Boxes with sharp tools inside need clear warning labels. This protects anyone handling the boxes. It also prevents careless stacking that could dull blades or cause injuries.
Rushing the Wrapping Process
It’s tempting to throw tools in a box quickly. But skipping proper wrapping is the fastest way to arrive with damaged tools. Take the time to wrap each tool carefully. Your future self will thank you.
Expert Tips for a Smooth Move with Tools
Here are some pro tips that make a real difference. These are the tricks that experienced movers and tradespeople use every day.
- Pack a “first night” tool box with essentials you’ll need immediately at your new place. Include a screwdriver set, hammer, tape measure, and flashlight.
- Take photos of complex setups before disassembling. This makes reassembly much faster and less confusing.
- Use color-coded tape on boxes to match them to rooms in your new home.
- Keep tools you use daily in your personal vehicle rather than the moving truck. This gives you access to them whenever you need them.
- Consider upgrading your tool storage for the new space. A move is a great time to reorganize and improve your workshop setup.
These small adjustments add up to a much smoother moving experience. They reduce stress and help you settle into your new space faster.
Final Checklist Before Moving Day
A checklist keeps you organized and ensures you haven’t missed anything. Use this quick reference to verify your packing is complete.
- All tools cleaned and dried
- All tools disassembled where possible
- All small parts bagged and labeled
- Every tool individually wrapped
- Boxes filled snugly with no room for shifting
- Every box labeled with contents and destination room
- Heavy boxes on the bottom, light boxes on top
- Inventory list completed and kept with you
- First-night tool box packed separately
- Batteries removed and stored safely
Go through this list the night before your move. Checking off each item gives you confidence that everything is ready. It also catches anything you might have missed in the rush.
Conclusion
How to pack tools for moving doesn’t have to be complicated. With the right supplies, a clear plan, and a little patience, you can protect every tool in your collection. The key is preparation. Clean your tools, disassemble what you can, wrap everything carefully, and label every box.
Avoid the common mistakes that cause damage. Use proper boxes, fill empty spaces, and secure heavy items. A little extra effort upfront saves you from headaches, expenses, and heartbreak later.
Your tools are an investment. They help you build, fix, and create. Taking the time to pack them properly ensures they’ll be ready to work for you in your new space from day one. Follow the steps in this guide, and you’ll move your tools safely and efficiently. Good luck with your move!
Frequently Asked Questions
What is the best way to pack hand tools for a move?
Wrap each hand tool individually in bubble wrap and group similar tools together in small, sturdy boxes. Use foam sheets to line the bottom of each box and fill any empty space with crumpled newspaper or packing peanuts. Label each box clearly with its contents and destination room.
Should I remove batteries from power tools before moving?
Yes, always remove batteries from power tools before packing them. Batteries can leak during transit and may cause corrosion or damage. Store batteries separately in a cool, dry place and pack them in a small box with padding to prevent contact with metal objects.
How do I protect sharp tool edges during a move?
Use bubble wrap with extra layers around sharp edges. Foam tubing works well for items like wrenches and pipes with protruding ends. Consider using cardboard edge protectors for particularly sharp blades. Always label these boxes with a “Sharp Contents” warning for safety.
Can I use original tool cases for moving?
Absolutely. If your tools came with original cases or holders, use them. These cases are specifically designed to fit and protect the tools. They provide a snug fit that minimizes movement during transit and often include built-in compartments for accessories.
How do I keep track of small tool parts during a move?
Place all small parts like screws, bolts, and drill bits into labeled ziplock bags. Tape each bag to its corresponding tool or place it inside the tool’s original packaging. Include a note on the box listing which bag belongs to which tool for easy reference during unpacking.
What should I pack in my “first night” tool box?
Include essential tools you’ll need immediately at your new home. A basic screwdriver set, hammer, adjustable wrench, tape measure, flashlight, and a few ziplock bags with common hardware should cover most immediate needs. Keep this box with you during the move rather than loading it onto the truck.