How to Prevent Water Buildup in Your Air Compressor
Water in your air compressor causes rust, clogs, and ruined projects. Preventing water in air compressor systems is easy with daily draining, moisture traps, and proper maintenance. This guide covers everything from basic tank drains to advanced dryers, so you can keep your tools running strong and your compressed air lines dry.
Key Takeaways
- Drain your tank after every use to remove collected condensation before it causes rust.
- Install a moisture trap or water separator at the point of use to protect pneumatic tools.
- Choose the right air dryer—aftercooler, refrigerated, or desiccant—based on your application.
- Follow a regular maintenance schedule to catch moisture problems early.
- Avoid common mistakes like ignoring the drain valve or running the compressor in humid conditions.
📑 Table of Contents
Why Water Builds Up in Air Compressors
Every compressor owner deals with moisture. It is not a sign of a broken machine. It is a natural result of how air compression works. When air enters the pump, it gets squeezed. That squeezing heats the air. As the hot air cools inside the tank, it releases water vapor. This vapor turns into liquid droplets. They collect at the bottom of the tank. Over time, this water in compressed air can cause big problems. Rust forms inside the tank. Valves get clogged. Pneumatic tools run poorly. Finished projects get ruined. Understanding this process is the first step to stopping it.
The Science of Condensation
Think of a cold glass of water on a hot day. Moisture forms on the outside. The same thing happens inside your compressor tank. Warm, humid air enters the pump. The compressor squeezes it. The air temperature rises. Then the air cools inside the tank. When it cools, it cannot hold as much moisture. The water condenses and pools at the bottom. This is called condensation. The warmer the air was when it entered, the more moisture it holds. In humid climates, this problem gets worse. Even a small amount of air compressor moisture can lead to corrosion. Regular draining is the simplest way to fight this cycle.
Common Causes of Moisture
Several factors speed up water buildup. High humidity in your workspace is a big one. Running the compressor for long periods without stopping lets heat build up and then cool. A dirty air filter lets in more humid air. Old or worn seals can let moisture past. Even the type of compressor matters. Oil-free compressors still produce water. Lubricated compressors may mix oil with water, creating a sludgy mess. Knowing these causes helps you target the right solutions.
How to Prevent Water in Air Compressor Systems
Preventing water in air compressor units does not require expensive gear. It starts with simple daily habits. A few minutes of attention after each use can save you hours of repair later. The goal is to remove liquid water before it has a chance to sit and cause damage. Below are the most effective habits you can start today.
Drain Your Tank After Every Use
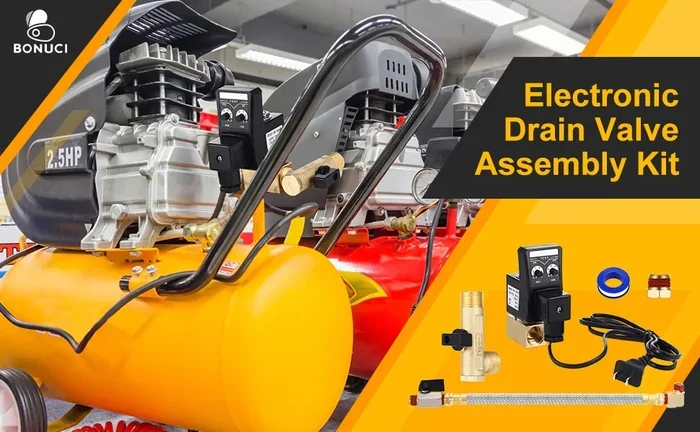
This is the single most important step. Every compressor has a drain valve at the bottom of the tank. Open it after each use. Let the water flow out. You can do this by hand or with a short hose. Some tanks have an automatic drain valve. These work well but still need occasional checks. Make it a habit to drain before you put the compressor away. A tank drain valve is cheap and easy to replace if it sticks. Do not let water sit overnight. Stagnant water accelerates rust from the inside out.
Check Your Air Intake Filter
The air filter protects the pump from dust. It also stops some moisture from entering. A clogged filter restricts airflow. This can cause the compressor to work harder and heat up more. More heat means more condensation later. Inspect your filter weekly. Clean or replace it when it looks dirty. A clean air filter helps keep the intake air as dry as possible. In very humid environments, consider a pre-filter or a moisture separator at the intake.
Use a Moisture Trap at the Point of Use
Even with a drained tank, some moisture remains in the compressed air lines. A moisture trap or water separator catches this before it reaches your tools. These devices install right before the air hose. They use centrifugal force to spin water droplets to the sides. The dry air continues to your tool. This is especially important for painting, sanding, or running sensitive pneumatic equipment. A point-of-use filter is a small investment that protects expensive tools.
Essential Equipment to Remove Moisture
For heavier use or sensitive applications, simple draining is not enough. You need dedicated equipment to remove compressed air moisture. Several options exist, ranging from simple passive devices to advanced dryers. Choosing the right one depends on your needs, budget, and the tools you run.
Moisture Traps and Water Separators
A basic moisture trap is the first upgrade many users make. It sits between the tank and the air hose. It catches liquid water and some oil mist. These traps are easy to install. They require no power. You just need to empty the collection bowl regularly. They are ideal for home workshops and light-duty tasks. If you only use your compressor for occasional tire inflation or small nail guns, a good moisture trap may be all you need.
Aftercoolers for Hot Air
An aftercooler attaches directly to the compressor output. It cools the hot compressed air quickly. This rapid cooling causes moisture to condense and drop out before it reaches the tank. Aftercoolers are especially useful for larger compressors that pump a lot of air. They reduce the load on your tank drain. Many rotary screw compressors come with a built-in aftercooler. For piston compressors, an aftermarket aftercooler is a smart add-on. This simple device can cut water in the tank dramatically.
Refrigerated Dryers vs. Desiccant Dryers
For workshop or industrial use, a dedicated air dryer provides the deepest level of dryness. Two main types exist. Each has its strengths.
| Feature | Refrigerated Dryer | Desiccant Dryer | Which One? |
|---|---|---|---|
| How it works | Cools air to condense water | Uses chemical desiccant to absorb moisture | Depends on required dryness |
| Dew point | Around 35–40°F | Can reach -40°F or lower | Desiccant for very dry air |
| Energy use | Moderate | Higher (some types use heat) | Refrigerated for most shops |
| Maintenance | Low | Desiccant replacement needed | Refrigerated for ease |
| Cost | Mid-range | Higher | Refrigerated for budget |
| Best for | General workshop, pneumatic tools | Painting, medical, electronics | Match to your application |
A refrigerated dryer works well for most woodworking shops and auto garages. It keeps the air dry enough to prevent rust in tools and lines. A desiccant dryer is for critical applications. If you do automotive painting or run sensitive instrumentation, a desiccant dryer gives you bone-dry air. The desiccant material absorbs moisture and must be replaced or regenerated periodically. Both types protect your compressed air lines from water damage.
Maintenance Schedule for a Dry Compressor
Consistency beats intensity. A quick check every day beats a deep cleaning once a year. A simple maintenance schedule keeps moisture under control and extends the life of your compressor. Here is a routine that works for most home and shop users.
Weekly and Monthly Checks
Make these steps part of your weekly routine. They take less than five minutes.
- Drain the tank. Open the drain valve after every use. If you use the compressor daily, drain it once a week even if you already drained it.
- Inspect the drain valve. Make sure it opens fully and closes tight. A stuck-open valve lets air escape. A stuck-closed valve lets water pool.
- Check the air filter. Clean or replace it if it looks clogged. A dirty filter strains the motor and can pull in humid air.
- Wipe down the exterior. Remove any water puddles around the tank. This prevents external rust and slip hazards.
Once a month, do a deeper check. Inspect hoses for cracks. Listen for unusual noises. Check the pressure gauge for accuracy. If you use a moisture trap, empty its bowl. These small habits add up to a very reliable machine.
Seasonal Maintenance Tips
Seasonal changes bring shifts in humidity. In summer, the air holds more moisture. In winter, cold temperatures can cause condensation inside the lines even if the tank is dry. Adjust your routine with the seasons. In humid months, drain the tank more frequently. Consider running the compressor for a few minutes after use to purge the lines. In winter, store the compressor in a heated space if possible. Cold metal causes more condensation. If you live in a damp climate, a seasonal inspection of the tank interior for rust is wise. A rust prevention coating inside the tank can help if you spot early signs of corrosion.
Quick Tips and Common Mistakes
Even experienced users sometimes skip steps. Here are quick tips to remember and common mistakes to avoid. Follow these and you will keep your system running dry.
Quick Tips to Remember
- Drain the tank while it is still warm. Warm air holds more moisture, so draining right after use releases the most water.
- Use a hose on the drain valve. This directs water away from your floor and into a bucket or drain.
- Install a moisture trap close to your tools. Point-of-use protection is the last line of defense.
- Do not run the compressor in a damp basement. High ambient humidity feeds moisture into the system.
- Keep the compressor level. This helps the drain valve release water completely.
Common Mistakes to Avoid
- Ignoring the drain valve. A valve that does not open means water stays in the tank. Replace it immediately.
- Letting the tank sit full of air for weeks. Stagnant air promotes rust and moisture buildup.
- Using the compressor beyond its duty cycle. Overheating causes excessive condensation. Let the motor cool between runs.
- Skipping the air filter. A missing or dirty filter lets in humid, dirty air. Always have a clean filter in place.
- Assuming an oil-free compressor does not produce water. It still does. Oil-free just means no oil mixes with the water. You still need to drain it.
Expert Insights: Keeping Your System Dry Long-Term
Over years of use, moisture management becomes part of your compressor ownership. A few expert-level steps can take your protection to the next level. These insights help you avoid costly repairs and keep your pneumatic tools running at peak performance.
When to Upgrade Your Compressor
If your compressor is old and the tank shows signs of rust, it may be time for a replacement. A tank with internal corrosion cannot be fully cleaned. Water contamination will persist no matter how often you drain. New compressors, especially oil-free compressors, come with better moisture-resistant coatings and more efficient aftercoolers. If you run a home workshop or a small business, investing in a unit with a built-in moisture separator can save you from buying separate traps. Also consider the power source. If you rely on a generator during outages, understanding how much gas a generator uses helps you plan uninterrupted runtime and avoid moisture problems from frequent stops and starts.
Professional Maintenance vs. DIY
Many maintenance tasks are simple enough for any owner. Draining, filter changes, and visual inspections are DIY-friendly. However, some tasks are best left to professionals. Internal tank inspections, pressure valve testing, and electrical connections should be checked by a qualified technician if you are unsure. If you use a generator to power your compressor, proper wiring is critical. Always follow safe setup guidelines, as explained in how to wire a generator to a breaker box, to prevent electrical issues that could damage your compressor or create safety hazards. A professional annual check-up can catch small moisture problems before they become tank failures.
Before a long job, check how long a generator can run to ensure you will not run out of fuel. A sudden shutdown during a long compressor session can cause temperature swings that pull extra moisture into the lines. Planning your runtime keeps the whole system stable and dry.
Conclusion
Preventing water in air compressor systems is not complicated. It comes down to a few consistent habits and the right equipment. Drain your tank after every use. Install a moisture trap or water separator. Choose an aftercooler or air dryer if your work demands it. Follow a simple maintenance schedule and avoid common mistakes. These steps protect your tank, your tools, and your finished work from the damaging effects of water contamination. With a little attention, your compressor will stay dry, efficient, and ready for the next job. Start today, and your future self will thank you.
Frequently Asked Questions
Why does water come out of my air compressor when I drain it?
When compressed air cools inside the tank, it releases moisture that was invisible in the warm intake air. This condensation collects at the bottom and drains out as liquid water. It is a normal byproduct of the compression process, especially in humid environments. Regular draining prevents this water from causing rust or reaching your tools.
Can water in an air compressor damage my pneumatic tools?
Yes, absolutely. Water in the compressed air lines can cause rust inside pneumatic tools, clog small passages, and wash away lubrication. It can also ruin paint jobs and cause inconsistent tool performance. Using a moisture trap or water separator at the point of use helps protect your tools from these issues.
How often should I drain my air compressor tank?
You should drain the tank after every use. If you use the compressor daily, a quick drain after each session is enough. In very humid conditions or after long runs, draining twice a day helps. An automatic drain valve can handle this for you, but it still needs periodic inspection to ensure it is working properly.
What is the difference between a moisture trap and an air dryer?
A moisture trap is a passive device that uses centrifugal force to spin liquid water out of the air stream. It catches bulk water but does not remove vapor. An air dryer actively cools or absorbs moisture to achieve a much lower dew point. Air dryers are used when you need very dry air for painting, medical tools, or sensitive equipment.
Does an oil-free compressor still produce water?
Yes. Oil-free compressors do not mix oil with the water, so the drain is just water. However, they still compress humid air and produce condensation. You must still drain the tank and use moisture traps to prevent water from reaching your tools and causing damage.
Should I run my compressor in a damp or humid room?
No. High ambient humidity increases the amount of moisture that enters the compressor with the intake air. This leads to more condensation in the tank and lines. If possible, place your compressor in a dry, well-ventilated area. If you must work in a damp space, increase your draining frequency and use a point-of-use moisture trap.