How to Test a Compressor and Diagnose Common Problems
Knowing how to test a compressor saves you time, money, and headaches. This guide walks you through pressure tests, motor checks, and common diagnostic steps anyone can follow. Whether you own a rotary screw compressor or a simple piston model, you will find practical advice to keep your machine running smoothly.
Key Takeaways
- Pressure Testing: Always check your compressor’s tank pressure with a gauge before running any diagnostics.
- Motor Health Matters: Testing the motor windings and capacitors can reveal hidden electrical faults early.
- Unloader Valve Inspection: A stuck unloader valve is one of the most common causes of compressor failure to start.
- Oil and Filters: Regularly checking oil levels and air filters prevents many performance issues.
- Safety First: Disconnect power and release all pressure before performing any test or repair.
- Know Your Limits: Some diagnostics require professional tools; do not hesitate to call a technician for complex issues.
📑 Table of Contents
- How to Test a Compressor and Diagnose Common Problems
- Why Regular Compressor Testing Matters
- Step-by-Step Guide on How to Test a Compressor
- Common Compressor Problems and How to Diagnose Them
- Testing Different Compressor Types
- How to Maintain Your Compressor After Testing
- When to Call a Professional
- Conclusion
How to Test a Compressor and Diagnose Common Problems
Air compressors are workhorses. They power nail guns, paint sprayers, and impact wrenches in workshops and construction sites everywhere. But like any machine, they break down. The key is catching problems early. Learning how to test a compressor gives you the confidence to handle minor issues yourself. It also helps you decide when a professional repair makes more sense.
This guide covers every step you need. From basic pressure checks to motor diagnostics, you will find clear instructions. We also cover the most common compressor problems and how to fix them. By the end, you will know exactly what to do when your compressor acts up.
Before you start, gather a few basic tools. You will need a pressure gauge, a multimeter, safety glasses, and gloves. Having these ready saves time and keeps you safe during the entire process.
Why Regular Compressor Testing Matters
Many people ignore their compressor until it stops working. That is a mistake. Regular testing extends the life of your machine. It also prevents unexpected downtime on the job. A compressor that fails mid-project can cost you hours of productivity.
Testing also helps you spot small issues before they become expensive repairs. A minor air leak today can turn into a burned-out motor tomorrow. Catching it early saves you money. Compressor maintenance does not have to be complicated. A few simple checks every month go a long way.
Think of it like checking your car’s oil. A few minutes of attention now prevents big problems later. The same logic applies to your air compressor.
Safety Tips Before You Begin
Safety always comes first. Compressors store pressurized air and use electricity. Both can cause serious injury if handled carelessly. Follow these steps every time:
- Unplug the compressor from the power outlet before any testing.
- Release all air pressure from the tank using the drain valve.
- Wear safety glasses and gloves during every test.
- Work in a well-ventilated area.
- Never test a compressor near flammable materials.
Taking these precautions might feel like extra work. But they protect you from serious harm. No repair is worth an injury.
Step-by-Step Guide on How to Test a Compressor
Now let us get into the actual testing process. We break it down into simple steps you can follow right away. Each step builds on the last, so do them in order.
Step 1: Check the Tank Pressure
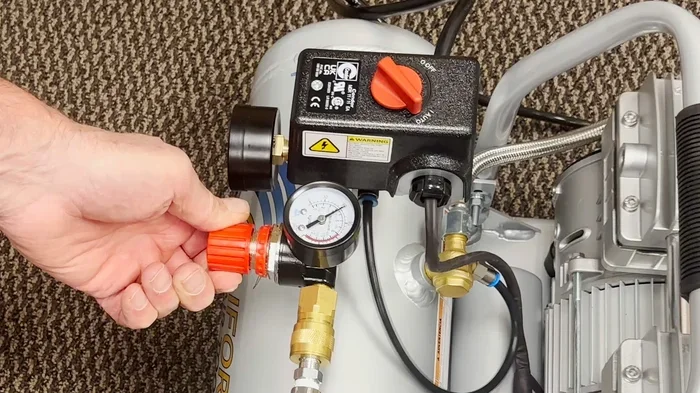
Start with the most basic check. Look at the pressure gauge on your compressor tank. It should read zero when the tank is fully drained. If it shows pressure when the compressor is off, that is normal. The tank holds residual air.
But if the gauge drops quickly after the compressor shuts off, you have a leak. Listen for hissing sounds around the tank, fittings, and hoses. Even a small leak wastes energy and reduces performance.
Use soapy water to find the exact leak location. Simply brush it on joints and connections. Bubbles will form where air escapes. This trick works every time and costs almost nothing.
Step 2: Test the Pressure Switch
The pressure switch controls when your compressor turns on and off. It is a critical component. A faulty switch causes the compressor to run constantly or not start at all.
To test it, first check the cut-in and cut-out pressures. These are the pressures at which the compressor starts and stops. Use a pressure gauge to verify they match the manufacturer’s settings. If the readings are off, the switch may need adjustment or replacement.
Most pressure switches have a differential setting. This is the pressure gap between start and stop. A typical differential is about 20 PSI. If yours is too wide or too narrow, your compressor will not cycle properly.
Step 3: Test the Motor Windings
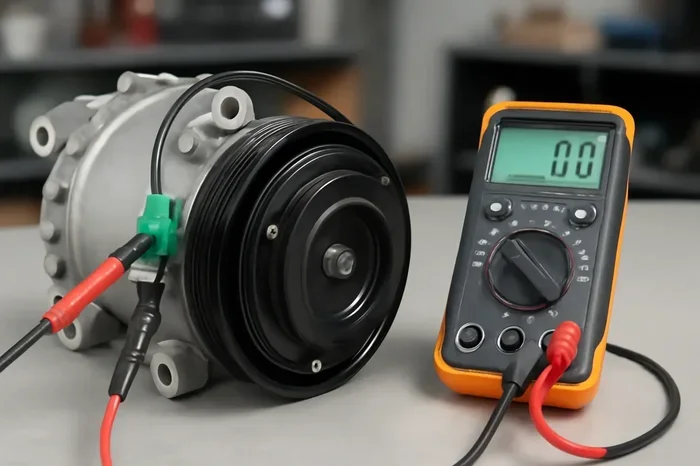
The motor is the heart of your compressor. Testing the windings tells you if the motor is healthy. You need a multimeter for this test.
First, disconnect the power completely. Then remove the motor wiring connections. Set your multimeter to measure resistance (ohms). Touch the probes to each motor terminal and compare the readings. They should be balanced across all terminals.
If one reading is significantly different, you have a winding problem. This could mean a short circuit or an open winding. Either way, the motor likely needs professional repair or replacement.
Step 4: Check the Run Capacitor
Many compressors use a run capacitor to help the motor start and run smoothly. A bad capacitor causes the motor to hum but not start. It can also cause the motor to overheat.
To test a capacitor, discharge it first. Then use your multimeter on the capacitance setting. Compare the reading to the capacitor’s rated value. If it is more than 10% off, replace the capacitor.
Capacitors are cheap and easy to replace. This is one of the simplest fixes you can do yourself. Always match the new capacitor to the original rating exactly.
Step 5: Inspect the Unloader Valve
The unloader valve releases air from the compressor head when the motor stops. If it sticks or fails, your compressor will not start. This is one of the most common compressor problems.
To check it, turn off the compressor and release the tank pressure. Then remove the unloader valve and inspect it for debris or damage. Clean it with compressed air and a soft brush. If the valve is cracked or worn, replace it.
A working unloader valve is essential for proper compressor operation. Do not skip this step during your testing routine.
Common Compressor Problems and How to Diagnose Them
Not every compressor problem is obvious. Some show up as subtle performance drops. Others announce themselves with loud noises or complete failure. Here are the most common issues and how to diagnose them.
Compressor Won’t Start
This is the most frustrating problem. The compressor sits there silent when you need it most. Start by checking the power supply. Is the outlet working? Is the cord damaged? These simple checks solve the problem more often than you think.
If power is not the issue, check the unloader valve and the start capacitor. A stuck unloader valve or a dead capacitor will prevent startup. Use the testing steps above to verify each component. Often, the problem is simpler than you expect.
Also check the pressure switch. If the tank pressure is above the cut-in level, the compressor will not start. Drain the tank and try again. This simple reset fixes many no-start issues.
Compressor Runs but Builds No Pressure
This problem means air is escaping somewhere before it reaches the tank. Start by checking all hoses, fittings, and connections for leaks. Use the soapy water test we mentioned earlier.
If there are no visible leaks, the problem could be inside the compressor head. Worn piston rings or a damaged valve plate can cause air to bypass the tank. These repairs require more advanced skills. Consider calling a professional if you suspect internal damage.
Also check the air filter. A clogged filter restricts airflow and reduces pressure. This is an easy fix that many people overlook. Replace the filter if it looks dirty or damaged.
Compressor Makes Strange Noises
Grinding, rattling, or squealing sounds are never good. Each noise points to a different problem. Grinding usually means worn bearings. Rattling could indicate a loose component or debris inside the tank.
Squealing often points to a belt issue. Check the belt tension and condition. A loose or worn belt will squeal under load. Replace it if needed. Always turn off and unplug the compressor before inspecting any moving parts.
Do not ignore unusual sounds. They almost always get worse over time. Early diagnosis prevents minor issues from becoming major repairs.
Compressor Overheats
Compressors generate heat during operation. But excessive heat signals a problem. Check the oil level first. Low oil causes friction and overheating in many compressor models.
Next, inspect the cooling fins or fan. Dirty fins block airflow and cause heat buildup. Clean them with a brush or compressed air. Also make sure the compressor is not running in an enclosed space with poor ventilation.
If the motor itself is overheating, the problem could be electrical. A failing capacitor or winding issue can cause excess heat. Use the motor testing steps above to check for electrical faults.
Testing Different Compressor Types
Not all compressors are the same. The type you own affects how you test it. Here is a quick look at testing for the most common types.
Reciprocating (Piston) Compressors
Piston compressors are the most common type for home and workshop use. Testing them focuses on the tank, pressure switch, and motor. Check for air leaks around the tank seals. Inspect the piston rings if pressure loss persists. These compressors use oil, so oil level and quality matter too.
Rotary Screw Compressors
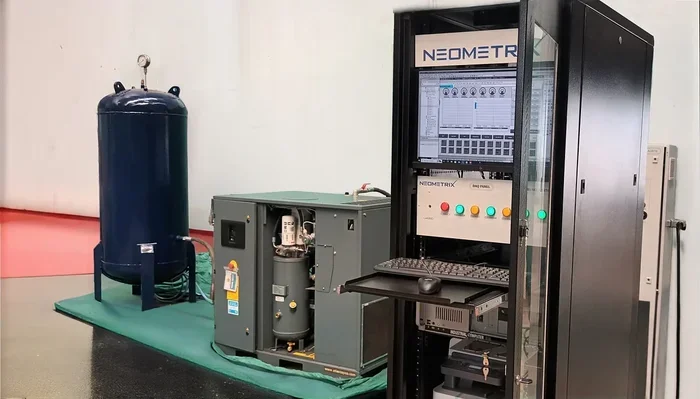
Rotary screw compressors are common in industrial settings. They are more complex and require specialized testing. Check the oil separator, air filter, and belt drive system. These compressors also have more sophisticated control systems. Professional diagnosis is often the best choice for rotary screw models.
Portable and Portable Tankless Compressors
Portable compressors are popular for contractors and DIYers. Testing them follows the same basic steps. Pay extra attention to the hose connections, as portable models are more prone to leaks from frequent movement. Also check the power cord and plug for wear.
For portable models that run on gas or need external power, consider whether your generator can handle the compressor’s power requirements. Matching the right generator size to your compressor ensures reliable performance on job sites. You can learn more about sizing a generator for power tools in our dedicated guide.
How to Maintain Your Compressor After Testing
Testing is only half the battle. Proper maintenance keeps your compressor in top shape between tests. Follow these simple habits for the best results.
- Drain the tank after every use. Moisture builds up inside the tank and causes rust over time.
- Check the oil level weekly. Low oil increases wear on internal components.
- Replace air filters every 3-6 months. A clean filter improves performance and efficiency.
- Inspect hoses and fittings monthly. Look for cracks, leaks, or loose connections.
- Keep the compressor clean. Dust and debris block cooling vents and reduce airflow.
- Store it properly. Keep the compressor in a dry, covered area when not in use.
These habits take just a few minutes each week. They pay off by preventing breakdowns and extending your compressor’s lifespan significantly.
Also consider the energy costs of running your compressor. If you use a generator to power it, understanding fuel consumption helps you plan better. Check out our article on how much gas a generator uses for useful tips on managing fuel costs.
Runtime matters too. If you need to run your compressor for extended periods, make sure your power source can keep up. Learn more about how long a generator can run continuously to plan your projects effectively.
When to Call a Professional
Not every compressor problem is a DIY fix. Some issues require professional tools and expertise. Here are signs you should call a technician:
- The motor burns out or shows signs of electrical failure.
- You hear metal-on-metal grinding inside the compressor.
- The compressor loses pressure even after replacing seals and valves.
- You need to perform a hydrostatic tank pressure test.
- The compressor trips circuit breakers repeatedly.
These problems can be dangerous if handled incorrectly. A professional has the right tools and training to fix them safely. Do not risk your safety or your equipment by attempting repairs beyond your skill level.
That said, regular testing and basic maintenance are well within anyone’s ability. Start with the simple checks in this guide. You will be surprised how much you can handle on your own.
Conclusion
Knowing how to test a compressor puts you in control of your equipment. You can catch problems early, save money on repairs, and avoid unexpected downtime. We covered pressure testing, motor diagnostics, unloader valve inspection, and common problem diagnosis. Each step is simple enough for beginners but valuable for experienced users too.
Make testing part of your regular routine. A few minutes of attention each week keeps your compressor running at peak performance. Pair this with good maintenance habits, and your compressor will serve you well for years to come.
Remember to always prioritize safety. Disconnect power, release pressure, and wear protective gear. When a problem exceeds your skills, do not hesitate to call a professional. The right approach keeps you safe and your compressor working.
Frequently Asked Questions
How often should I test my compressor?
Test your compressor at least once a month if you use it regularly. For occasional users, a check before each major project is a good habit. Regular testing catches small problems before they become big expenses.
Can I test a compressor without a multimeter?
Yes, you can perform many basic tests without a multimeter. Pressure gauge checks, visual inspections, and soapy water leak tests require no electrical tools. However, a multimeter is essential for motor winding and capacitor tests.
What is the most common compressor failure?
The most common failure is a stuck unloader valve or a bad start capacitor. Both prevent the compressor from starting. These are also the easiest and cheapest fixes, so always check them first.
How do I know if my compressor tank has rust?
Inspect the tank visually for any flaking, discoloration, or pitting on the surface. If you see rust, have a professional inspect the tank. Rust can weaken the tank and create a safety hazard. A hydrostatic test can confirm the tank’s structural integrity.
Is it safe to use a compressor with a small air leak?
Small leaks are common but should be fixed promptly. They waste energy, reduce performance, and can worsen over time. Use soapy water to locate the leak and tighten or replace the fitting as needed.
What PSI should my compressor tank hold?
Most home compressors are designed to hold between 90 and 150 PSI. Check your owner’s manual for the exact specifications. If your tank cannot hold pressure at all, there is likely a significant leak or valve failure that needs attention.