How to Recharge a Refrigerator Compressor Safely at Home
Recharging your refrigerator compressor is a manageable DIY task when you have the right tools and knowledge. This guide walks you through every step, from spotting low refrigerant signs to completing the recharge safely. You will learn what equipment you need, how to identify leaks, and when to call a professional for help.
Your refrigerator works hard every single day to keep your food cold and safe. But what happens when it starts struggling? A warm fridge is more than just annoying. It is a sign that something is wrong with the refrigerator compressor. Understanding how to recharge a refrigerator compressor can save you hundreds of dollars in repair costs. Many homeowners assume they need to call an expensive technician for every cooling problem. The truth is, recharging the compressor is something you can do yourself at home with the right guidance.
This guide covers everything you need to know about refrigerator compressor recharge. We will walk through the symptoms of low refrigerant, the tools you need, and the exact steps to get your compressor running again. We also share important safety tips and common mistakes to avoid. Whether you are a complete beginner or a seasoned DIYer, you will find practical advice here that actually works.
Before you grab any tools, it is important to understand what the compressor does. The compressor is the heart of your refrigerator’s cooling system. It pumps refrigerant through the coils, removing heat from inside the fridge and releasing it outside. When the refrigerant level drops, the compressor works harder and eventually fails. Recharging means adding more refrigerant to restore proper cooling pressure. Think of it like filling up your car’s coolant system. You need the right fluid, the right amount, and the right procedure.
Key Takeaways
- Know the Warning Signs: Warm air, ice buildup, and strange noises are clear signals your compressor needs attention.
- Safety Comes First: Always wear protective gear and work in a well-ventilated area before handling refrigerant.
- Use the Right Tools: A recharge kit, pressure gauge, and thermometer are essential for a successful recharge.
- Match Your Refrigerant Type: Using the wrong refrigerant can damage your compressor and void your warranty.
- Know When to Call a Pro: Some issues, like major leaks or compressor failure, require professional diagnosis and repair.
- Prevent Future Problems: Regular maintenance and cleaning can extend compressor life significantly.
📑 Table of Contents
Understanding Your Refrigerator Compressor
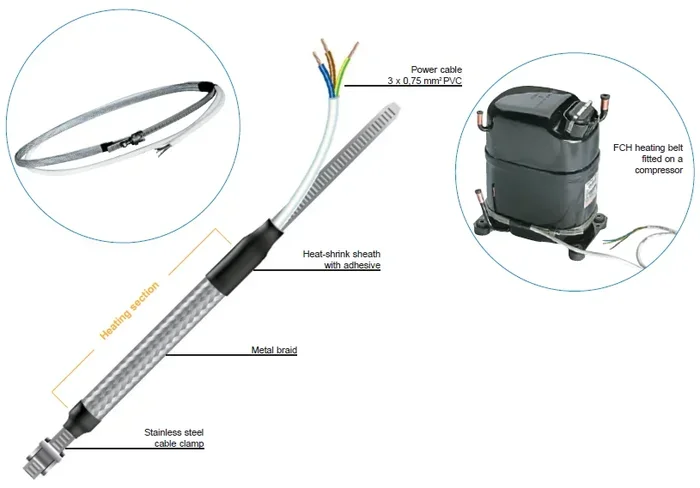
The compressor is a small but powerful motor located at the back of your refrigerator, usually near the bottom. It compresses the refrigerant gas and pushes it through the system. This cycle of compression and expansion is what creates cold air inside your fridge. Without enough refrigerant, the whole process breaks down.
How the Cooling Cycle Works
Here is a simple breakdown of how your refrigerator stays cold:
- The compressor pressurizes the refrigerant gas, turning it into a hot, high-pressure gas.
- This hot gas flows through the condenser coils at the back of the fridge, releasing heat into the room.
- The gas cools down and turns into a liquid as it moves through the expansion valve.
- The liquid refrigerant absorbs heat from inside the fridge through the evaporator coils.
- The cycle repeats over and over to maintain a consistent temperature.
When any part of this cycle is disrupted, your fridge suffers. Low refrigerant is one of the most common causes of cooling failure. A refrigerant recharge restores the system to proper working order. However, you should always check for leaks before recharging. Simply adding refrigerant without fixing a leak is a temporary fix at best.
Signs Your Compressor Needs Recharging
How do you know if your compressor actually needs a recharge? There are several clear warning signs that point to low refrigerant levels. Catching these early can prevent more serious damage to the compressor and other components.
Warning Signs to Watch For
- Warm air from the vents: If your fridge feels warm inside despite running constantly, low refrigerant is a likely cause.
- Ice buildup on the coils: Frost or ice forming on the back wall or evaporator coils signals insufficient refrigerant flow.
- Unusual clicking or humming sounds: A compressor struggling with low refrigerant often makes louder or irregular noises.
- Higher electricity bills: A compressor working overtime uses more energy, which shows up on your utility bill.
- Food spoiling faster: If your produce goes bad quicker than usual, the internal temperature may be rising.
- Constant running: A compressor that never cycles off is working too hard to maintain the set temperature.
If you notice any combination of these symptoms, it is time to investigate further. A simple compressor troubleshooting session can confirm whether low refrigerant is the culprit. Start by checking the temperature inside both the fridge and freezer compartments. Use a thermometer for accuracy. If the fridge is above 40 degrees Fahrenheit and the freezer is above 0 degrees, the compressor is likely not getting enough refrigerant to function properly.
Tools and Materials You Will Need
Before you start any work, gather everything you need. Having the right tools makes the process smoother and safer. You do not want to stop halfway through because you are missing a key piece of equipment.
Essential Equipment List
- Refrigerant recharge kit: Make sure it matches your refrigerator’s specific refrigerant type. Common types include R-134a and R-600a.
- Manifold pressure gauge set: This measures the pressure on both the high and low sides of the system.
- Thermometer: A simple fridge thermometer helps you monitor temperature changes during the recharge.
- Safety gloves and goggles: Refrigerant can cause skin and eye irritation. Protect yourself before you begin.
- Work light or flashlight: The compressor area is often dark and cramped behind the fridge.
- Towels or rags: You may encounter small refrigerant residue or condensation during the process.
- Vacuum pump (optional): This helps remove air and moisture from the lines before recharging.
You can find most of these items at your local hardware store or online. A basic recharge kit typically costs between 20 and 50 dollars, depending on the refrigerant type. This is a fraction of what a professional repair would cost. However, always double-check your refrigerator model to ensure compatibility with the refrigerant you purchase.
Step-by-Step Recharge Process
Now that you have your tools ready, it is time to get to work. Follow these steps carefully and do not rush. Patience and precision are the keys to a successful compressor recharge.
Step 1: Unplug the Refrigerator
Safety first. Always unplug the refrigerator before opening any panels or working on the compressor. Working on an energized appliance creates serious risk of electrical shock. Find the outlet and pull the plug completely. If your fridge is hardwired, turn off the circuit breaker for that area.
Step 2: Locate the Compressor and Service Ports
Move the fridge away from the wall carefully. You will see the compressor at the bottom back, usually a black or silver cylindrical component. Near the compressor, you will find two service ports. The larger one is the low-pressure port, and the smaller one is the high-pressure port. These are where you will connect your gauges and recharge hose.
Step 3: Check for Leaks First
Before adding any refrigerant, inspect the system for leaks. Look for oily residue around the compressor, lines, or service ports. This oily film is a telltale sign of a refrigerant leak. You can also use a leak detection solution and apply it to the connections. Bubbles will form if there is an active leak. Just like a generator needs proper maintenance to run continuously, your refrigerator compressor needs a sealed system to function correctly. If you find a leak, you must repair it before recharging, or the new refrigerant will simply escape again.
Step 4: Connect the Pressure Gauges
Attach the manifold gauge hoses to the service ports. The low-pressure hose connects to the larger port, and the high-pressure hose connects to the smaller one. Make sure the connections are tight to prevent refrigerant from escaping during the process. Open the valves on the gauges slowly and check the current pressure readings.
Step 5: Recover Any Remaining Refrigerant
If there is any refrigerant still in the system, recover it using the low-side hose. Connect the recovery hose from the gauge set to a recovery tank. This ensures you are not releasing refrigerant into the atmosphere, which is harmful to the environment and often illegal. Handle all refrigerant with care and dispose of it properly according to local regulations.
Step 6: Evacuate the System (Optional but Recommended)
Using a vacuum pump, pull a vacuum on the system for about 15 to 20 minutes. This removes any air and moisture that may have entered the lines. Moisture in the system can cause ice blockages and corrosion over time. If you do not have a vacuum pump, you can skip this step, but the recharge may not last as long.
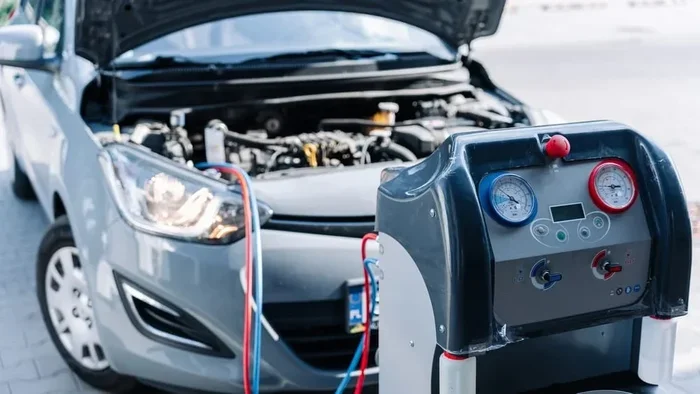
Step 7: Recharge the System
Now it is time to add the new refrigerant. Connect the recharge can to the low-side hose. Open the valve on the can slowly and let the refrigerant flow into the system. Monitor the pressure gauge constantly. Add refrigerant until the pressure reaches the manufacturer’s recommended level. You can usually find this information on a sticker inside the fridge door or in the owner’s manual.
Step 8: Test the System
Once the recharge is complete, plug the refrigerator back in and let it run for several hours. Check the temperature inside the fridge and freezer periodically. The fridge should reach 37 to 40 degrees Fahrenheit, and the freezer should reach 0 degrees Fahrenheit. Listen for any unusual sounds from the compressor. If everything sounds normal and the temperatures are dropping, your recharge was successful.
Safety Precautions and Common Mistakes
Recharging a compressor is not without risks. Refrigerant can be harmful if handled improperly, and working on electrical appliances always carries some danger. Following safety guidelines protects both you and your appliance.
Essential Safety Tips
- Always wear gloves and safety goggles when handling refrigerant and tools.
- Work in a well-ventilated area. Refrigerant fumes can be harmful if inhaled in large amounts.
- Never overcharge the system. Too much refrigerant causes excess pressure and can damage the compressor.
- Keep refrigerant cans upright during the recharge process to prevent liquid from entering the compressor directly.
- Store refrigerant cans in a cool, dry place away from heat sources and direct sunlight.
- Keep children and pets away from the work area during the recharge.
Common Mistakes to Avoid
- Using the wrong refrigerant type: This is one of the most common errors. Always verify your refrigerator’s required refrigerant before purchasing a recharge kit.
- Skipping leak detection: Recharging without fixing a leak wastes time and money. The refrigerant will escape again quickly.
- Overcharging the system: Too much refrigerant raises pressure to dangerous levels and can cause compressor failure.
- Rushing the process: Taking shortcuts leads to mistakes. Follow each step carefully and patiently.
- Ignoring unusual symptoms after recharge: If the compressor still struggles after recharging, there may be a deeper mechanical issue that needs professional attention.
One important thing to keep in mind is that a refrigerator compressor repair is not always about refrigerant. Sometimes the compressor itself is failing due to age, wear, or electrical issues. If you have recharged the system and the cooling problem persists, do not keep adding refrigerant. This can make the problem worse. Instead, investigate further or consult a professional technician.
When to Call a Professional
There are times when a DIY recharge is not the right answer. Knowing when to call a professional saves you time, money, and potential injury. If you are uncomfortable working with refrigerant or electrical components, there is no shame in hiring an expert.
Call a professional if you notice any of the following:
- The compressor makes loud grinding or knocking noises, which may indicate internal mechanical failure.
- You find a major leak that requires soldering or replacing copper lines.
- The compressor does not start at all, even after a full recharge.
- You are unsure about the refrigerant type or the correct pressure levels for your model.
- The refrigerator is more than 10 years old and the compressor has failed multiple times.
A professional technician has specialized tools and training to diagnose complex issues quickly. They can also perform a full compressor repair or replacement if needed. While professional service costs more upfront, it can extend the life of your refrigerator significantly and prevent costly mistakes from improper DIY repairs.
Also, keep in mind that the cost of professional service varies widely. For context, a basic diagnostic visit might cost 100 to 200 dollars, while a full compressor replacement can range from 500 to 1500 dollars depending on the model. Compare this to the cost of a recharge kit, which is typically under 50 dollars. Doing it yourself makes financial sense when the problem is straightforward and you feel confident in your abilities.
Maintaining Your Refrigerator Compressor
The best way to avoid future compressor problems is through regular maintenance. A well-maintained compressor runs more efficiently and lasts longer. These simple habits can make a big difference in the lifespan of your refrigerator.
Simple Maintenance Tips
- Clean the condenser coils: Dust and debris on the back coils force the compressor to work harder. Clean them every six months with a vacuum or coil brush.
- Check the door seals: Worn gaskets let warm air in, making the compressor run longer than necessary. Replace them if they feel loose or brittle.
- Keep the fridge level: An unlevel refrigerator puts extra strain on the compressor. Use a spirit level and adjust the feet as needed.
- Do not overfill the fridge: Overcrowding blocks airflow and forces the compressor to work harder to cool everything evenly.
- Check the temperature settings: Keep the fridge at 37 degrees Fahrenheit and the freezer at 0 degrees Fahrenheit for optimal performance.
- Listen for changes: Pay attention to any new sounds or changes in how your fridge runs. Early detection prevents small problems from becoming big ones.
Regular maintenance also helps you spot early warning signs of low refrigerant. If you notice frost building up faster than usual or the compressor running more frequently than normal, check the refrigerant level sooner rather than later. Addressing a small leak early prevents the need for a full compressor replacement later.
Another important consideration is the age of your refrigerator. Most compressors last between 10 and 15 years with proper care. If your fridge is older than that, a recharge might only be a temporary fix. In that case, you may want to weigh the cost of repair against the cost of a new home appliance. A new energy-efficient refrigerator can save you money on electricity bills over time, even if the upfront cost is higher.
Final Thoughts
Knowing how to recharge a refrigerator compressor gives you confidence and saves money. The process is straightforward when you follow the right steps and prioritize safety. Start by identifying the symptoms of low refrigerant, gather your tools, and work through each step methodically. Never skip leak detection, never use the wrong refrigerant, and never overcharge the system.
Remember that recharging is a temporary solution for a sealed system problem. If your compressor continues to lose refrigerant, there is an underlying issue that needs professional attention. Use this guide as a starting point, but always trust your instincts. If something feels wrong or you are unsure about any step, reach out to a qualified technician.
Your refrigerator is one of the most important appliances in your home. Taking care of the compressor means taking care of your food, your energy bills, and your peace of mind. With the knowledge you have gained from this guide, you are now equipped to handle a compressor recharge safely and effectively at home.
Frequently Asked Questions
How long does a refrigerator compressor recharge take?
Most recharges take between 30 minutes and 2 hours depending on the severity of the refrigerant loss and whether you need to repair a leak first. If you are a first-timer, give yourself extra time to work carefully and avoid mistakes.
Is it safe to recharge a refrigerator compressor at home?
Yes, it is safe as long as you follow all safety precautions. Wear gloves and goggles, work in a ventilated area, unplug the fridge, and use the correct refrigerant type. If you feel uncomfortable at any point, stop and consult a professional.
How much does it cost to recharge a refrigerator compressor?
A DIY recharge kit costs between 20 and 50 dollars. Professional service typically ranges from 150 to 300 dollars depending on the refrigerant type and whether leak repair is needed. The DIY route saves significant money when the problem is straightforward.
What happens if you overcharge a refrigerator compressor?
Overcharging raises system pressure to dangerous levels, which can cause the compressor to overheat and fail prematurely. It also reduces cooling efficiency and increases energy consumption. Always follow the manufacturer’s recommended refrigerant amount precisely.
How often should a refrigerator compressor be recharged?
A properly sealed system should never need recharging. If your compressor needs frequent recharges, there is likely a leak that must be repaired. A well-maintained compressor should hold refrigerant for the entire lifespan of the refrigerator.
Can I use any refrigerant to recharge my refrigerator?
No, you must use the exact refrigerant type specified for your model. Common types include R-134a and R-600a. Using the wrong refrigerant can cause serious damage to the compressor and void your warranty. Check the label inside your fridge door or the owner’s manual to confirm.