How To Check Compressor Terminal And Diagnose Common Issues
Checking your compressor terminal is one of the most important maintenance skills for any HVAC or refrigeration owner. This guide walks you through the entire process, from understanding what compressor terminals are to diagnosing common electrical faults. You will learn the tools needed, the step-by-step testing process, and how to spot warning signs before they become costly repairs.
If you have ever opened up an HVAC unit or a refrigeration system and stared at those three little metal pins, you know the confusion they can cause. Those pins are your compressor terminals, and they hold the key to understanding why your system is not working right.
Checking compressor terminals might sound intimidating, but it is actually one of the most straightforward diagnostic skills you can learn. Whether you are a homeowner trying to save on service calls or a technician sharpening your skills, this guide will give you everything you need. We will cover exactly what compressor terminals are, which tools to use, how to test them step by step, and what the readings mean.
By the end of this article, you will feel confident opening up a compressor panel and running basic electrical tests. You will also know when a problem is beyond your skill level and it is time to call in a professional. Let us dive in.
Key Takeaways
- Know Your Terminals: Understanding the Common, Start, and Run terminals is the foundation of compressor diagnostics.
- Use the Right Tools: A multimeter and insulation resistance tester are essential for accurate readings.
- Follow Safety First: Always disconnect power and discharge capacitors before touching any terminals.
- Spot Common Problems Early: Windings shorts, open circuits, and grounding faults are the most frequent terminal issues.
- Know When to Call a Pro: Some compressor problems require professional diagnosis and should not be DIY.
📑 Table of Contents
Understanding Compressor Terminals
Before you grab any tools, you need to understand what you are looking at. Every compressor has three main terminals, and each one serves a specific purpose. Knowing their roles makes diagnosis much easier.
The Three Main Terminals
Most single-phase compressors have three terminals labeled T1, T2, and T3. Sometimes they are marked Common (C), Start (S), and Run (R). Here is what each one does:
- Common (C): This is the shared ground point for the compressor motor. It connects to the neutral side of the electrical supply.
- Start (S): This terminal connects to the start winding. It helps the compressor motor reach full speed before disengaging.
- Run (R): This terminal connects to the run winding. It keeps the motor spinning once the compressor is up and running.
The compressor wiring connects these terminals to the capacitor, relay, and power supply. When one of these connections goes bad, the compressor may fail to start, run erratically, or trip a breaker.
Why Terminal Checks Matter
Terminal issues are among the top causes of compressor failure. A loose connection, corroded pin, or damaged wire can cause overheating, short circuits, and complete system breakdown. Regular terminal checks help you catch problems early, saving you from expensive compressor replacement. Think of it like checking the battery terminals on your car, a small habit that prevents big headaches.
Tools You Need for Terminal Testing
You do not need a garage full of expensive equipment to check compressor terminals. A few essential tools will get the job done right.
Essential Testing Equipment
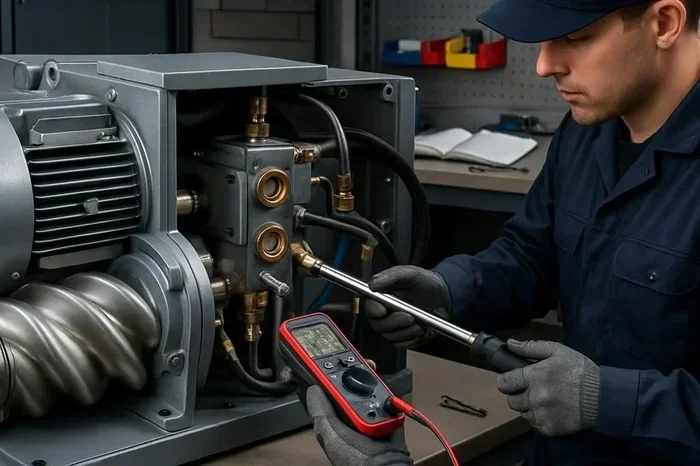
- Digital Multimeter: This is your most important tool. It measures voltage, resistance, and continuity. A basic digital multimeter costs under $30 and works perfectly for compressor checks.
- Insulation Resistance Tester (Megger): This tool tests the insulation integrity of compressor windings. It is especially useful for detecting ground faults.
- Screwdriver Set: You need a good set of insulated screwdrivers to safely open panels and remove terminal covers.
- Wire Brush: Corrosion on terminals can cause false readings. A wire brush cleans the contact points before testing.
- Safety Gear: Insulated gloves and safety glasses protect you from electrical shock.
If your compressor is part of a larger system that uses a generator for backup power, you should also check that your electrical connections are properly sized and secured. For example, if the compressor shares a circuit with other household appliances, you may want to verify your generator wiring setup is correct and safe.
Step-by-Step Process to Check Compressor Terminals
Now that you have your tools ready, let us walk through the actual testing process. Follow these steps carefully and in order.
Step 1: Turn Off All Power
Safety comes first. Locate the circuit breaker that powers your compressor and switch it off. Do not rely on just turning off the thermostat or control panel. You need to cut power at the breaker. If your compressor runs on a generator backup system, make sure the generator is also off and disconnected.
Step 2: Access the Terminal Box
Remove the access panel on your compressor. Most units have a removable cover held by screws or clips. Once you have access, look at the terminal connections. Check for any visible signs of damage, such as burned wires, melted insulation, or corrosion.
Step 3: Clean the Terminals
Use your wire brush to gently clean each terminal pin. Remove any dirt, oxidation, or debris. Clean terminals give you accurate readings. This is a step many people skip, but it makes a real difference.
Step 4: Test Resistance Between Terminals
Set your multimeter to the ohms setting. Then test the resistance between each pair of terminals:
- Common to Run (C to R): You should get a low resistance reading, typically between 1 and 5 ohms.
- Common to Start (C to S): This reading is usually higher, around 5 to 20 ohms.
- Start to Run (S to R): This should equal the sum of the C-to-R and C-to-S readings.
If any reading shows zero ohms, you have a short circuit. If any reading shows infinite ohms, you have an open winding. Both conditions mean the compressor is damaged.
Step 5: Test for Ground Faults
Set your multimeter to the highest ohm range. Test from each terminal to the compressor body or ground. The reading should be infinite (or very close to it). If you get any continuity to ground, the compressor winding is broken down and leaking current. This is a serious fault that usually means the compressor needs replacement.
Step 6: Check the Start and Run Capacitors
Capacitors store electrical energy and help the compressor motor start and run. Use your multimeter to test capacitor continuity. A healthy capacitor should show a resistance that starts low and gradually increases. If the reading is zero or the capacitor is visibly swollen, it needs replacement.
Common Compressor Terminal Issues and How to Diagnose Them
Not all compressor problems are the same. Here are the most common terminal-related issues and how to identify them.
Open Winding
An open winding means there is a break in the motor coil. When you test resistance between terminals, you get an infinite reading. The compressor will not start, and you may hear a humming sound from the motor. This usually requires compressor replacement.
Short Circuit Between Windings
A short circuit happens when the wiring inside the compressor touches where it should not. The resistance reading between terminals will be very low or zero. Short circuits cause overheating and can burn out the compressor quickly. You may also notice a burning smell when you open the unit.
Ground Fault
A ground fault occurs when a winding breaks down and makes contact with the compressor housing. This is dangerous because it can cause electrical shock or fire. Testing from each terminal to ground will reveal this issue. Ground faults are non-negotiable, the compressor must be replaced.
Loose or Corroded Connections
Sometimes the problem is not inside the compressor but at the terminal connections themselves. Loose wires or corroded pins create resistance that prevents proper electrical flow. This causes the compressor to run poorly, overheat, or trip the breaker. Tightening or cleaning the connections often solves this problem.
Capacitor Failure
A failed start capacitor means the compressor struggles to start. It may hum, vibrate, or cycle on and off rapidly. A failed run capacitor causes the compressor to run inefficiently and overheat. Always test capacitors alongside terminal resistance checks for a complete diagnosis.
Safety Tips When Working With Compressor Terminals
Working with electrical components is dangerous if you do not follow proper safety protocols. Please take these precautions seriously.
- Always disconnect power at the breaker before opening any panel.
- Discharge capacitors before touching any terminals. Capacitors can hold a lethal charge even when the power is off.
- Wear insulated gloves and safety glasses at all times.
- Never work on a compressor in wet conditions. Moisture increases the risk of electrical shock.
- Keep a fire extinguisher nearby when testing electrical components.
- If you are unsure about any step, stop and consult a licensed professional.
Remember, no diagnostic is worth risking your safety. If the compressor is connected to a whole-house electrical system, consider reviewing your home generator setup to make sure your circuits are properly protected and sized for the load.
When to Call a Professional
There is a big difference between a simple terminal check and a complex compressor repair. You should call a professional in these situations:
- The compressor shows a ground fault or short circuit.
- You smell burning insulation or see visible damage to the windings.
- The compressor trips the breaker repeatedly even after you have cleaned the terminals.
- You are uncomfortable working with electrical components.
- The system uses refrigerant and you need to handle EPA-regulated chemicals.
A licensed HVAC technician has the training, tools, and certifications to handle complex repairs safely. Sometimes replacing a compressor is the right call, and a professional can advise you on whether repair or replacement makes more financial sense.
Key Takeaways
- Know Your Terminals: Understanding the Common, Start, and Run terminals is the foundation of compressor diagnostics.
- Use the Right Tools: A multimeter and insulation resistance tester are essential for accurate readings.
- Follow Safety First: Always disconnect power and discharge capacitors before touching any terminals.
- Spot Common Problems Early: Windings shorts, open circuits, and grounding faults are the most frequent terminal issues.
- Know When to Call a Pro: Some compressor problems require professional diagnosis and should not be DIY.
Frequently Asked Questions
What are the three compressor terminals called?
The three compressor terminals are Common (C), Start (S), and Run (R). The Common terminal is the shared ground point, the Start terminal connects to the starting winding, and the Run terminal connects to the running winding. Testing between these terminals helps you identify electrical faults inside the compressor.
Can I check compressor terminals without a multimeter?
You really cannot diagnose electrical issues without a multimeter. Visual inspections can reveal loose or corroded connections, but resistance and continuity testing require a multimeter. A basic digital multimeter is inexpensive and essential for any compressor maintenance toolkit.
What should the resistance reading be between compressor terminals?
Resistance readings vary by compressor model, but typically Common to Run should read between 1 and 5 ohms, Common to Start should read between 5 and 20 ohms, and Start to Run should equal the sum of the other two readings. Zero or infinite readings indicate a fault.
Is it safe to test compressor terminals myself?
Yes, it is safe if you follow proper safety procedures. Always disconnect power at the breaker, discharge all capacitors, wear insulated gloves, and work in dry conditions. If you are not comfortable with any of these steps, call a licensed professional instead.
What causes compressor terminal corrosion?
Corrosion is usually caused by moisture exposure, aging, or poor-quality connections. Over time, oxidation builds up on the terminal pins and creates resistance that interferes with electrical flow. Regular cleaning and inspection can prevent corrosion from causing compressor problems.
How often should I check my compressor terminals?
It is a good practice to inspect compressor terminals at least once a year, preferably before peak cooling or heating season. If you notice the compressor running poorly, tripping breakers, or making unusual noises, check the terminals right away. Regular checks help extend the life of your compressor and prevent unexpected breakdowns.
=== CONCLUSION ===
Checking your compressor terminal connections is a simple yet powerful way to keep your HVAC or refrigeration system running smoothly. With just a multimeter, a wire brush, and a little patience, you can diagnose most common electrical problems before they turn into expensive repairs. The steps are straightforward, the tools are affordable, and the knowledge you gain is invaluable.
Remember to always prioritize safety. Disconnect power, discharge capacitors, and never hesitate to call a professional when the situation is beyond your comfort zone. Regular terminal inspections, paired with good maintenance habits, will help your compressor last longer and perform better.
Whether you are troubleshooting a single unit or managing a larger system that relies on backup power, understanding your compressor terminals gives you control and confidence. Take what you learned here, grab your tools, and put it into practice. Your compressor, and your wallet, will thank you.