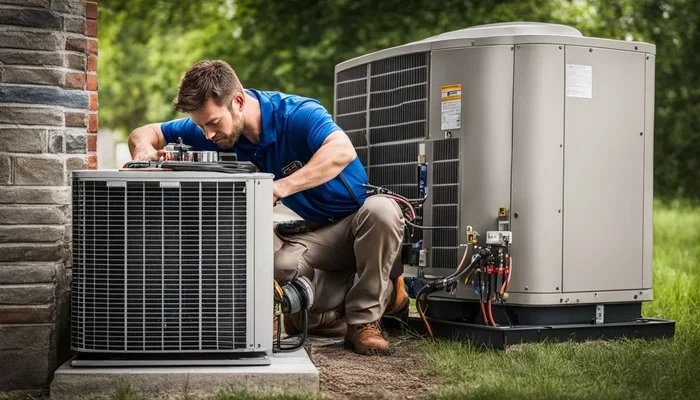
How to Install AC Compressor Easy Guide for Beginners
Installing an AC compressor does not have to be intimidating. This easy guide walks beginners through every step, from understanding the unit to testing the system. You will learn the tools you need, safety precautions, and how to avoid the most common mistakes.
Installing an AC compressor might sound like a job for a professional. But with the right guide, many homeowners can handle this project themselves. Whether you are replacing an old unit or upgrading your central air system, knowing the process makes a big difference. This guide breaks everything down into simple steps you can follow with confidence.
A working air conditioning compressor keeps your home cool during the hottest months. When it fails, the whole cooling unit stops working. That means sweat, discomfort, and sometimes expensive emergency repairs. Learning how to install one yourself can save you hundreds of dollars in labor costs. Plus, it gives you a real sense of accomplishment.
Before you start, understand that this job involves electrical work and handling refrigerant. Both require careful attention. If you feel unsure at any point, it is perfectly okay to call a licensed technician. But if you are ready to learn, let us dive into the full process of AC compressor installation.
Key Takeaways
- Know your unit: Understanding the different types of AC compressors helps you choose the right one for your home.
- Gather tools first: Having everything ready before you start saves time and prevents frustration.
- Safety comes first: Always disconnect power and handle refrigerant lines with care.
- Follow each step carefully: Mounting, wiring, and connecting refrigerant lines all require precision.
- Test before you trust: Running the system after installation confirms everything works properly.
- Avoid common errors: Skipping steps or ignoring safety can lead to costly repairs.
📑 Table of Contents
Understanding Your AC Compressor
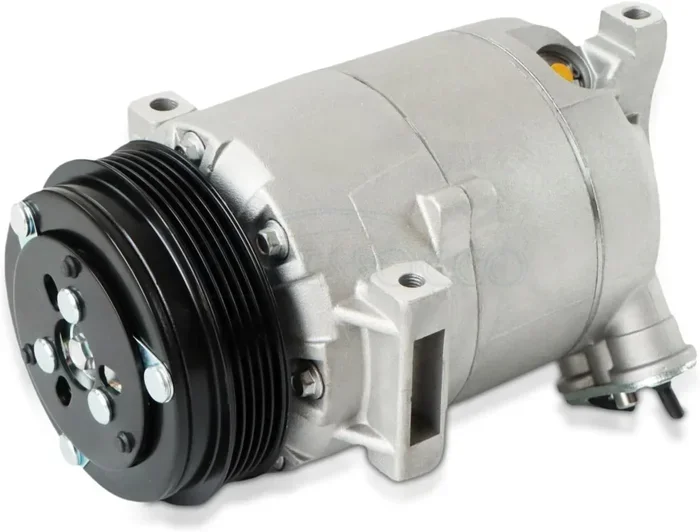
The compressor is the heart of your HVAC system. It pumps refrigerant through the air conditioning system to remove heat from your home. Without it, the entire cooling process stops. Before you begin any compressor replacement, you need to know what you are working with.
Types of AC Compressors
Not all compressors are the same. Different systems use different types. Here are the most common ones you will encounter:
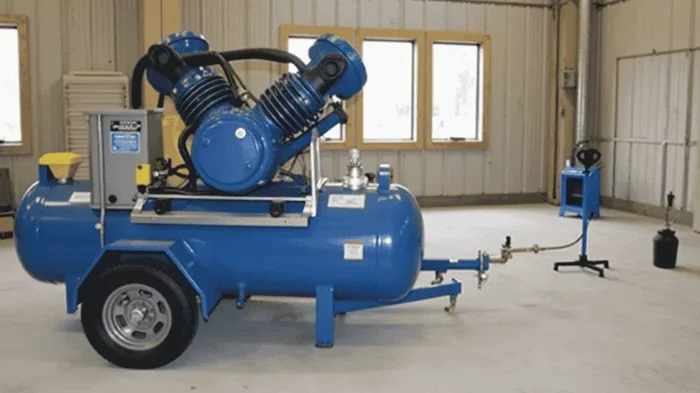
- Reciprocating compressors: These use pistons to compress refrigerant. They are common in smaller central air systems and residential units.
- Rotary compressors: These use a rotating mechanism. They are quieter and often found in modern cooling units.
- Scroll compressors: These use two spiral-shaped parts. They are very reliable and popular in home HVAC systems.
- Screw compressors: These are larger and typically used in commercial buildings.
For most homeowners, a scroll or reciprocating compressor is what you will deal with. Check your current unit to confirm the type before buying a new one.
Signs Your Compressor Needs Replacement
How do you know it is time to replace the compressor? Watch for these warning signs:
- Warm air coming from the vents instead of cool air
- Strange noises like grinding or clicking from the outdoor unit
- Frequent circuit breaker trips
- Ice buildup on the refrigerant lines
- The unit cycles on and off more than usual
If you notice any of these, it is time to investigate further. Sometimes the issue is a faulty compressor relay or a wiring problem. Other times, the compressor itself has failed and needs full replacement.
Tools and Materials You Will Need
Gathering everything before you start is one of the best things you can do. It keeps the workflow smooth and prevents annoying pauses. Here is a complete checklist.
Essential Tools
- Wrench set: Both metric and standard sizes for fitting bolts and nuts
- Screwdriver set: Flathead and Phillips head for electrical panels and mounting screws
- Multimeter: For testing electrical connections and voltage
- Tube cutter: For cutting copper refrigerant lines cleanly
- Flare nut wrench: Specifically for fitting refrigerant line connections
- Drill with bits: For mounting the compressor and creating access holes
- Vacuum pump: For pulling a vacuum on the refrigerant lines before charging
- Refrigerant gauge set: For measuring pressure during and after installation
Materials and Supplies
- New AC compressor (matched to your system size)
- Refrigerant (the correct type for your unit)
- Refrigerant oil (if required by the manufacturer)
- Copper refrigerant lines (if replacement is needed)
- Electrical wire (proper gauge for your compressor)
- Mounting bolts and vibration dampeners
- Soldering supplies for joining copper lines
- Safety gloves and goggles
Having all of these ready means you can focus on the work instead of running to the hardware store mid-project. It also keeps you safe because you will not be improvising with the wrong tools.
Step-by-Step AC Compressor Installation
This is the core of the guide. Follow each step in order. Do not skip ahead or rush through. Proper installation ensures your cooling unit runs efficiently and lasts for years.
Step 1: Turn Off All Power
Safety is the number one priority. Before you touch anything, shut off power to the HVAC system. Go to your breaker box and switch off the circuit that powers the air conditioner. Then, at the outdoor unit, disconnect the power supply. Use your multimeter to confirm there is no voltage present.
Never assume the power is off. Always test it. This single habit prevents thousands of injuries every year.
Step 2: Recover the Old Refrigerant
The refrigerant in your system must be removed before you can disconnect anything. This is a regulated substance and must be handled properly. Use a refrigerant recovery machine to extract all the refrigerant from the lines. Never release refrigerant into the air. It is harmful to the environment and illegal in many areas.
If you do not have a recovery machine, many HVAC supply stores offer this service. You can also hire a technician just for this step.
Step 3: Disconnect the Old Compressor
Now you can begin disconnecting the old unit. Start with the electrical connections. Remove the wire nuts and label each wire so you know where it goes. Take a photo before disconnecting anything. This makes reassembly much easier.
Next, disconnect the refrigerant lines. Use your flare nut wrench to carefully loosen the fittings. Place a towel underneath to catch any residual refrigerant. Remove the mounting bolts and carefully lower the old compressor out of its position.
Inspect the refrigerant lines and electrical connections for damage. If the lines are corroded or the wiring is frayed, replace them before installing the new unit.
Step 4: Prepare the New Compressor
Unbox the new compressor and check it against the old one. Confirm the model number, size, and specifications match. Before mounting, add the recommended amount of refrigerant oil to the new unit if the manufacturer specifies it.
Some compressors come pre-oiled. Others require you to add oil manually. Check the installation manual that comes with the unit. Using the wrong amount of oil can damage the compressor or reduce its efficiency.
Step 5: Mount the New Compressor
Place the new compressor in the same position as the old one. Use vibration dampeners to reduce noise and wear. Secure the unit with mounting bolts. Make sure the compressor sits level and stable.
If you are replacing a compressor clutch or the entire outdoor condensing unit, ensure the new unit is properly aligned with the indoor air handler. Misalignment puts stress on the refrigerant lines and can cause leaks over time.
Step 6: Connect the Refrigerant Lines
This is the most technical part of the job. You will need to connect the copper refrigerant lines between the indoor and outdoor units. Use a torch and solder to join any new copper sections. Clean the joints thoroughly before soldering to ensure a strong, leak-free connection.
After all connections are made, wrap each joint with refrigerant-safe tape and insulation. This prevents moisture from entering the lines, which can cause ice buildup and reduce cooling efficiency.
Step 7: Handle Electrical Connections
Now reconnect the electrical wiring. Follow the labels you made earlier or the photo you took. Connect each wire to its matching terminal. Tighten all connections securely but do not overtighten, which can strip the terminals.
If you are also dealing with a backup power setup, you might want to check how to how to wire a generator to a breaker box for proper electrical safety and backup power readiness during outages.
Step 8: Evacuate and Charge the System
Before you can run the system, you must remove all moisture and air from the refrigerant lines. Connect your vacuum pump to the system and pull a vacuum for at least 30 minutes. This step is critical. Moisture in the lines can form acids that damage the compressor and other components.
After the vacuum holds steady, disconnect the vacuum pump and open the refrigerant valves. Charge the system with the correct amount of refrigerant. Use your refrigerant gauge set to monitor the pressure and ensure it matches the manufacturer specifications.
Step 9: Test the System
Turn the power back on at the breaker box. Set your thermostat to cool mode and lower the temperature. Listen for the compressor to start. You should hear a steady hum and feel cool air coming from the vents within a few minutes.
Check the pressure readings on your gauge set. They should fall within the normal range specified by the manufacturer. If the pressures are too high or too low, there may be a refrigerant leak or a charging issue that needs to be addressed.
Let the system run for at least 30 minutes. Monitor the cooling capacity and make sure the air coming from the vents is consistently cold. If everything looks good, you have successfully completed your AC compressor installation.
Safety Tips and Precautions
Working with air conditioning compressors involves real risks. Electricity and refrigerant both demand respect. Here are the safety rules you must follow.
Electrical Safety
- Always disconnect power before starting any work
- Use insulated tools to prevent electrical shock
- Never work on a live circuit
- Wear rubber-soled shoes when handling electrical connections
- Keep the work area dry at all times
Refrigerant Safety
- Never inhale refrigerant fumes. They can cause serious health problems
- Use proper recovery equipment. Do not vent refrigerant into the atmosphere
- Wear safety goggles and gloves when handling refrigerant lines
- Store refrigerant containers upright in a well-ventilated area
- Follow all local regulations for refrigerant handling and disposal
Physical Safety
- Compressors are heavy. Use a lifting partner or a dolly when moving the unit
- Wear work gloves to protect your hands from sharp edges
- Keep children and pets away from the work area
- Use a stable ladder or platform when working at height
Following these precautions does not slow you down. It keeps you safe and helps you avoid accidents that could turn a simple project into an emergency room visit.
Common Mistakes to Avoid
Even experienced DIYers make mistakes. The key is learning from them. Here are the most common errors people make during compressor installation and how to avoid them.
Skipping the Vacuum Step
This is the number one mistake. Some people skip pulling a vacuum and go straight to charging the system. Moisture left in the lines causes corrosion, ice buildup, and eventual compressor failure. Always pull a proper vacuum and hold it for at least 30 minutes before charging.
Using the Wrong Refrigerant
Not all refrigerants are the same. Using the wrong type can damage your system and is also illegal. Check your unit’s manual and use only the refrigerant specified by the manufacturer. Mixing refrigerants is never a good idea.
Ignoring Electrical Specifications
Every compressor has specific electrical requirements. Using the wrong wire gauge or connecting to an undersized circuit can cause overheating, breaker trips, or even fires. Match the wiring to the manufacturer’s specifications. If you are unsure, consult a licensed electrician.
Over-tightening Fittings
It is tempting to crank down every bolt and fitting as tight as possible. But over-tightening copper fittings can crack them and cause refrigerant leaks. Tighten until snug, then give it just a quarter turn more. That is all you need.
Forgetting to Replace the Compressor Relay
If your old compressor failed due to a faulty relay, replacing just the compressor without the relay means the new unit may fail again soon. Always inspect the relay and replace it if it shows signs of wear.
Avoiding these mistakes saves time, money, and headaches. It also extends the life of your new compressor and keeps your home cool and comfortable.
Testing and Maintaining Your New Compressor
Installation is not the end of the story. Proper testing and ongoing maintenance keep your cooling unit running at peak performance.
Post-Installation Testing
After you turn the system on, watch and listen carefully. The compressor should start smoothly without loud banging or grinding noises. Check the refrigerant charge with your gauges after the system has been running for 15 minutes. The pressures should stabilize and stay within the normal range.
Measure the temperature drop across the evaporator coil. A well-functioning system should cool the air by 15 to 20 degrees Fahrenheit. If the drop is much smaller, there may be a refrigerant issue or airflow problem that needs attention.
Routine Maintenance Tips
Keep your new compressor healthy with regular maintenance:
- Clean or replace the air filter every 1 to 3 months
- Check the refrigerant lines for signs of leaks or wear every few months
- Keep the outdoor unit clear of debris, leaves, and dirt
- Schedule a professional HVAC inspection once a year
- Listen for unusual noises during operation
- Monitor your energy bills. A sudden increase can signal compressor problems
Good maintenance habits prevent most problems before they start. Your new compressor can last 15 years or more with proper care.
When to Call a Professional
DIY installation is rewarding and cost-effective. But there are times when calling a professional is the smart choice. If you are uncomfortable working with electrical systems or handling refrigerant, do not hesitate to get help. A licensed HVAC technician has the training and certification to handle these materials safely.
Also, if your HVAC system has unique requirements or you are dealing with a complex setup, a professional can ensure everything is done correctly. The cost of a service call is often much less than the cost of repairing a mistake.
Additionally, if you are considering a backup power solution for your home cooling system, understanding your power needs is essential. You can explore how to what size generator to run a refrigerator to keep your home cool during power outages, or learn more about how long can a generator run to plan for extended outages.
Finally, proper placement of any backup power equipment matters for safety and efficiency. Check out how far should generator be from house to ensure safe and code-compliant installation of any generator setup you may add alongside your HVAC system.
Final Thoughts
Learning how to install AC compressor is a valuable skill for any homeowner. It saves money, builds your confidence, and keeps your home comfortable. By following the steps in this guide, you can tackle the project with a clear plan and realistic expectations.
Remember to take your time. Do not rush through any step. If something does not feel right, stop and reassess. The most important part of any DIY project is doing it safely and correctly.
With the right tools, the right knowledge, and a careful approach, your new compressor will keep your home cool for many years to come. Enjoy the satisfaction of a job well done and the comfort of a properly functioning air conditioning system.
Frequently Asked Questions
How long does it take to install an AC compressor?
For most homeowners, a complete AC compressor installation takes between 4 and 8 hours. Experienced DIYers may finish faster, while first-timers should plan for a full day. The time depends on the complexity of the job, the type of compressor, and whether any additional parts need replacing.
Can I install an AC compressor myself?
Yes, many homeowners successfully install their own compressor if they have basic mechanical and electrical skills. However, handling refrigerant requires EPA certification in the United States. You can still do the mechanical and electrical work yourself and hire a licensed professional for the refrigerant portion.
How much does it cost to install an AC compressor?
The cost varies widely. A DIY installation saves you the labor charge, which is typically $500 to $1,500. The compressor unit itself costs between $400 and $1,200. Add in refrigerant and any replacement parts, and you can expect a total cost of $800 to $2,000 for a DIY job.
What size generator do I need if I want backup power for my AC?
If you are planning backup power for your cooling system, the size depends on the total electrical load. You can find detailed guidance on sizing a generator for home use by checking resources about how many kW a generator needs to run a house. A properly sized generator ensures your compressor and other appliances stay powered during outages.
Do I need to replace the refrigerant lines when installing a new compressor?
Not always. If the existing refrigerant lines are in good condition, you can reuse them. However, if the lines are corroded, kinked, or leaking, replacement is strongly recommended. New lines ensure proper refrigerant flow and prevent future problems with your cooling unit.
How often should I maintain my new AC compressor?
Schedule a professional maintenance check at least once a year, ideally before the cooling season starts. In between, clean or replace filters every 1 to 3 months and inspect the outdoor unit for debris. Regular maintenance extends the compressor lifespan and keeps your HVAC system running efficiently.
=== CONCLUSION ===
Installing an AC compressor is a manageable project for motivated homeowners. You now have the knowledge to understand your unit, gather the right tools, follow each installation step, and avoid the most common pitfalls. The key is patience and attention to detail. Take your time, follow the safety guidelines, and do not hesitate to call a professional when needed.
With your new compressor running smoothly, you will enjoy reliable cooling all summer long. The skills you gained through this project also prepare you for future home maintenance tasks. Keep learning, keep improving, and enjoy the comfort of a well-functioning air conditioning system in your home.