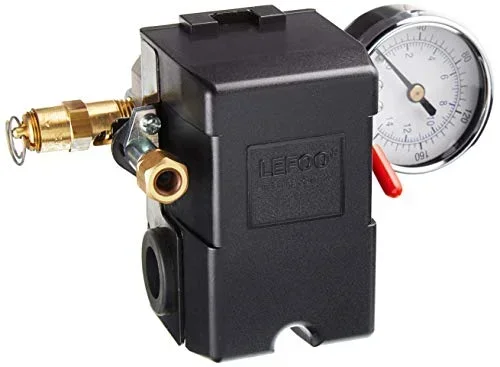
Fix Your Ingersoll Rand Air Compressor Pressure Switch
A faulty pressure switch can bring your Ingersoll Rand air compressor to a halt. This guide walks you through diagnosing, adjusting, and replacing your pressure switch so your compressor runs reliably again. You will learn the most common failure signs, simple troubleshooting steps, and expert maintenance tips that save time and money.
Your Ingersoll Rand air compressor is a workhorse. Whether you use it in a garage, a workshop, or on a job site, it relies on a small but critical component to start and stop at the right times. That component is the pressure switch. When it fails, your compressor either won’t start, won’t stop, or behaves erratically. The good news is that fixing a pressure switch is often simpler than you think.
This guide covers everything you need to know about the Ingersoll Rand air compressor pressure switch. We will walk you through the most common problems, show you how to troubleshoot them step by step, and explain when it is time to replace the switch instead of repairing it. By the end, you will feel confident tackling this repair yourself.
Key Takeaways
- Know the signs: Recognizing pressure switch failure early prevents costly compressor damage.
- Safety first: Always disconnect power before inspecting or working on your pressure switch.
- Adjustment can fix minor issues: Many pressure switch problems are resolved with simple calibration.
- Replacement is straightforward: Swapping out a bad pressure switch is a DIY-friendly task with basic tools.
- Maintenance prevents failure: Regular cleaning and inspection extend the life of your pressure switch significantly.
- Check electrical connections: Loose wiring is one of the most overlooked causes of pressure switch malfunction.
- Match your settings: Correct cut-in and cut-out pressures ensure optimal compressor performance and longevity.
📑 Table of Contents
Understanding Your Ingersoll Rand Pressure Switch
The pressure switch is the brain of your compressor’s start and stop cycle. It monitors the air pressure inside the tank and tells the motor when to kick on and when to shut off. Without it, your compressor would run continuously or not start at all. Understanding how it works makes troubleshooting much easier.
When tank pressure drops to a set level, the switch triggers the motor to start pumping air. Once the pressure reaches the upper set point, the switch shuts the motor off. This cycle repeats automatically. The switch uses a combination of mechanical force and electrical signals to control this process.
How the Pressure Switch Works
Inside the pressure switch, there are several key parts. The diaphragm moves in response to air pressure changes. This movement pushes against contact points that complete or break the electrical circuit. A spring provides the tension that sets your cut-in and cut-out pressure levels. When the spring is adjusted correctly, the switch operates smoothly and reliably.
The unloader valve is another important part connected to the pressure switch. When the compressor stops, the unloader valve releases trapped air from the pump. This reduces the starting load on the motor. If the unloader valve sticks or fails, your compressor may struggle to start even if the pressure switch is working fine.
Types of Pressure Switches Used in Ingersoll Rand Compressors
Ingersoll Rand compressors use different pressure switch designs depending on the model and size. Some units use a standard differential pressure switch with adjustable settings. Others come with a fixed-range switch that cannot be adjusted. Knowing which type you have helps you decide whether to repair or replace it.
Smaller portable compressors often use simpler switch designs. Larger stationary units may have more sophisticated switches with additional safety features. Always check your owner’s manual to identify the exact switch type installed on your machine.
Common Problems with Ingersoll Rand Pressure Switches
Pressure switches fail for several reasons. Wear and tear over time is the most common culprit. But other factors can accelerate failure and cause sudden breakdowns. Let us look at the problems you are most likely to encounter.
Compressor Won’t Start
If your compressor does not start when tank pressure drops, the pressure switch may be at fault. The contact points inside the switch can wear out or become pitted. When this happens, the electrical signal cannot reach the motor. You might hear a faint click when the pressure drops, but the motor stays silent.
Before you assume the switch is bad, check the electrical connections. Loose wires at the switch terminals are a surprisingly common cause of no-start conditions. A simple tightening or cleaning of the terminals often solves the problem.
Compressor Runs Continuously
A compressor that never shuts off is both frustrating and wasteful. This usually happens when the pressure switch fails to detect the upper pressure limit. The diaphragm inside the switch may be ruptured or stuck. When this occurs, the contact points never break the circuit, and the motor keeps running.
Running continuously can overheat your motor and cause serious damage. If you notice this behavior, turn off the compressor immediately and inspect the switch. Continuing to run a compressor with a faulty switch can lead to expensive repairs.
Intermittent Starting and Stopping
Sometimes the compressor starts and stops too frequently. This short cycling puts extra strain on the motor and reduces the lifespan of your compressor. Short cycling often results from incorrect pressure switch settings or a weak spring inside the switch.
Air leaks in the system can also cause this problem. If the tank loses pressure faster than the compressor can keep up, the switch will trigger the motor to start again too soon. Always check for leaks in hoses, fittings, and the tank itself before adjusting the switch.
Pressure Switch Makes Strange Noises
Clicking, buzzing, or humming sounds from the pressure switch are warning signs. A rapid clicking often means the contact points are worn and cannot make solid electrical connection. A buzzing sound might indicate a stuck diaphragm or debris interfering with the switch mechanism.
Do not ignore unusual sounds. They usually get worse over time and can lead to complete switch failure. Addressing noise issues early often prevents a full replacement.
Step-by-Step Troubleshooting Guide
Before you open up the pressure switch, follow these troubleshooting steps. They will help you confirm that the switch is actually the problem and rule out other causes.
Step 1: Check Power Supply
Start with the basics. Make sure the compressor is plugged in and receiving power. Check your circuit breaker or fuse box for a tripped breaker. If you are using an extension cord or generator, verify that it can handle the compressor’s power requirements. A weak power source can mimic pressure switch problems.
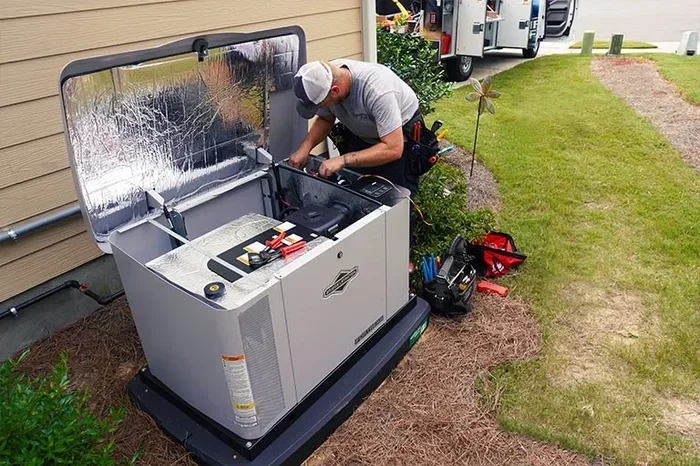
For those running tools off a generator, you may want to check what size generator you need to properly power your compressor and any attached equipment like a 30 amp RV air conditioner or other tools on the same circuit.
Step 2: Inspect the Pressure Gauge
Look at the tank pressure gauge. Note the current reading. When you start the compressor, watch the gauge closely. Does the pressure rise when the motor runs? Does it shut off at the expected pressure level? These observations tell you whether the problem is with the switch or elsewhere in the system.
Step 3: Test the Contact Points
Turn off the compressor and disconnect the power. Remove the pressure switch cover. Inspect the contact points for pitting, corrosion, or burning. Clean them with fine-grit sandpaper if they are lightly damaged. If the contact points are badly worn or melted, the switch needs replacement.
Step 4: Check the Diaphragm
The diaphragm should be flexible and free of cracks. Gently press on it to feel for resistance and spring-back. A damaged diaphragm will not respond correctly to pressure changes. Replace the diaphragm or the entire switch if you find any tears or stiffness.
Step 5: Inspect the Spring
The spring inside the switch controls your pressure range. If the spring is weak or bent, your cut-in and cut-out pressures will be off. You can test the spring by carefully compressing it and feeling for consistent resistance. A weak spring will feel mushy or uneven.
How to Adjust Your Pressure Switch
Many pressure switch issues can be resolved with simple adjustment. Before you begin, make sure you know the recommended pressure range for your specific Ingersoll Rand model. Your owner’s manual provides these specifications.
Adjusting Cut-In and Cut-Out Pressure
Most pressure switches have two adjustment screws. The smaller screw typically controls the differential, which is the pressure range between cut-in and cut-out. The larger screw sets the upper cut-out pressure. Turn the screw clockwise to increase pressure and counterclockwise to decrease it.
Make small adjustments and test the compressor after each change. Over-tightening can damage the switch or cause the compressor to run at unsafe pressures. Always stay within the manufacturer’s recommended range.
Resetting the Pressure Switch
Some Ingersoll Rand pressure switches have a reset button. If your compressor trips and will not restart, try pressing the reset button. This is often a quick fix for switches that have tripped due to overheating or electrical overload.
If the reset button does not work, or if your switch does not have one, you may need to manually troubleshoot the underlying issue. A switch that keeps tripping usually signals a deeper problem that needs attention.
Quick Tips for Pressure Switch Adjustment
- Always adjust the switch with the compressor turned off and unplugged.
- Make small adjustments, then test before making further changes.
- Keep a log of your pressure settings for future reference.
- Never exceed the maximum pressure rating listed on the switch label.
- Use a reliable pressure gauge to verify readings during adjustment.
When to Replace Your Pressure Switch
Not every pressure switch problem can be fixed with adjustment or cleaning. Knowing when to replace the switch saves you time and prevents further damage to your compressor.
Signs You Need a Replacement
Look for these clear indicators that your pressure switch needs to be replaced:
- The contact points are badly pitted or burned and cannot be cleaned effectively.
- The diaphragm is cracked, torn, or permanently deformed.
- The spring feels weak or does not return to its original position.
- The switch trips repeatedly even after proper adjustment.
- You notice visible damage or corrosion on the switch housing.
- The compressor starts and stops erratically despite all other components working fine.
Choosing the Right Replacement Switch
When replacing your pressure switch, match the specifications exactly. Check the pressure range, the number of terminals, and the wiring configuration. Using the wrong switch can damage your compressor or create safety hazards. Ingersoll Rand offers replacement switches designed specifically for their compressor models.
If you are unsure which switch to buy, check your model number and contact an Ingersoll Rand dealer or authorized service center. They can help you find the correct replacement part quickly and easily.
DIY Replacement Steps
Replacing a pressure switch is a straightforward DIY job if you are comfortable working with electrical components. Here is the basic process:
- Disconnect the power supply completely.
- Release all tank pressure by opening the drain valve.
- Disconnect the wires from the old switch terminals and take a photo for reference.
- Remove the old switch from the compressor.
- Install the new switch in the same position and secure it.
- Reconnect the wires matching the original configuration.
- Restore power and test the compressor at both cut-in and cut-out pressures.
Always double-check your wiring before powering on. Incorrect wiring can damage the motor or the new pressure switch. If you are not comfortable with electrical work, hire a qualified technician.
Maintenance Tips to Prevent Future Pressure Switch Issues
Prevention is always better than repair. A simple maintenance routine keeps your pressure switch and entire compressor system running smoothly for years.
Regular Inspection Schedule
Make it a habit to inspect your pressure switch at least once every few months. Look for signs of wear, corrosion, or debris buildup. Clean the switch housing and check all electrical connections. Tighten any loose terminals and remove any dust or moisture from the switch area.
Keep the Tank Clean
Moisture and debris inside the tank can affect pressure readings and damage the switch. Drain the tank after each use to remove accumulated moisture. This simple step prevents corrosion and keeps your pressure switch reading accurately.
Check for Air Leaks
Air leaks cause your compressor to cycle more frequently, putting extra stress on the pressure switch. Inspect all hoses, fittings, and seals regularly. Use soapy water on connections to detect leaks — bubbles will form where air is escaping.
Lubricate Moving Parts
While the pressure switch itself does not need lubrication, the compressor motor and pump do. Follow the manufacturer’s recommendations for oil changes and lubrication schedules. A well-maintained motor reduces the electrical load on the pressure switch and extends its lifespan.
Expert Insight on Extending Switch Life
Experienced technicians recommend keeping spare contact points and diaphragms on hand if you use your compressor frequently. Replacing these small wear parts before they fail can prevent unexpected downtime. It is a small investment that pays off quickly, especially in a busy workshop or job site.
Another expert tip is to avoid running your compressor at the very top of its pressure range for extended periods. This puts extra stress on the switch and motor. Staying in the middle of the recommended range gives your components more room to breathe and last longer.
Key Takeaways
- Know the signs: Recognizing pressure switch failure early prevents costly compressor damage.
- Safety first: Always disconnect power before inspecting or working on your pressure switch.
- Adjustment can fix minor issues: Many pressure switch problems are resolved with simple calibration.
- Replacement is straightforward: Swapping out a bad pressure switch is a DIY-friendly task with basic tools.
- Maintenance prevents failure: Regular cleaning and inspection extend the life of your pressure switch significantly.
- Check electrical connections: Loose wiring is one of the most overlooked causes of pressure switch malfunction.
- Match your settings: Correct cut-in and cut-out pressures ensure optimal compressor performance and longevity.
Conclusion
Your Ingersoll Rand air compressor pressure switch plays a vital role in keeping your compressor running safely and efficiently. When it starts to fail, the symptoms are usually clear: the compressor won’t start, runs nonstop, or cycles too frequently. With the troubleshooting steps and maintenance tips in this guide, you can diagnose and fix most pressure switch problems yourself.
Remember to always prioritize safety. Disconnect power before any inspection or repair work. Make adjustments carefully and stay within manufacturer specifications. When the switch is beyond repair, replacing it with the correct model is a quick and rewarding DIY task.
Keep up with regular maintenance, and your pressure switch will serve you well for many years. A little attention today saves you from bigger headaches tomorrow. Now go get that compressor running smoothly again.
Frequently Asked Questions
What does a pressure switch do on an Ingersoll Rand air compressor?
The pressure switch monitors the air pressure inside the tank and controls when the motor starts and stops. When tank pressure drops to the cut-in level, the switch activates the motor. When pressure reaches the cut-out level, it shuts the motor off. This automatic cycle keeps your compressor running efficiently without manual intervention.
How do I know if my pressure switch is bad?
Common signs include the compressor not starting, running continuously without stopping, cycling on and off too frequently, or making unusual clicking or buzzing noises. You may also notice the compressor not reaching the expected pressure level. Visual inspection of the switch can reveal burned contact points, a damaged diaphragm, or corrosion that confirms failure.
Can I adjust my Ingersoll Rand pressure switch myself?
Yes, most Ingersoll Rand pressure switches can be adjusted with basic tools. The adjustment screws control your cut-in and cut-out pressure settings. Always refer to your owner’s manual for the recommended pressure range and make small adjustments at a time. If you are unsure about the process, consult a qualified technician.
How much does it cost to replace a pressure switch?
Replacement pressure switches for Ingersoll Rand compressors typically range from $30 to $100 depending on the model and features. If you hire a professional for the installation, labor costs may add another $50 to $150. However, replacing the switch yourself is straightforward and can save you money on service fees.
Why does my pressure switch keep tripping?
A pressure switch that keeps tripping can be caused by several factors. Overheating, electrical overload, a weak spring, or a stuck diaphragm are common causes. Air leaks in the system can also cause the switch to trip frequently as the tank loses pressure too quickly. Check for leaks and inspect the switch components to identify the root cause.
How often should I inspect my pressure switch?
Inspect your pressure switch at least every three to six months as part of routine compressor maintenance. If you use your compressor frequently or in dusty environments, check it more often. Regular inspection helps you catch wear and tear early before it leads to complete switch failure or compressor damage.