How to Clean Power Tools and Keep Them Running Strong
Keeping your power tools clean is one of the simplest ways to make them last longer and work better. This guide walks you through step-by-step cleaning methods for every type of power tool. You will learn how to remove dust, grease, and rust so your tools stay in top shape for years.
Your power tools take a beating every day. They spin, cut, drill, and grind their way through tough jobs. But here is something most people forget: cleaning power tools is just as important as using them. A little care goes a long way toward keeping your tools working their best.
Think about it. When was the last time you really cleaned your drill, saw, or grinder? If you cannot remember, you are not alone. Many people use their tools until they break down. Then they wonder why the tool died so soon. The truth is, power tool maintenance does not take much time. It just takes a little know-how.
This guide covers everything you need to know about cleaning power tools the right way. You will learn simple steps for every type of tool. We will also share tips on storage, lubrication, and how to spot early signs of wear. By the end, you will have a clear plan to keep your tools in great shape.
Key Takeaways
- Clean your power tools after every use: This prevents buildup and keeps them running smoothly.
- Use the right cleaning supplies: Mild soap, compressed air, and wire brushes are your best friends.
- Lubricate moving parts regularly: This reduces friction and prevents early wear.
- Store tools properly: Clean and dry storage stops rust and damage before it starts.
- Inspect tools while cleaning: Catching small problems early saves money on repairs.
- Follow manufacturer guidelines: Each tool has specific care needs you should respect.
- Use compressed air for hard-to-reach spots: An air compressor makes deep cleaning quick and easy.
📑 Table of Contents
- Why Cleaning Power Tools Matters
- Gather Your Cleaning Supplies
- Step-by-Step Cleaning Process
- Cleaning Specific Power Tools
- How to Remove Rust from Power Tools
- Lubrication Tips for Power Tools
- Best Practices for Storing Power Tools
- Common Mistakes to Avoid
- Expert Tips for Keeping Power Tools in Top Shape
- How Often Should You Clean Your Power Tools?
- Final Thoughts
Why Cleaning Power Tools Matters
Some people skip cleaning because it seems like extra work. But the benefits are huge. Clean tools run cooler, last longer, and perform better. Here is why you should make cleaning a habit.
It Extends Tool Life
Dust, debris, and grease build up inside your tools over time. This gunk creates friction. Friction causes heat. Heat wears out parts faster. A clean power drill can last for decades if you take care of it. A dirty one might give out in just a few years.
Think of it like brushing your teeth. Small habits prevent big problems later. The same idea applies to your tools.
It Keeps You Safe
Dirty tools can be dangerous. Sawdust buildup near the motor can cause overheating. Grease on the handle makes it slippery. Rust on blades creates rough edges. Regular tool cleaning helps you spot these hazards before they cause an accident.
It Saves You Money
Replacing a power tool costs a lot of money. But maintaining one costs very little. A few minutes of cleaning after each use can save you hundreds of dollars over time. Power tool upkeep is one of the best returns on investment you will ever get.
Gather Your Cleaning Supplies
Before you start, grab the right supplies. You do not need anything fancy. Just a few basics will do the job well.
Essential Cleaning Supplies
- Soft-bristle brush — for sweeping away loose dust and debris
- Compressed air — for blowing out hard-to-reach spots (learn more about using one in our Easy Air Compressor How To Use guide)
- Mild dish soap — for wiping down surfaces
- Microfiber cloths — for gentle, streak-free cleaning
- Wire brush — for removing rust and tough grime
- Rubbing alcohol — for disinfecting and cutting through grease
- Machine oil or tool lubricant — for keeping moving parts smooth
- Old toothbrush — for getting into small crevices
- Protective gloves — to keep your hands safe during cleaning
What to Avoid
Not all cleaners are safe for power tools. Stay away from harsh chemicals that can damage plastic or rubber parts. Avoid soaking electric tools in water. And never use abrasive pads that can scratch surfaces. Stick to gentle methods that protect your tools.
Step-by-Step Cleaning Process
Now let us walk through the actual cleaning process. This works for most power tools including drills, saws, grinders, and sanders.
Step 1: Unplug or Remove the Battery
Safety first. Always disconnect the tool from its power source before cleaning. For corded tools, unplug them. For cordless tools, remove the battery. This prevents accidental starts and keeps you safe.
Step 2: Remove Loose Debris
Take your soft-bristle brush and sweep away loose dust and particles. Pay attention to vents, vents, and moving parts. Use your compressed air canister or air compressor to blow out stubborn dust from inside the tool housing. A 2 stage compressor works especially well for this because it provides steady, powerful airflow. You can learn how one works in our guide on How Does A 2 Stage Compressor Work.
Step 3: Wipe Down the Exterior
Dampen a microfiber cloth with warm water and a drop of mild soap. Wipe down the outer surfaces of the tool. This removes surface grime and grease. For tough spots, apply a little rubbing alcohol to the cloth and gently scrub.
Step 4: Clean the Ventilation Areas
Ventilation slots are where most dust collects. Use your toothbrush or compressed air to clean these areas thoroughly. Blocked vents cause tools to overheat. Overheating shortens the motor life. This is one of the most important parts of tool maintenance.
Step 5: Inspect and Clean the Collet or Chuck
The collet or chuck holds your drill bits and attachments. Remove any bits first. Then use a small brush to clean out any debris stuck inside. If the chuck feels sticky, apply a drop of lubricant and work it back and forth.
Step 6: Lubricate Moving Parts
Apply a small amount of machine oil to gears, bearings, and other moving parts. This keeps everything running smooth and quiet. Wipe off any excess oil with a clean cloth. Too much oil can attract dust, which defeats the purpose.
Step 7: Let It Dry Completely
After cleaning, let your tool air dry fully before putting it away. Moisture leads to rust. Rust leads to damage. A few minutes of patience here saves you from bigger problems later.
Cleaning Specific Power Tools
Different tools need slightly different care. Here is how to handle some of the most common ones.
Drills and Drivers
Drills collect a lot of dust around the chuck and ventilation grilles. After each use, blow out the dust with compressed air. Wipe the handle and grip with a damp cloth. Check the trigger mechanism for any stuck debris. A clean power drill shifts gears smoothly and charges without issues.
Circular Saws
Sawdust is the biggest enemy of circular saws. After cutting wood, blow out the dust from the blade guard and motor housing. Wipe the blade with a cloth soaked in rubbing alcohol. This removes pitch and resin buildup. Clean blades cut smoother and last longer.
Angle Grinders
Grinders create a lot of sparks and metal dust. This debris builds up quickly. Use a wire brush to clean the grinding wheel area. Check the air vents and blow them out. Also inspect the side handle and make sure it is tight and free of grime.
Orbital Sanders
Sanders collect a lot of sanding dust. Remove the sandpaper and clean the dust bag or vacuum port. Use compressed air to blow dust out of the motor housing. A clean sander glides smoothly and delivers consistent results.
Jigsaws
Jigsaws have small moving parts that can clog with sawdust. Remove the blade and clean the blade holder. Blow air through the tool body to clear dust from internal channels. Wipe the shoe (the base plate) with a damp cloth to keep cuts accurate.
How to Remove Rust from Power Tools
Rust is the enemy of every tool owner. It eats away at metal and weakens your tools. But removing rust is easier than you think.
Light Rust
For light surface rust, use a wire brush or fine sandpaper. Rub gently in the direction of the metal grain. Then wipe the area clean and apply a thin layer of oil to protect it.
Heavy Rust
For heavier rust, soak a cloth in white vinegar or a commercial rust remover. Wrap it around the rusty area and let it sit for 30 minutes. Then scrub with a wire brush. Wipe clean and dry thoroughly before applying a protective oil coat.
Preventing Rust
The best way to deal with rust is to prevent it. Always wipe your tools dry after cleaning. Store them in a dry, cool place. Consider using silica gel packs in your tool storage area to absorb moisture. A little prevention saves a lot of elbow grease later.
Lubrication Tips for Power Tools
Lubrication keeps your tools running smooth and quiet. But too much or the wrong type of lubricant can cause problems.
- Use the right lubricant: Check your tool manual for the recommended oil type
- Less is more: A thin layer is enough. Excess oil attracts dust and creates gummy buildup
- Lubricate after cleaning: Always apply oil after you clean the tool, not before
- Focus on moving parts: Gears, bearings, slides, and pivots need the most attention
- Wipe off excess: Use a clean cloth to remove any oil that did not absorb
If you use an air compressor to clean your tools, you want it running at its best. Learn how to get more CFM from your air compressor for stronger, more efficient cleaning power.
Best Practices for Storing Power Tools
Proper storage protects your tools from dust, moisture, and damage. Here is how to store them right.
Clean Before Storing
Never put a dirty tool back in its case. Always clean it first. Remove all dust, debris, and moisture. A clean tool stored properly will be ready to go the next time you need it.
Use the Right Case
Store each tool in its original case or a dedicated toolbox. This prevents scratches and keeps dust out. For larger tools like table saws, use a fitted cover or a dedicated storage area.
Control Humidity
Moisture is a tool killer. Store your tools in a dry area with good ventilation. If your workshop tends to be damp, use a dehumidifier. You can also place silica gel packs inside your tool cases to absorb excess moisture.
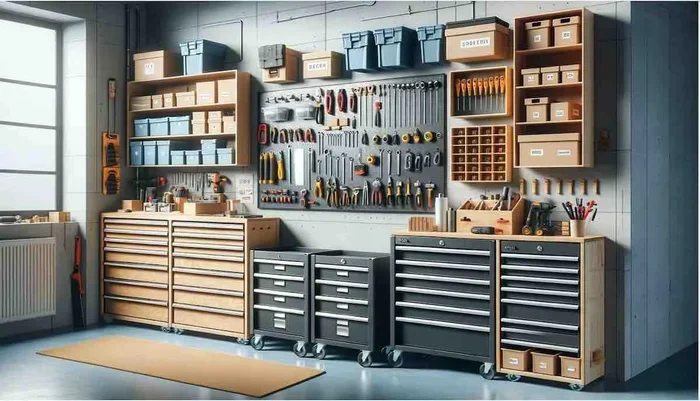
Hang Tools When Possible
Wall-mounted racks are great for keeping tools off the floor and organized. Hanging drills, grinders, and sanders also saves space and prevents accidental damage from falling.
Common Mistakes to Avoid
Even well-meaning tool owners make mistakes. Here are the most common ones and how to avoid them.
- Using water on electric tools: Water and electricity do not mix. Always use damp cloths, not wet ones
- Skipping the drying step: Moisture left on tools leads to rust. Always dry thoroughly
- Using too much lubricant: Excess oil attracts dust and creates sticky buildup
- Ignoring small problems: A loose chuck or squeaky gear might seem minor, but it can become a big issue
- Not reading the manual: Each tool has specific care instructions. The manual is your best resource
- Cleaning while the tool is still warm: Let hot tools cool down first to avoid burns and warping of plastic parts
Expert Tips for Keeping Power Tools in Top Shape
Professional tradespeople know that clean tools work better. Here are some expert tips you can start using today.
Clean your tools after every single use. It takes just five minutes and makes a huge difference. Sawdust, metal shavings, and grease dry out over time. The longer you wait, the harder they are to remove.
Create a cleaning schedule. Post a simple checklist near your workbench. Include daily, weekly, and monthly tasks. Daily tasks might include brushing off dust and wiping down handles. Monthly tasks could include deep cleaning and lubrication.
Keep a cleaning kit ready. Store your brushes, cloths, oil, and compressed air in one place near your tools. When everything is within arm’s reach, you are much more likely to actually clean your tools.
Inspect while you clean. Cleaning is the perfect time to check for wear and tear. Look for cracked cords, loose screws, and worn brushes. Catching these issues early prevents costly repairs.
Use compressed air wisely. Compressed air is fantastic for blowing out dust from tight spaces. If you use an air compressor for this, make sure it is set to the right pressure. Too much pressure can damage sensitive parts. For more tips on getting the most from your compressor, check out our guide on How To Get More Cfm From Air Compressor.
Replace worn parts promptly. Worn brushes, clogged filters, and dull blades all affect performance. Replacing them as needed keeps your tools running like new.
How Often Should You Clean Your Power Tools?
The short answer is: after every use. But let us break it down further.
- After every use: Quick brush-off, wipe down, and visual inspection
- Weekly: Deep clean with compressed air, check vents, and lubricate moving parts
- Monthly: Full disassembly (if possible), thorough cleaning, and part replacement if needed
- Seasonally: Full inspection, rust check, and battery terminal cleaning for cordless tools
Sticking to this schedule keeps your tools in excellent condition. It also builds a habit that becomes second nature over time.
Final Thoughts
Cleaning power tools is one of the easiest and most rewarding habits you can build. It takes just a few minutes after each use, but the payoff is enormous. Your tools run smoother, last longer, and stay safer to use.
Start small. Pick one tool today and give it a thorough cleaning. Notice how it feels and how it performs afterward. Then make it a routine. Before long, cleaning your tools will feel like second nature.
Remember, your tools are an investment. Treat them well, and they will reward you with years of reliable service. Clean tools, sharp tools, happy you.
Frequently Asked Questions
What is the best way to clean power tools?
The best way is to start with compressed air to remove loose dust, then wipe down surfaces with a damp microfiber cloth, and finish by lubricating moving parts. This simple routine works for most power tools and takes only a few minutes.
Can I use water to clean my power tools?
You can use a damp cloth, but never soak or spray water directly on electric power tools. Water can damage the motor and electrical components. Always dry your tools thoroughly after cleaning.
How often should I lubricate my power tools?
Lubricate your tools after every deep cleaning session, which should happen at least once a month. For tools used daily, a quick lubrication check every week helps keep everything running smooth.
What removes rust from power tools?
White vinegar, a wire brush, or a commercial rust remover works well for rust. Soak a cloth in vinegar, wrap it around the rusty spot for 30 minutes, then scrub and dry. Apply a light coat of oil afterward to prevent rust from returning.
Should I clean my tools after every use?
Yes, a quick cleaning after every use is ideal. It removes dust and debris before it has a chance to build up. Even a quick brush-off makes a big difference over time.
What supplies do I need for a basic power tool cleaning kit?
A basic kit should include a soft-bristle brush, compressed air, microfiber cloths, mild soap, rubbing alcohol, machine oil, and an old toothbrush. These items cover all your cleaning and lubrication needs.