How to Hook Up a Generator Transfer Switch Yourself
Hooking up a generator transfer switch yourself is easier than most homeowners think. This guide walks you through every step, from choosing the right switch to testing the final setup. You will learn how to connect a generator transfer switch safely, avoid costly mistakes, and keep your home powered during outages. With the right tools and a little patience, you can handle this project without hiring an electrician.
A generator transfer switch is the bridge between your backup generator and your home’s electrical system. Without one, you risk backfeeding electricity into the grid, which is dangerous for utility workers and can damage your generator. Learning how to hook up a generator transfer switch yourself gives you control over your power supply and saves you hundreds of dollars in installation costs.
In this guide, we walk you through the entire process from start to finish. You will learn what a transfer switch does, how to pick the right one, what tools you need, and exactly how to install it step by step. Whether you own a portable generator or a whole house generator, this article covers everything you need to know about transfer switch installation. By the end, you will feel confident enough to tackle the project on your own.
Let us be clear upfront: working with electricity requires respect and caution. This guide gives you practical, actionable steps, but always prioritize safety. If any part of the process feels beyond your comfort level, stop and consult a professional. That said, millions of homeowners successfully install their own transfer switches every year, and you can too.
Key Takeaways
- Choose the Right Switch Type: Automatic and manual transfer switches serve different needs. Pick based on your budget and how much convenience you want.
- Turn Off Power First: Always disconnect the main breaker before working on your electrical panel. Safety comes first.
- Match the Switch to Your Generator: Check the generator rated amperage and make sure the transfer switch can handle the load.
- Use the Right Tools: Having the correct tools ready before you start saves time and prevents frustration.
- Test Before You Need It: Always run a test after installation to make sure everything works during an actual power outage.
- Know Your Limits: If you feel unsure about any step, call a licensed electrician. It is better to be safe than sorry.
📑 Table of Contents
- What Is a Generator Transfer Switch and Why You Need One
- Types of Generator Transfer Switches
- Tools and Materials You Will Need
- Step-by-Step Guide to Hook Up a Generator Transfer Switch
- Common Mistakes to Avoid When Installing a Generator Transfer Switch
- Safety Tips and Expert Advice for Generator Transfer Switch Installation
- Conclusion
What Is a Generator Transfer Switch and Why You Need One
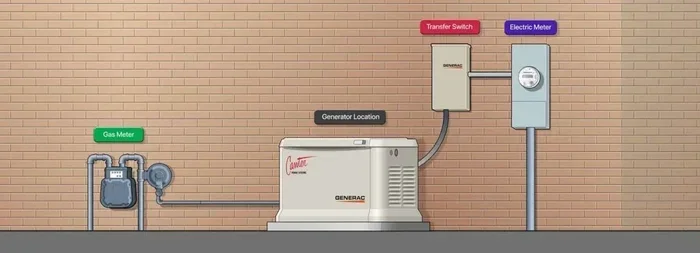
A generator transfer switch is a device that connects your generator to your home’s electrical panel. It acts as a gatekeeper, making sure power flows in only one direction. When the grid goes down, you flip the switch, and your generator takes over. When power returns, you flip it back, and your home reconnects to the utility.
How a Transfer Switch Works
The switch sits between your generator and your main electrical panel. It isolates your home from the grid when the generator is running. This prevents backfeed, which is when electricity flows backward into the power lines. Backfeed can be fatal to lineworkers fixing the grid. A generator safety switch eliminates this risk entirely.
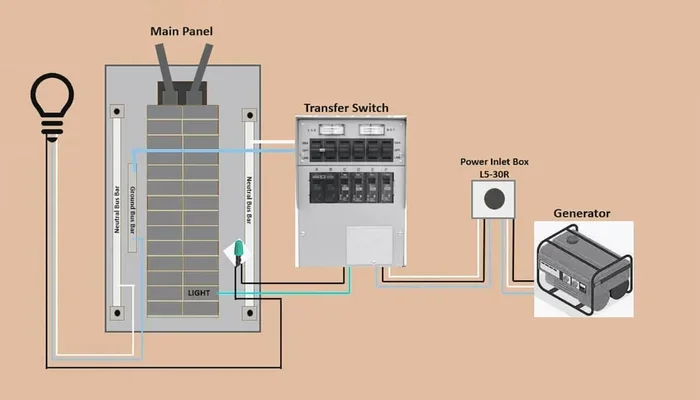
Here is how the process works in simple terms. First, your generator produces electricity. Second, the transfer switch receives that power. Third, the switch routes the power only to the circuits you have selected. Fourth, the switch blocks any power from flowing back to the grid. It is a simple but critical safety mechanism.
Benefits of Using a Transfer Switch
There are many reasons why a backup power system needs a transfer switch. Here are the biggest benefits:
- Safety: It prevents backfeed and protects utility workers.
- Convenience: An automatic transfer switch kicks in within seconds of a power outage. No need to run outside in the dark.
- Compliance: Most local building codes require a transfer switch for permanent generator connections.
- Load Management: The switch lets you choose which circuits get power, so you do not overload your generator.
- Protection: It shields your generator and your home’s wiring from electrical damage.
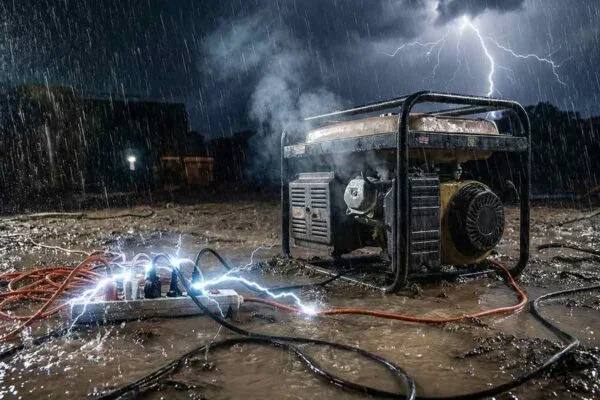
Without a transfer switch, people often use extension cords run through windows or doors. This is unsafe and impractical. A proper generator hookup through a transfer switch is the only reliable and code-compliant way to power your home during an outage.
Types of Generator Transfer Switches
Not all transfer switches are the same. Understanding the differences helps you make the right choice for your home. The two main types are automatic and manual. Each has its own advantages and best use cases.
Automatic Transfer Switches
An automatic transfer switch (ATS) detects when the power goes out and starts your generator for you. Within seconds, it switches your home over to generator power. When grid power returns, it switches back automatically. You do not need to lift a finger.
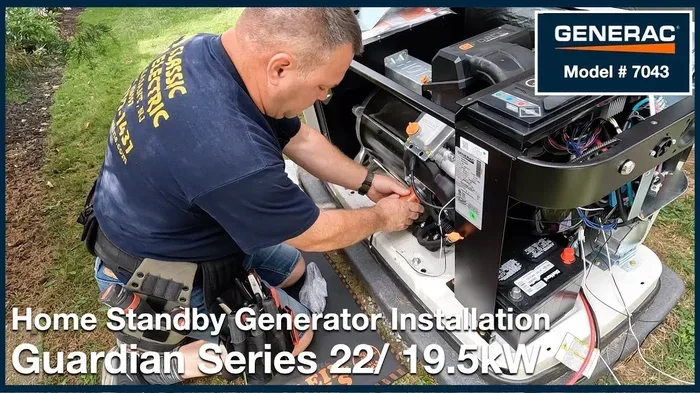
These switches are ideal for homeowners who want seamless backup power. They work great with standby generators, which are permanently installed outside your home. The downside is cost. An ATS typically costs more than a manual switch, and the installation is more complex.
Manual Transfer Switches
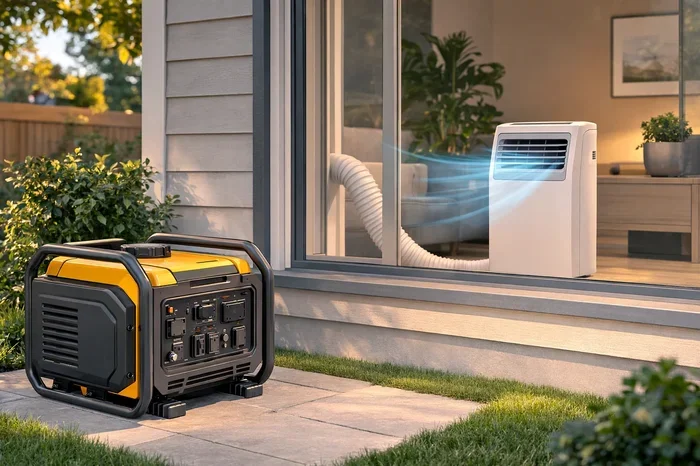
A manual transfer switch requires you to start the generator and physically flip the switch. This type is common with portable generators. You run the generator outside, connect it to the switch, and then toggle it on.
Manual switches are more affordable and simpler to install. They work well for homeowners who only need backup power occasionally. The tradeoff is that you must be home and ready to act when the power goes out.
Comparison: Automatic vs. Manual Transfer Switches
| Feature | Automatic Transfer Switch | Manual Transfer Switch |
|---|---|---|
| Cost | $300-$800+ | $100-$400 |
| Installation Complexity | Higher | Lower |
| Automatic Start | Yes | No |
| Best For | Standby generators | Portable generators |
| Convenience Level | Very high | Moderate |
| Generator Rated Amperage Range | 50A-200A+ | 30A-100A |
How to Choose the Right Type for Your Home
Your choice depends on a few factors. First, consider your generator type. A standby generator pairs best with an automatic switch. A portable generator works well with a manual switch. Second, think about your budget. Manual switches cost less upfront but require more effort during an outage. Third, consider how often you experience power outages. If outages are frequent and long, an automatic switch is worth the investment.
Also check your local building codes. Some areas require specific types of switches for generator connections. A generator interlock kit is another option that some homeowners prefer. It is a simpler device that prevents backfeed but does not offer the same level of convenience as a full transfer switch.
Quick Tip: Before buying a switch, check your generator’s output rating. Match the switch amperage to your generator’s capacity. A mismatch can cause overheating or electrical faults.
Tools and Materials You Will Need
Gathering everything before you start makes the installation smooth and stress-free. Here is a complete list of what you need to hook up a generator transfer switch properly.
Essential Tools
- Screwdriver set (flathead and Phillips)
- Wire stripper and cutter
- Voltage tester or multimeter
- Drill with appropriate bits
- Pliers (needle-nose and lineman’s)
- Wrench set
- Fish tape for pulling wires through walls
- Level for mounting the switch
Materials and Supplies
- Generator transfer switch (matched to your generator’s amperage)
- Generator inlet box (if not included with the switch)
- Appropriate gauge electrical wire (check local code for requirements)
- Mounting bracket and screws
- Electrical tape and wire nuts
- Conduit or cable clamps
- Generator cord (heavy duty, rated for your generator)
Make sure all materials are rated for outdoor use where applicable. The generator inlet box and any exposed wiring must withstand weather conditions. Using undersized wire is a common mistake that creates fire hazards. Always refer to the manufacturer’s specifications for wire gauge and amperage ratings.
Expert Insight: Many electricians recommend buying a transfer switch kit that includes all the necessary components. These kits come with the switch, inlet box, conduit, and wire already matched. It saves time and ensures compatibility.
Step-by-Step Guide to Hook Up a Generator Transfer Switch
Now for the part you have been waiting for. This is the actual transfer switch installation process. Follow each step carefully and do not skip ahead. Working on your electrical panel involves live wires, so take your time.
Step 1: Turn Off Power and Prepare the Panel
Before you touch anything inside your electrical panel, turn off the main breaker. This cuts all power to your panel and makes it safe to work on. Use your voltage tester to confirm that no power is flowing. Never assume the breaker is off without testing it.
Next, choose the location for your transfer switch. It should be mounted next to your main electrical panel, within easy reach. The switch must be accessible and protected from the elements if it is installed outdoors. Mark the mounting holes and drill them into the wall.
Step 2: Mount the Transfer Switch
Secure the transfer switch to the wall using the mounting bracket. Use a level to make sure it is straight. A crooked switch is not just unsightly, it can also make future maintenance harder. Tighten all screws firmly but do not overtighten, which can crack the housing.
Once mounted, identify the input wires that will come from the generator inlet box. These wires pass through the wall and connect to the switch. Make sure the knockout holes in the switch box align with where the wires will enter.
Step 3: Wire the Transfer Switch to the Panel
This is the most important step in the entire process. You are connecting the transfer switch between the generator and your home’s electrical panel.
- Run the wires from the generator inlet box through the wall and into the transfer switch box.
- Strip the wire ends carefully using your wire stripper. Expose enough copper to make a solid connection.
- Connect the generator wires to the input terminals on the transfer switch. Match the hot wires, neutral, and ground to their correct terminals.
- Connect the load wires from the transfer switch to your electrical panel. These wires carry power from the switch to your home’s circuits.
- Secure all connections with wire nuts and wrap with electrical tape. Tug gently on each connection to make sure it is tight.
Every connection matters. A loose wire can cause arcing, heat buildup, and eventually a fire. Take your time with this step and double-check every connection before moving on.
Quick Tip: Label each wire as you connect it. Use small pieces of tape marked with the circuit number or appliance name. This saves enormous time during troubleshooting later.
Step 4: Connect the Generator Inlet Box
The generator inlet box is the external connection point for your generator cord. Mount it on the exterior wall near where you will run the generator. Drill a hole through the wall for the conduit or cable that runs from the inlet box to the transfer switch.
Connect the inlet box to the transfer switch using the appropriate cable. Make sure the inlet box is rated for the amperage of your generator. A 30-amp generator needs a 30-amp inlet box, and a 50-amp generator needs a 50-amp inlet box. Do not mix and match ratings.
Seal any gaps around the inlet box with caulk or weatherproofing material. This prevents moisture from entering the wall and reaching your electrical connections. Water intrusion is one of the leading causes of electrical problems in generator setups.
Step 5: Test the System
Before you ever need the system during a real power outage, test it thoroughly. Start by turning off all selected circuits in your panel. Then start your generator outside and let it reach full operating speed.
Flip the transfer switch to the generator position. You should hear the switch engage and see your selected circuits come back to life. Use your voltage tester to verify that each circuit is receiving the correct voltage. Check for any unusual sounds or smells from the switch or panel.
Now flip the switch back to the utility position. Your home should reconnect to the grid seamlessly. Turn the generator off and let it cool down. Repeat this test a couple of times to make sure everything works reliably.
Testing is not optional. A transfer switch that has never been tested may fail when you need it most. Make it a habit to test the system every few months, especially before storm season.
Common Mistakes to Avoid When Installing a Generator Transfer Switch
Even experienced DIYers make mistakes during generator transfer switch installation. Knowing what to avoid saves you time, money, and potentially dangerous situations.
Skipping the Permit and Inspection
Many homeowners skip getting a permit for their transfer switch installation. This is a mistake. Most local jurisdictions require permits for any electrical work involving the main panel. Without a permit, you may face fines, and your insurance may not cover damage caused by an unpermitted installation.
Additionally, an inspection ensures that your installation meets local electrical codes. A professional inspector can spot issues you might have missed, like improper grounding or undersized wire. Always check with your local building department before starting the project.
Mismatching the Switch and Generator
Using a transfer switch that does not match your generator’s capacity is a serious error. If the switch is rated for 30 amps but your generator puts out 50 amps, the switch can overheat and fail. Always check the generator rated amperage before purchasing a switch.
Also consider your total load. If you plan to power your entire house, you need a switch and generator that can handle the full load. A load management system can help by prioritizing essential circuits and preventing overloads.
Ignoring Grounding Requirements
Proper generator grounding is essential for safety. Your transfer switch installation must include a grounding rod or grounding electrode. Without it, a fault in the generator could energize your home’s plumbing or structural steel, creating a serious shock hazard.
Follow the grounding requirements in your local electrical code. If you are unsure about grounding, consult a licensed electrician. Grounding is not something you want to guess about.
Forgetting to Install a Main Breaker Interlock
A main breaker interlock is a safety device that prevents you from turning on the generator and the utility power at the same time. Some transfer switches include this feature built in. Others require a separate interlock device. Without it, you risk backfeed even with a transfer switch installed.
Check your transfer switch manual to see if an interlock is included. If not, purchase and install one separately. It is a small investment that provides enormous peace of mind.
Safety Tips and Expert Advice for Generator Transfer Switch Installation
Safety should always be your number one priority when working with electricity. Here are essential tips and expert insights to keep you safe and ensure a successful installation.
Quick Tips for a Smooth Installation
- Always turn off the main breaker before working inside the panel.
- Wear rubber-soled shoes and use insulated tools.
- Keep a fire extinguisher nearby when testing connections.
- Work with a partner whenever possible, especially when lifting heavy equipment.
- Read the entire transfer switch manual before starting any work.
- Take photos at each step for reference during future maintenance.
- Keep children and pets away from the work area.
- Never work on electrical systems in wet conditions.
Expert Insights from Electricians
Professional electricians share a few insights that can make your DIY installation much smoother. First, they emphasize the importance of planning. Before you buy anything, map out which circuits you want to power during an outage. This determines the size of the transfer switch and the generator you need.
Second, experienced electricians recommend using a power management panel with larger generator setups. A power management panel automatically prioritizes circuits and prevents overloads. It is especially useful if you are running a portable generator, which typically has a lower output than a standby unit.
Third, do not underestimate the importance of proper wire routing. Wires should be protected from physical damage, especially where they pass through walls and ceilings. Use conduit where wires are exposed to prevent accidental cuts or abrasions.
Finally, professionals stress the value of documentation. Keep all receipts, manuals, permits, and inspection reports in a folder near your electrical panel. If you ever sell your home, this documentation proves that your generator setup was installed correctly and safely.
Quick Tip: If you live in an area prone to hurricanes, ice storms, or frequent outages, consider investing in an automatic transfer switch with a whole house generator. The convenience and peace of mind are well worth the upfront cost.
Conclusion
Hooking up a generator transfer switch yourself is a rewarding project that gives you real control over your home’s backup power. You now know how to choose the right switch, what tools and materials you need, and exactly how to install it step by step. You also understand the common mistakes to avoid and the safety precautions that keep you protected.
Remember, a properly installed generator transfer switch is the cornerstone of any reliable backup power system. It keeps your home running during outages and protects your family from electrical hazards. Take your time with the installation, test the system thoroughly, and do not hesitate to call a professional if you encounter any uncertainty.
The next time the power goes out, you will be glad you took the time to learn this skill. You will not be sitting in the dark while your neighbors are scrambling with extension cords. You will flip a switch, and your home will be back to normal in minutes. That is the power of knowing how to hook up a generator transfer switch yourself.
Frequently Asked Questions
Do I need a permit to install a generator transfer switch?
In most areas, yes. Local building codes typically require a permit for any electrical work involving the main panel. Check with your local building department before starting the project. An inspection may also be required to ensure the installation meets code.
Can I use a generator transfer switch with a portable generator?
Absolutely. Manual transfer switches are designed specifically for portable generators. You connect the generator to the inlet box using a heavy-duty generator cord, then flip the transfer switch to route power into your home. Just make sure the switch amperage matches your generator’s output.
How long does it take to install a generator transfer switch?
A DIY installation typically takes between 4 and 8 hours, depending on your experience level and the complexity of the setup. If you are comfortable working with electrical panels and have all your tools ready, you can finish in one afternoon. First-timers should budget extra time for research and careful work.
What happens if I do not use a transfer switch?
Without a transfer switch, you risk backfeed, which sends electricity back into the power grid. This is extremely dangerous for utility workers and can result in fines or legal liability. It can also damage your generator and your home’s electrical system. A transfer switch prevents all of these problems.
Can I install a transfer switch myself or do I need an electrician?
Many homeowners successfully install their own transfer switches. However, electrical work carries inherent risks. If you are not comfortable working inside your main panel, hire a licensed electrician. The cost of professional installation is usually worth the added safety and peace of mind.
How often should I test my generator transfer switch?
You should test your transfer switch at least every three to six months. Run the generator, switch to generator power, verify all circuits are working, then switch back to utility power. Regular testing ensures the system works reliably when you need it most, especially before storm season.