How to Oil Pneumatic Tools Right And Avoid Costly Repairs
Knowing how to oil pneumatic tools properly keeps your equipment running strong and saves you from pricey fixes. Regular lubrication reduces friction, prevents overheating, and extends the life of your air-powered tools. This guide walks you through choosing the right oil, following a step-by-step lubrication process, and avoiding common mistakes that lead to breakdowns.
Pneumatic tools are workhorses. They pack serious power into a compact design and make tough jobs feel effortless. But here is the thing most people overlook. These tools need regular care to keep performing at their best. One of the most important maintenance tasks is how to oil pneumatic tools the right way.
Skipping this simple step can lead to stuck valves, worn cylinders, and eventually a tool that no longer works. The cost of replacing a pneumatic tool can be shocking. A little oil goes a long way toward avoiding that headache. In this guide, we will walk you through everything you need to know about air tool lubrication. You will learn which oil to use, how to apply it, and how to keep your tools running smoothly for years.
Whether you are a weekend warrior in the garage or a professional contractor on a job site, this guide has something for you. We will break it all down into simple steps. No jargon. No fluff. Just practical advice you can use right away.
Key Takeaways
- Regular oiling prevents wear: Pneumatic tools run on compressed air and need proper lubrication to keep internal parts moving smoothly without grinding or overheating.
- Use the right oil type: Not all oils work the same. Choosing the correct pneumatic tool oil or compressor oil makes a big difference in performance and longevity.
- Follow a consistent schedule: Sticking to a lubrication schedule keeps your tools in top shape and helps you spot problems early before they become costly.
- Avoid common mistakes: Over-oiling, using wrong oil, and skipping maintenance are the top reasons pneumatic tools fail prematurely.
- Clean before you oil: Always clean fittings and ports before adding oil to prevent dirt and debris from entering the pneumatic system.
📑 Table of Contents
- Why Oiling Pneumatic Tools Matters
- Understanding How Pneumatic Tools Work
- Choosing the Right Oil for Your Pneumatic Tools
- Step-by-Step Guide to Oiling Pneumatic Tools
- Common Mistakes That Lead to Costly Repairs
- Building a Maintenance Schedule for Long Tool Life
- Quick Tips for Better Pneumatic Tool Care
- How Proper Oiling Boosts Tool Performance
- Conclusion
Why Oiling Pneumatic Tools Matters
Air-powered tools rely on compressed air to drive pistons, valves, and motors. All of those moving parts create friction. Friction creates heat. Heat causes wear. Over time, that wear leads to poor performance and eventually tool failure.
Oiling your pneumatic tools does three critical jobs:
- Reduces friction: Oil creates a thin film between metal parts. This means less grinding and less heat.
- Prevents corrosion: Moisture from compressed air can rust internal components. Oil acts as a protective barrier.
- Keeps seals supple: Rubber seals and O-rings dry out over time. Proper lubrication keeps them flexible and leak-free.
Think of it like this. You would not drive a car for 10,000 miles without changing the oil. Your pneumatic tools deserve the same respect. Pneumatic tool maintenance is not optional. It is essential.
When you skip lubrication, the pneumatic cylinder and pneumatic valve start to suffer. Dust and debris stick to dry surfaces. Metal-on-metal contact accelerates wear. Soon, your tool starts losing power or making strange noises. By then, the damage may already be done.
The Cost of Neglect
Let us talk numbers. A quality pneumatic impact wrench or angle grinder can cost anywhere from $100 to $500 or more. Replacing seals, valves, or cylinders can easily run $50 to $150 in parts and labor. And if the damage is severe, you may need a full replacement.
On the other hand, a bottle of pneumatic tool oil costs around $10 to $15. A little oil goes a long way. The math is simple. Regular tool lubricant application saves you hundreds of dollars over the life of your equipment.
Also, keep in mind that poorly maintained tools lose efficiency. A dry pneumatic tool uses more air, which means your air compressor works harder. That extra strain can reduce the lifespan of your compressor too. It is all connected.
Understanding How Pneumatic Tools Work
To understand why oiling matters, it helps to know the basics of how these tools operate. Pneumatic tools convert compressed air into mechanical motion. The air flows through pneumatic fittings and into the tool body. Inside, a piston or vane system uses that air pressure to create rotational or linear force.
Here is a quick look at the main components:
- Intake port: Where compressed air enters the tool.
- Piston or rotor: The moving part that creates power.
- Valve system: Controls the direction and flow of air.
- Exhaust port: Releases used air after the tool operates.
- Seals and O-rings: Keep air from leaking and maintain pressure.
All of these parts move at high speed. Without proper air tool lubrication, they grind against each other. The result is faster wear, more heat, and poor air tool performance.
If you want to understand the deeper mechanics, check out how a two-stage compressor operates. Understanding compressor mechanics helps you appreciate why the air feeding your tools needs to be clean and properly managed.
Oil-Lubricated vs. Oil-Free Tools
Not all pneumatic tools are the same. Some come factory oiled and require regular re-lubrication. Others are designed to be oil-free from the start.
Oil-lubricated tools have internal chambers that hold oil. You need to add pneumatic tool oil periodically. These tools generally last longer and handle heavy-duty tasks better. They are the ones that benefit most from regular maintenance.
Oil-free tools come with pre-lubricated bearings or self-lubricating materials. They require less maintenance but may not last as long under heavy use. Even oil-free tools benefit from occasional external lubrication of fittings and moving joints.
Always check your tool manual to know which type you have. Using oil on an oil-free tool can cause problems. And skipping oil on an oil-lubricated tool is even worse.
Choosing the Right Oil for Your Pneumatic Tools
Not all oils are created equal. Using the wrong type can damage your tools or reduce their performance. The right oil keeps everything running smooth and protects internal components from wear.
Here are the most common types of oil used for pneumatic tools:
- Non-detergent pneumatic tool oil: This is the gold standard. It is specifically designed for air-powered tools and leaves no residue that could clog internal passages.
- ISO 100 or ISO 220 compressed air oil: These are industrial-grade lubricants that work well in heavy-duty applications. Check what oil your air compressor takes for guidance on compatible oil types.
- Automatic tool oilers: These devices deliver a consistent amount of oil every time you use the tool. They are a great option if you use your tools frequently.
- Teflon-based lubricants: These work well for light-duty tools and provide excellent protection against moisture.
Avoid using motor oil, WD-40, or household lubricants. These products are not designed for pneumatic systems. They can leave sticky residues, break down under pressure, or attract dust and debris. The result is gunked-up internal parts and reduced tool longevity.
What to Look for on the Label
When shopping for pneumatic tool oil, look for these key features:
- Non-detergent formula
- Designed for compressed air tools
- Viscosity rating of ISO 100 or ISO 220
- Anti-corrosion additives
- Low residue or residue-free formulation
Brands like Alemite, Chicago Pneumatic, and DeWalt make reliable options. You do not need to spend a fortune. A quality pneumatic tool oil typically costs between $8 and $20 per bottle and lasts a long time.
Step-by-Step Guide to Oiling Pneumatic Tools
Now let us get into the hands-on part. Oiling your pneumatic tools is straightforward. Once you learn the process, it takes only a few minutes per tool. Here is exactly how to do it.
Step 1: Gather Your Supplies
Before you start, make sure you have everything ready:
- Bottle of the right pneumatic tool oil
- Clean rags or paper towels
- A small brush or compressed air canister for cleaning
- Your tool owner’s manual
Having everything at hand makes the process fast and smooth. You do not want to stop halfway through because you are missing something.
Step 2: Clean the Tool
Always start with a clean tool. Use a dry rag to wipe down the exterior. Use a small brush to clean around the pneumatic fittings and air intake port. If there is any debris or old oil buildup, gently remove it.
You can also use a brief burst of clean compressed air to blow out loose dust. Just hold the tool upside down so any dislodged particles fall out rather than get pushed deeper inside.
Cleaning before oiling prevents dirt from mixing with fresh oil. Dirty oil accelerates wear instead of preventing it.
Step 3: Locate the Oil Port
Most pneumatic tools have a small oil fill port or fitting on the body. Check your owner’s manual to find the exact location. It is usually marked with an oil can symbol or labeled “Lube.”
Some tools use a built-in oiler that releases oil automatically when air flows through the tool. If your tool has this type, you may just need to fill the reservoir and let the tool do the work.
Step 4: Add the Oil
Now it is time to add oil. Follow these guidelines:
- Hold the tool upright. This prevents oil from spilling into areas where it does not belong.
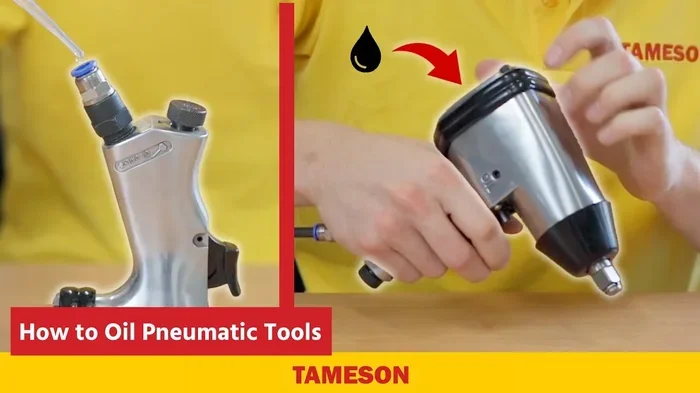
- Add 2 to 3 drops of oil into the fill port. More is not better. Over-oiling can cause excess oil to blow out with the exhaust air and create a mess.
- Wipe away any excess oil around the port with a clean rag.
If your tool has an automatic oiler, simply fill the reservoir to the marked line and let the system handle the rest.
Step 5: Run the Tool
After adding oil, connect the tool to your air supply and run it for 10 to 15 seconds. This circulates the oil through the internal passages and coats all the moving parts.
You may notice a slight mist of oil from the exhaust port. That is normal. It means the oil is reaching all the right places inside the tool.
For tools you use regularly, consider installing an inline air tool lubricator. This device sits between your compressor and the tool and delivers a fine mist of oil with every breath of air. It is one of the best upgrades you can make for consistent pneumatic system care.
Step 6: Wipe Down and Store Properly
Once you have run the tool briefly, give it one final wipe-down. This removes any oil that may have seeped out around fittings or joints. Then store the tool in a clean, dry place.
Proper storage matters too. Moisture in the air supply can cause internal rust. If your compressor does not have a moisture trap, consider adding one. Clean, dry air means less contamination inside your tools.
Common Mistakes That Lead to Costly Repairs
Even with the best intentions, people make mistakes when maintaining their pneumatic tools. Here are the most common errors and how to avoid them.
Using the Wrong Oil
This is the number one mistake. Using motor oil, vegetable oil, or general-purpose lubricants can cause serious problems. These oils break down under the high pressure and temperature conditions inside pneumatic tools. They leave behind sticky residues that clog passages and gum up valves.
Always use oil specifically formulated for pneumatic or compressed air tools. It is designed to handle the unique demands of these systems.
Over-Oiling
More oil is not better. Too much oil creates excess pressure inside the tool. It can blow out seals and O-rings. It also attracts dust and debris, forming a gritty paste that accelerates wear.
Stick to the recommended amount. Two to three drops is usually sufficient for most tools. If you are unsure, check your tool manual or the oiler manufacturer’s guidelines.
Skipping the Cleaning Step
Adding oil to a dirty tool just mixes contaminants with fresh lubricant. The result is abrasive sludge that wears down internal parts faster than dry operation would.
Always clean the tool before oiling. Take a few extra minutes to wipe it down and blow out debris. Your tools will thank you.
Ignoring the Exhaust Oil
If you notice excessive oil blowing out of the exhaust port, something is wrong. It could mean you are over-oiling, or it could indicate worn seals or internal damage. Do not ignore this sign. Check your oil levels and inspect seals if the problem persists.
Forgetting to Oil Regularly
One oiling session is not enough. Pneumatic tools need regular maintenance to stay in good shape. Make oiling part of your routine. A quick wipe-down and oil application after each heavy use session goes a long way.
If you want to learn more about keeping your compressor in top shape, read about how to use your air compressor effectively. Proper compressor use reduces strain on connected pneumatic tools.
Building a Maintenance Schedule for Long Tool Life
Consistency is the key to pneumatic tool maintenance. A simple schedule keeps your tools in top condition and helps you catch small problems before they become big ones.
Daily or Per-Use Maintenance
- Wipe down the tool after each use
- Check for visible leaks or damage
- Add 2 to 3 drops of oil if the tool has been stored
- Inspect pneumatic fittings for tightness and wear
Weekly Maintenance
- Clean the air intake port and exhaust port thoroughly
- Check hoses for cracks or leaks
- Verify your compressor moisture trap is working
- Inspect the tool for unusual noise or vibration
Monthly Maintenance
- Disassemble the tool (if comfortable) and clean internal parts
- Replace worn O-rings or seals
- Check pneumatic valve operation
- Lubricate all moving joints and fittings
Seasonal or Quarterly Maintenance
- Deep clean the entire tool
- Inspect the motor or rotor for wear
- Test air tool performance under load
- Replace any filters or separators in your compressor system
Sticking to this schedule takes minimal time but pays off big. Well-maintained pneumatic tools run smoother, last longer, and perform better. You also avoid the frustration and expense of unexpected breakdowns.
For tips on getting the most out of your compressor, check out how to get more CFM from your air compressor. More efficient airflow means better performance for all your connected pneumatic tools.
Quick Tips for Better Pneumatic Tool Care
Here are some extra tips that experienced users swear by:
- Use an inline lubricator: It provides continuous, consistent oil delivery without you having to think about it.
- Keep oil bottles capped: Dust and debris can contaminate open oil containers. Always seal them tightly after use.
- Label your oil: If you work with multiple tools, label your oil bottles clearly to avoid mixing products.
- Store tools horizontally: This prevents oil from pooling in one area and keeps seals evenly lubricated during storage.
- Use filtered, dry air: A good moisture separator and air filter on your compressor line makes a huge difference in tool lifespan.
- Track your maintenance: Keep a simple log of when you oil each tool. It helps you stay consistent and catch patterns.
How Proper Oiling Boosts Tool Performance
When you oil your pneumatic tools correctly, you will notice immediate improvements. The tool runs smoother, with less vibration. It feels more responsive and powerful. Exhaust air is cleaner, with less oil mist blowing around your workspace.
Over time, proper lubrication preserves the internal components. Pistons move freely. Valves open and close without sticking. Seals remain flexible and leak-free. The result is a tool that performs like new even after years of regular use.
Good pneumatic tool care also means less downtime. You are not standing around waiting for a repair or searching for a replacement. Your tools are ready to go whenever you need them. That reliability matters whether you are a professional contractor or a DIY enthusiast.
Taking care of your tools also protects your investment. Quality pneumatic tools are not cheap. Getting the most life out of them through proper maintenance makes solid financial sense. A few minutes of oiling today can prevent a $200 repair bill next month.
Remember that your entire pneumatic system works together. The compressor, hoses, fittings, and tools all play a role in overall performance. Taking care of each component ensures everything runs at its best. For more on system optimization, see how understanding fuel and energy usage applies to running efficient equipment setups.
Conclusion
Learning how to oil pneumatic tools is one of the simplest and most valuable skills you can develop as a tool user. It takes just a few minutes, costs very little, and pays for itself many times over by preventing costly repairs and extending tool life.
Use the right oil. Follow a consistent schedule. Clean before you lubricate. Avoid common mistakes like over-oiling or using the wrong product. And build a maintenance routine that fits your workflow.
Your pneumatic tools work hard for you. Give them the care they deserve. A well-oiled tool runs better, lasts longer, and keeps you productive. Start today. Your future self will thank you when your tools are still running strong years from now.
Frequently Asked Questions
How often should I oil my pneumatic tools?
It depends on how often you use them. For light home use, oiling once a week is usually enough. For heavy daily use, add oil after each session or at minimum once per day. The key is consistency. A quick oil application takes seconds and prevents expensive internal damage.
Can I use regular motor oil in pneumatic tools?
No. Regular motor oil is not designed for the high-pressure, high-speed conditions inside pneumatic tools. It breaks down quickly, leaves residue, and can clog internal passages. Always use oil specifically formulated for pneumatic or compressed air tools to ensure proper protection and performance.
What happens if I over-oil my pneumatic tool?
Over-oiling causes excess oil to blow out with the exhaust air, creating a mess. It can also blow out seals and O-rings over time. Too much oil attracts dust and debris, forming abrasive sludge that accelerates internal wear. Stick to the recommended 2 to 3 drops per application.
Do oil-free pneumatic tools need any oil at all?
Oil-free tools come with pre-lubricated or self-lubricating components and do not need internal oiling. However, they still benefit from occasional external lubrication of fittings, joints, and moving connections. Check your tool manual for specific guidance on maintaining oil-free pneumatic tools.
What is the difference between pneumatic tool oil and compressor oil?
Pneumatic tool oil is designed to lubricate the internal moving parts of the tool itself. Compressor oil lubricates the pump and internal components of the compressor. While they serve different purposes, both are non-detergent oils formulated for compressed air systems. Using the right oil for each component ensures optimal performance.
Can I use an automatic oiler with any pneumatic tool?
Most pneumatic tools work well with automatic oilers. These devices deliver a consistent, metered amount of oil with each use. However, always check your tool manual first. Some tools have specific oiler requirements or may not be compatible with certain automatic lubrication systems.