How to Remove All Tools from Adobe Acrobat Step by Step
Removing all tools from Adobe Acrobat is simpler than you think. This guide walks you through every step to clean up your Acrobat workspace and customize your toolbar for a distraction-free PDF experience. Whether you use Acrobat Pro or the standard version, you will learn how to hide, remove, and reset tools in just a few clicks.
Adobe Acrobat comes packed with features. There are tools for editing, commenting, signing, measuring, and much more. But here is the thing. Not everyone needs all of them. If your toolbar feels crowded and overwhelming, you are not alone. Many users want a cleaner workspace. They want to know how to remove all tools from Adobe Acrobat and start fresh. This guide shows you exactly how to do it. You will learn simple steps that work across different versions of Acrobat. By the end, you will have a streamlined, personalized PDF editor that actually feels good to use.
Think about it. When you open a tool-heavy application, it can slow you down. You waste time searching for the one tool you actually need. Removing unused tools is like decluttering your desk. It clears your mind and helps you focus. And the best part? You can do it in under five minutes. No advanced technical skills required. Let us dive in and get your workspace looking clean.
Key Takeaways
- Easy Access: You can remove tools from the right-hand panel in just a few clicks.
- Workspace Control: Customizing your tools gives you a cleaner, more focused editing environment.
- Reset Option: You can always reset tools back to default if you change your mind.
- Productivity Boost: Fewer tools mean less clutter and faster navigation.
- Multiple Methods: There are several ways to remove tools, including hiding, disabling, and resetting.
- Cross-Version Compatible: The steps work for Acrobat Pro, Standard, and Reader.
📑 Table of Contents
- Understanding the Tools Panel in Adobe Acrobat
- Why You Might Want to Remove Tools from Acrobat
- Step-by-Step Guide to Remove All Tools from Adobe Acrobat
- Customizing Your Acrobat Workspace for Maximum Productivity
- Common Mistakes When Removing Tools from Acrobat
- How to Keep Your Acrobat Workspace Clean Long-Term
- Expert Insights on Managing Adobe Acrobat Tools
- Final Thoughts on Removing Tools from Adobe Acrobat
Understanding the Tools Panel in Adobe Acrobat
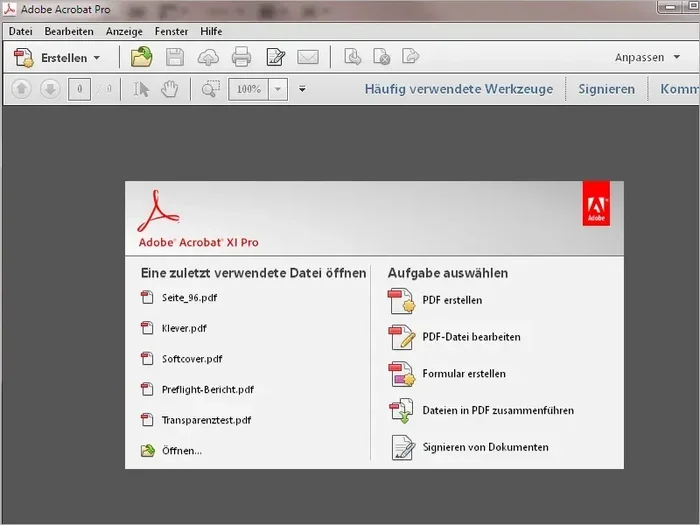
Before you start removing tools, it helps to understand what you are working with. When you open Adobe Acrobat, you will notice a panel on the right side of the screen. This is the Tools Panel. It contains shortcuts to every feature Acrobat offers. There are tools for reading, editing text, adding comments, signing documents, and organizing pages. Each tool serves a specific purpose. But if you are like most users, you probably only use a handful of them regularly.
The Tools Panel is designed to give you quick access to everything. But for many people, it creates more noise than value. You might see tools you have never touched. Some you may not even know what they do. The good news is that you can hide or remove these tools entirely. This frees up screen space and makes your workflow much smoother. Understanding the layout is the first step toward mastering your workspace.
What Are the Default Tools?
When you first install Adobe Acrobat, the default tools include things like:
- Home – Your dashboard for recent files and tasks
- Page Thumbnails – For navigating multi-page documents
- Edit PDF – For modifying text and images
- Comment – For adding notes and annotations
- Sign – For adding digital signatures
- Protect – For adding passwords and permissions
- Organize Pages – For reordering and deleting pages
These are just the most common ones. Depending on your version, you may see even more. The full list can feel overwhelming, especially for new users. But remember, you do not have to keep all of them visible.
Why the Tools Panel Matters
The Tools Panel is the command center of Acrobat. It is where you go to access features quickly. But having too many tools open at once can actually hurt your productivity. Research shows that clutter on screen increases cognitive load. That means your brain works harder to find what it needs. By trimming down your tools, you make Acrobat faster and more intuitive. A clean workspace leads to better focus and fewer mistakes.
Why You Might Want to Remove Tools from Acrobat
There are many reasons to strip down your Acrobat workspace. Let us look at the most common ones. First, some people share their computers with others. They do not want family members or coworkers seeing their editing tools. Removing sensitive tools adds a layer of privacy. Second, many users work on older computers with smaller screens. Every inch of screen space matters. Hiding unused tools gives you more room to read and edit documents. Third, some people simply prefer a minimalist setup. They like opening Acrobat and seeing only what they need.
Another reason is distraction. When you see a long list of tools, it is tempting to click around and explore. This breaks your focus. You start experimenting instead of working. By removing tools you do not use, you eliminate temptation. You stay on task and get work done faster. Some professionals also need a standardized workspace for training purposes. If you are teaching others how to use Acrobat, a simplified interface is much easier to explain.
Who Benefits Most from Removing Tools?
Several types of users benefit from a cleaner Acrobat setup:
- Students – They mainly need to read and annotate PDFs
- Office workers – They use only a few core features daily
- Graphic designers – They prefer a minimal interface to focus on design work
- IT administrators – They set up standardized workstations for employees
- Casual users – They just want to view and sign PDFs without distraction
No matter who you are, removing unnecessary tools can improve your experience. It is one of the simplest ways to make Acrobat work better for you.
Step-by-Step Guide to Remove All Tools from Adobe Acrobat
Now let us get into the actual steps. This is the core of our guide on how to remove all tools from Adobe Acrobat. We will cover multiple methods so you can choose the one that works best for you. Each method is simple and straightforward. You do not need to be a tech expert to follow along.
Method 1: Hide Individual Tools from the Panel
This is the most common approach. It lets you pick and choose which tools stay and which go. Here is how to do it:
- Open Adobe Acrobat on your computer.
- Look at the right side of the screen. You will see the Tools Panel.
- Find the tool you want to remove.
- Right-click on the tool icon.
- Select Hide Tool from the dropdown menu.
- Repeat for each tool you want to remove.
That is it. The tool disappears from your panel. It is still installed in Acrobat, but it is hidden from view. You can bring it back anytime by following the same steps and selecting Show Tool instead.
Quick Tip: If you want to hide multiple tools at once, hold down the Ctrl key (or Cmd on Mac) and click each tool before right-clicking. This saves time when you are removing several tools.
Method 2: Use the View Menu to Toggle the Tools Panel
Want to hide the entire Tools Panel at once? You can do that too. This method removes all tools from view in a single step. Here is what to do:
- Open Adobe Acrobat.
- Go to the top menu bar.
- Click on View.
- Hover over Tools.
- Click on Hide Tools Panel.
The entire panel vanishes from the right side of your screen. Your document now takes up the full workspace. This is perfect for reading or reviewing PDFs without distractions. To bring the panel back, simply go to View > Tools > Show Tools Panel.
Quick Tip: You can also use the keyboard shortcut Ctrl + F6 (or Cmd + F6 on Mac) to toggle the Tools Panel on and off quickly. This is a great shortcut to memorize if you switch between full and partial views often.
Method 3: Reset the Workspace to Default
If you have made a mess of your workspace and want to start over, resetting is the way to go. This method restores the original tool layout. Here is how:
- Open Adobe Acrobat.
- Go to the View menu at the top.
- Click on Workspace.
- Select Reset Workspace.
- Confirm your choice when prompted.
Your workspace goes back to the factory settings. All tools return to their default positions. This is especially useful if you have been experimenting and nothing looks the way you want it. Think of it as a fresh start. You can then carefully add back only the tools you actually need.
Expert Insight: Before resetting, take a screenshot of your current workspace. This way, you have a reference point if you ever want to return to your custom setup. It is a small step that saves a lot of frustration later.
Method 4: Customize the Tools via Preferences
For more advanced users, the Preferences menu offers deeper control. You can fine-tune which tools appear and which do not. Here is the process:
- Open Adobe Acrobat.
- Go to Edit in the top menu.
- Click on Preferences (or press Ctrl + K).
- Look for the Documents or General category.
- Adjust the toolbar and tools settings as needed.
- Click OK to save your changes.
This method gives you the most control. You can decide which tools show up by default and which stay hidden. It takes a bit more time than the other methods, but the results are more permanent and tailored to your workflow.
Quick Tip: If you share your computer with others, consider creating a separate user profile for each person. Each profile can have its own tool preferences. This keeps everyone’s workspace clean and personalized.
Customizing Your Acrobat Workspace for Maximum Productivity
Removing tools is just the beginning. Once you have cleared the clutter, you can build a workspace that truly fits your needs. Customization is key to getting the most out of Adobe Acrobat. A well-organized workspace saves time and reduces frustration every single day.
Pin Your Favorite Tools
After removing the tools you do not use, think about which ones you use most. Pin those tools so they are always easy to find. To pin a tool, simply drag it to a preferred position in the panel. You can also create custom tool sets for different types of work. For example, you might have one set for editing documents and another for reviewing contracts. Switching between sets takes seconds and keeps your workflow efficient.
Organize Tools by Task
Think about how you use Acrobat throughout your day. Do you mostly edit text? Add comments? Sign documents? Group your tools by task type. This makes it much easier to find what you need. You can create folders within the Tools Panel to keep related tools together. A little organization goes a long way toward a productive workspace.
Use Keyboard Shortcuts for Common Actions
Once you have trimmed down your tools, learn the keyboard shortcuts for your most-used features. This makes your workflow even faster. You will not need to hunt through the panel to find a tool. Your fingers do the work instead. Some essential shortcuts include:
- Ctrl + E – Edit PDF
- Ctrl + Shift + N – Add a new note
- Ctrl + Shift + D – Add a digital signature
- Ctrl + L – Highlight text
Memorizing even a few shortcuts can dramatically speed up your work. It is one of those small changes that makes a big difference over time.
Common Mistakes When Removing Tools from Acrobat
Removing tools from Adobe Acrobat is straightforward, but people do make mistakes. Here are the most common ones to avoid:
Mistake 1: Removing Tools You Might Need Later
It is tempting to remove everything except the three or four tools you use daily. But what happens when you need a tool you removed last month? You have to go through the steps to bring it back. Our advice is to remove only the tools you are absolutely sure you will never use. Keep the rest hidden for now. You can always remove them later when you are confident.
Mistake 2: Forgetting to Save Your Custom Layout
After you have customized your workspace, save it. Acrobat allows you to save workspace layouts so you can switch between them. If you do not save, your changes might get lost after an update or a restart. Take two seconds to save your layout. It is an easy step that prevents headaches later.
Mistake 3: Confusing Hide with Uninstall
Removing a tool from the panel does not uninstall it from Acrobat. The tool is still part of your software. It is simply hidden from view. This is an important distinction. If you truly want to remove a feature, you need to go through your system’s add or remove programs. But for most users, hiding tools is the better approach. It keeps your software intact and reversible.
Mistake 4: Not Exploring the Tools Panel Settings
Many users do not realize that the Tools Panel has its own settings menu. Right-clicking on the panel header gives you access to layout options and customization features. Explore these settings to get even more control over your workspace. A few minutes of exploration can save you hours of frustration down the road.
How to Keep Your Acrobat Workspace Clean Long-Term
Removing tools is not a one-time task. Over time, your workspace can get cluttered again. New tools get added. Old habits creep back. Here is how to keep your workspace clean and organized on an ongoing basis.
Schedule Monthly Workspace Reviews
Set a reminder once a month to review your Tools Panel. Look at what you have been using and what has been sitting there untouched. Remove anything that no longer serves you. This small habit keeps your workspace lean and efficient. It only takes five minutes, but the payoff is huge.
Create a Clean Slate After Major Updates
Adobe releases updates regularly. Sometimes these updates add new tools to your panel. After a major update, take a few minutes to review your workspace. Remove any new tools you do not need. Reset your layout if necessary. This ensures your workspace stays clean no matter how many updates you install.
Share Your Setup with Your Team
If you work in an office or with a team, consider sharing your optimized workspace settings. A clean, standardized setup helps everyone work more efficiently. It also reduces the learning curve for new team members. A well-organized workspace is a professional asset.
Back Up Your Custom Layouts
If you have spent time creating the perfect workspace, back it up. Export your custom tool sets and layouts. Store them in a safe place like a cloud drive or external hard drive. If your computer crashes or you switch to a new machine, you can quickly restore your setup. It is a small precaution that pays off big time.
Expert Insights on Managing Adobe Acrobat Tools
We asked experienced Acrobat users and IT professionals for their top tips on managing tools. Here is what they had to say:
Start with the end in mind. Before you remove any tool, think about what you actually do in Acrobat every day. Make a list of your core tasks. Then keep only the tools that support those tasks. Everything else goes. This approach ensures your workspace is built around your real needs, not random features you stumbled upon.
Less is more. The most productive Acrobat users keep their interface as simple as possible. They treat the Tools Panel like a kitchen drawer. You only keep the utensils you actually use. Everything else gets put away. This mindset applies to all software, not just Acrobat.
Do not be afraid to reset. If your workspace gets messy again, do not stress. Just reset it and start over. Acrobat makes it easy to return to a clean state. The ability to reset gives you freedom to experiment without fear of breaking anything.
Use the Search bar wisely. Even with a clean workspace, you may occasionally need a tool you removed from the panel. Use the Search bar at the top of Acrobat to find any feature quickly. This is a great safety net that removes the anxiety of permanently hiding tools.
Final Thoughts on Removing Tools from Adobe Acrobat
Learning how to remove all tools from Adobe Acrobat is one of the simplest ways to improve your PDF workflow. A clean workspace means less distraction, faster navigation, and a better overall experience. Whether you hide individual tools, toggle the entire panel, or reset your workspace, the process is quick and easy. You do not need any special skills or expensive software. Just a few minutes and the steps outlined in this guide.
Take control of your Acrobat workspace today. Remove the tools you do not need. Keep the ones that matter. Your future self will thank you every time you open a PDF. A streamlined workspace is not just about aesthetics. It is about working smarter, not harder. Start simplifying your Acrobat experience now and feel the difference it makes in your daily work.
Remember, you can always change your setup again. There is no permanent commitment. Experiment until you find the perfect balance. The goal is a workspace that feels comfortable and efficient for you. With the tips and steps in this guide, you have everything you need to get there.
Frequently Asked Questions
Can I remove tools from Adobe Acrobat without affecting my PDF files?
Yes, absolutely. Removing tools from the Tools Panel only changes your workspace layout. It does not delete or alter any of your PDF files. Your documents remain completely safe. You are simply hiding features you do not need from view.
Will removing tools from Acrobat save me money?
Removing tools does not change your subscription cost. Adobe Acrobat pricing stays the same regardless of which tools you have visible. However, a cleaner workspace can save you time, which has its own value. You work faster and more efficiently when your interface is streamlined.
Can I restore removed tools after I hide them?
Yes, you can restore any hidden tool at any time. Simply right-click on the Tools Panel and select the option to show hidden tools. You can also reset your entire workspace to bring back all default tools. Nothing is permanently lost when you hide tools from Acrobat.
Do the steps for removing tools work in Adobe Acrobat Reader?
The steps work in Acrobat Pro and Standard versions. Adobe Acrobat Reader has a more limited set of tools by default. You may not have the same level of customization available in the free Reader version. For full control, consider upgrading to Acrobat Pro.
How many tools can I remove from Adobe Acrobat at once?
You can remove as many tools as you want. There is no limit. You can hide individual tools one by one, or hide the entire Tools Panel at once. The only restriction is that some core tools like the Home and View tools cannot be fully removed from the interface.
Is there a way to automate tool removal for multiple computers?
Yes, IT administrators can use Adobe’s enterprise deployment tools to pre-configure tool visibility across multiple machines. This is useful for organizations that want a standardized workspace for all employees. Contact your IT department for details on setting this up.
=== CONCLUSION ===
Removing all tools from Adobe Acrobat is a quick and rewarding process. You now have the knowledge and steps to create a clean, focused workspace that boosts your productivity. Whether you use the right-click method, the View menu, or the Preferences settings, you can tailor Acrobat to fit your exact needs. A clutter-free interface makes a real difference in how you work with PDFs every day. Start today, and enjoy the benefits of a streamlined Adobe Acrobat experience. Your workspace, your rules, your productivity.