The Best Cabinet Installation Tool Kit for Beginners
A cabinet installation tool kit gives you everything you need to hang and secure cabinets without hiring a professional. These kits include power drills, levels, screwdrivers, and specialty tools designed specifically for kitchen and bathroom projects. The best kit saves time, reduces frustration, and ensures your cabinets look professional. Whether you are a DIY beginner or a weekend warrior, the right tools make all the difference. Read on to find the perfect kit for your next project.
Installing cabinets for the first time can feel overwhelming. There are so many pieces to manage, walls to measure, and screws to drive. But here is the good news. The right cabinet installation tool kit makes the entire process smoother and far less stressful. Instead of digging through your garage for random tools, a dedicated kit gives you everything in one organized package.
Whether you are updating your kitchen, building a bathroom vanity, or adding storage to any room, having the correct tools is essential. A cabinet installation tool kit is not just a collection of random items. It is a carefully assembled set of tools designed to handle the unique challenges of cabinet work. From drilling precise holes to keeping cabinets perfectly level, these kits cover it all.
In this guide, we will walk you through everything you need to know about cabinet installation tool kits. We will cover what tools are included, how to choose the best one, and tips for using them like a pro. By the end, you will feel confident enough to tackle your next cabinet project on your own.
Key Takeaways
- A complete cabinet installation tool kit includes all the must-have tools for hanging, leveling, and securing cabinets.
- Beginners should look for kits that include a power drill, level, stud finder, and pocket hole jig.
- Quality matters more than quantity when choosing a tool kit for cabinet work.
- Proper preparation and layout are just as important as having the right tools.
- Safety gear like goggles and gloves should always be part of your installation process.
- Investing in a good kit pays off by reducing project time and improving results.
📑 Table of Contents
- What Is a Cabinet Installation Tool Kit?
- Essential Tools Every Beginner Needs
- Top Cabinet Installation Tool Kits Reviewed
- How to Choose the Right Kit for Your Project
- Step-by-Step Guide to Using Your Cabinet Installation Tool Kit
- Common Mistakes Beginners Make and How to Avoid Them
- Expert Tips for a Professional-Quality Finish
- Conclusion
What Is a Cabinet Installation Tool Kit?
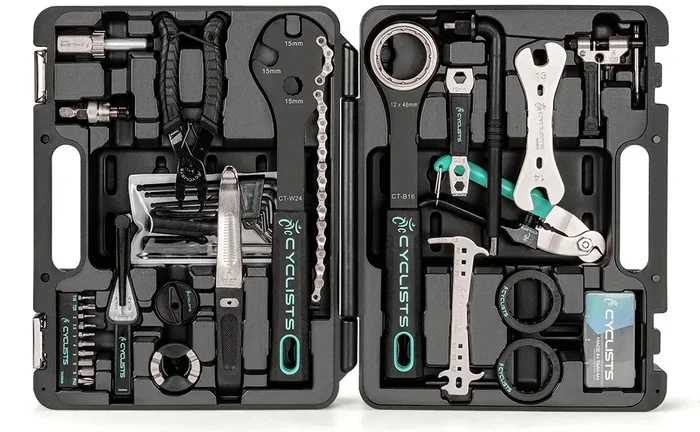
A cabinet installation tool kit is a curated set of tools specifically designed for hanging and securing cabinets. Unlike general tool kits, these are built with cabinet makers and installers in mind. They include tools for measuring, leveling, drilling, and fastening that are essential for cabinet work.
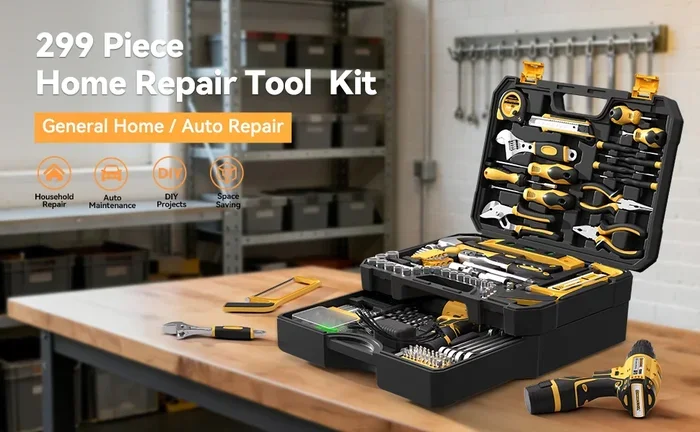
Most kits come in a carrying case or bag for easy transport and storage. This is a huge plus if you work in different rooms or locations. You do not want to be running back and forth to your toolbox every five minutes. A good cabinet installation tool kit keeps everything organized and within reach.
What Tools Are Typically Included?
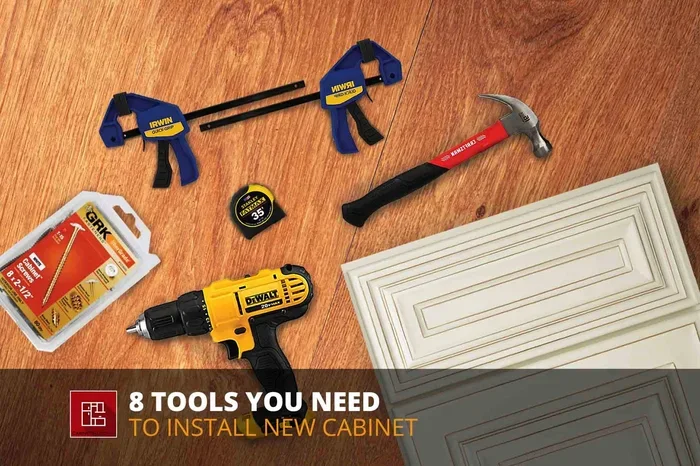
A standard cabinet installation tool kit usually contains the following items:
- Power drill or impact driver for driving screws quickly and efficiently
- Level to ensure cabinets are perfectly straight
- Stud finder to locate wall studs for secure mounting
- Measuring tape for accurate measurements
- Screwdriver set with various bit sizes
- Pocket hole jig for creating strong joints
- Shims for leveling and adjusting cabinet position
- Clamps to hold cabinets in place during installation
- Utility knife for cutting packaging and shims
- Safety goggles and gloves for protection
Some premium kits also include a cabinet jack, which is a handy tool for lifting and positioning heavy cabinets. Others may include a hinge installer or drill bits specifically sized for cabinet screws. The exact contents vary by brand and price point.
Essential Tools Every Beginner Needs
Not all kits are created equal. Some include tools you may never use, while others leave out critical items. As a beginner, you want a kit that covers the essentials without overwhelming you. Let us break down the must-have tools for any cabinet installation project.
Power Drill or Impact Driver
This is the workhorse of any cabinet installation tool kit. A power drill lets you drive screws into wood and drywall quickly. An impact driver delivers more torque, which is helpful when working with dense materials or long screws. For beginners, a cordless drill is the best choice. It gives you freedom of movement and does not tether you to an outlet.
Look for a drill with adjustable speed settings. This gives you more control when driving screws near cabinet edges. You do not want to strip a screw or damage the wood. A variable speed drill lets you start slow and increase power as needed.
Level
A cabinet level is absolutely non-negotiable. Crooked cabinets look terrible and can cause doors to not close properly. A standard torpedo level works great for most cabinet jobs. Some kits include a longer level for spanning across multiple cabinets.
Pro tip: always check your level before starting each cabinet. Walls are rarely perfectly straight, and floors are almost never level. Using a spirit level helps you compensate for these imperfections and keep your cabinets looking professional.
Stud Finder
Cabinets are heavy. They need to be anchored to wall studs for safety and stability. A stud finder helps you locate the wooden studs behind your drywall. Without one, you risk mounting cabinets into drywall alone, which will not hold the weight over time.
Electronic stud finders are more accurate than magnetic ones. They detect changes in density behind the wall surface. Many cabinet installation tool kits include a basic stud finder, but you can also purchase a standalone one if needed.
Measuring Tape and Pencil
Accurate measurements are the foundation of any successful cabinet install. A measuring tape at least 25 feet long gives you the range you need for most projects. Always measure twice and cut once. This old carpenter saying still holds true today.
Keep a pencil handy for marking stud locations and height lines. A small pencil or a marking tool that clips to your tape is very convenient. Some professionals use a laser level to project straight lines on the wall, but a pencil and tape work perfectly for beginners.
Clamps and Shims
Clamps hold cabinets in place while you secure them. This is especially helpful when working alone. You can clamp a cabinet to the wall, check its level, and then drive screws without it shifting.
Shims are thin wedges used to fill gaps and level cabinets. They are inexpensive but incredibly useful. You slide them behind the cabinet to adjust its position until it is perfectly flush and level. Plastic shims are preferred over wood shims because they do not swell or rot over time.
Top Cabinet Installation Tool Kits Reviewed
The market is full of options, and choosing the right one can be tricky. Let us look at what makes a cabinet installation tool kit worth your money. We will compare features, quality, and value to help you decide.
What to Look for in a Quality Kit
When evaluating different cabinet installation kits, pay attention to these factors:
- Tool quality: Look for kits with durable, well-built tools. Cheap tools break easily and can frustrate you mid-project.
- Completeness: Does the kit include all the tools you need, or will you have to buy extras?
- Carrying case: A sturdy case keeps everything organized and protected during transport.
- Brand reputation: Stick with trusted brands known for quality cabinet hardware and tools.
- Price: More expensive does not always mean better. Look for kits that offer good value without sacrificing quality.
Budget vs. Premium Kits
Budget kits typically cost between $50 and $100. They include basic tools like a drill, level, and screwdriver set. These kits work well for simple cabinet installations where you are not making custom modifications.
Premium kits range from $150 to $300 or more. They often include advanced tools like cabinet jacks, pocket hole jigs, and specialty bits. These kits are ideal for professionals or serious DIYers who tackle multiple projects.
For most beginners, a mid-range kit offers the best balance of quality and affordability. You get reliable tools without overspending on features you may not need yet.
How to Choose the Right Kit for Your Project
Choosing the right cabinet installation tool kit depends on several factors. Every project is different, and your tool needs will vary based on the scope of your work.
Consider Your Project Scope
Are you installing a single bathroom vanity or a full kitchen with ten cabinets? The size of your project directly impacts the tools you need. A small project may only require a basic kit with a drill, level, and screws. A large project benefits from a more comprehensive kit that includes a cabinet jack, clamps, and specialty bits.
Think about whether you are installing base cabinets, wall cabinets, or both. Wall cabinets require different techniques and tools than base cabinets. Make sure your kit covers both if you are doing a full installation.
Check Your Wall Type
The type of wall you are working with matters. Standard drywall with wooden studs is the most common setup. But some homes have plaster walls, concrete block walls, or other surfaces. If your walls are not standard drywall, you may need additional tools like masonry bits or specialized anchors.
Check what your kit includes and whether it is suitable for your specific wall type. Some cabinet installation tool kits come with adapters and bits for various surfaces, while others are designed for standard wood-and-drywall setups only.
Evaluate Your Skill Level
If you are a complete beginner, look for kits that include clear instructions and beginner-friendly tools. Some kits come with video tutorials or step-by-step guides. These resources are invaluable when you are learning cabinet installation techniques.
More experienced DIYers may prefer kits with advanced tools and fewer instructions. The key is to be honest about your skill level and choose a kit that matches your comfort zone. You can always upgrade to a more advanced kit as you gain experience.
Step-by-Step Guide to Using Your Cabinet Installation Tool Kit
Having the right tools is only half the battle. You also need to know how to use them properly. Here is a simple step-by-step guide to help you get started with your cabinet installation tool kit.
Step 1: Plan Your Layout
Before you touch any tools, plan your cabinet layout. Measure the wall where the cabinets will go. Mark the height for the top of your cabinets and the location of each cabinet. Use a pencil and measuring tape to create a layout on the wall.
Consider the placement of electrical outlets, plumbing, and ventilation. You do not want to install a cabinet that blocks an outlet or interferes with plumbing. Planning ahead saves time and prevents costly mistakes.
Step 2: Locate Wall Studs
Use your stud finder to locate the wall studs. Mark each stud with a pencil. Studs are typically spaced 16 inches apart, but this can vary. Always verify by finding two adjacent studs and measuring the distance between them.
Make a clear mark at the center of each stud. These marks will guide your drilling and ensure your cabinets are securely anchored to the wall structure.
Step 3: Install a Reference Line
Use your level to draw a horizontal reference line on the wall. This line marks the top edge of your base cabinets. It is the guide you will follow to ensure all cabinets are installed at the same height.
If your floor is not level, measure up from the highest point of the floor. This ensures your cabinets sit level even on an uneven surface. A laser level can make this step easier, but a standard bubble level works just as well.
Step 4: Hang Wall Cabinets First
Start with wall cabinets before installing base cabinets. This gives you more working space and makes the process smoother. Use your clamps to hold the cabinet in place against the wall while you check for level.
Drive screws through the cabinet back and into the wall studs. Use your power drill with the appropriate bit. Make sure each screw goes into a stud for maximum holding power. Repeat this process for each wall cabinet, checking level after each one.
Step 5: Install Base Cabinets
Once wall cabinets are secure, move on to base cabinets. Place each cabinet on the floor along your reference line. Use shims to level the cabinet and fill any gaps between the cabinet back and the wall.
Clamp the cabinet in place and check for level both side to side and front to back. Drive screws through the cabinet and into the wall studs. Then connect adjacent cabinets with screws through the side panels. This creates a solid, unified installation.
Step 6: Attach Hardware and Final Adjustments
With all cabinets in place, it is time to attach doors, drawers, and hardware. Use a hinge installer or your drill to attach hinges. Make small adjustments until doors open and close smoothly.
Step back and admire your work. Check every cabinet for level and alignment. Make any final adjustments with shims or by loosening and repositioning screws. A little extra attention to detail at this stage makes a big difference in the final result.
Common Mistakes Beginners Make and How to Avoid Them
Even with the best cabinet installation tool kit, beginners can make mistakes. The good news is that most of these mistakes are easy to avoid with a little knowledge and preparation.
Skipping the Stud Finder
This is the most common mistake new installers make. They mount cabinets into drywall alone, and the cabinets eventually pull away from the wall. Always use your stud finder and anchor screws into studs. If you cannot hit a stud, use appropriate wall anchors rated for the cabinet weight.
Ignoring Level Checks
It is tempting to skip level checks when you are in a hurry. Do not do it. Even a slight imbalance causes doors to stick and cabinets to look crooked. Check level after every installation step. Your future self will thank you.
Measuring Only Once
Measurement errors are the leading cause of ill-fitting cabinets. Always measure twice, and ideally three times. Double-check every dimension before drilling. A few extra minutes of measuring can save hours of rework.
Using the Wrong Screws
Not all screws are created equal. Using the wrong screw length or type can damage the wood or fail to hold the cabinet securely. Most cabinet installations require wood screws that are long enough to penetrate the cabinet and reach the stud. Check your kit and make sure you have the right screws for the job.
Forgetting Safety Gear
It is easy to overlook safety when you are focused on getting the job done. Always wear safety goggles when drilling or cutting. Wear gloves to protect your hands from sharp edges and splinters. A dust mask is also a good idea when working with wood or drywall.
Expert Tips for a Professional-Quality Finish
Want your cabinet installation to look like it was done by a pro? Here are some expert tips that make a real difference.
First, pre-drill your screw holes. This prevents wood from splitting and gives you cleaner results. Use a drill bit slightly smaller than your screw diameter for the best hold.
Second, use painter’s tape on your drill bit to mark the depth of the screw. This prevents you from driving screws too deep and damaging the cabinet surface.
Third, label your shims as you work. When you are adjusting multiple cabinets, it is easy to get confused about which shim goes where. A simple label saves time and frustration.
Fourth, keep your cabinet installation tool kit organized throughout the project. A tidy workspace reduces mistakes and keeps you focused. Put tools back in their case after each use.
Finally, take breaks. Cabinet installation is physically demanding. Fatigue leads to sloppy work and potential injuries. A well-rested installer produces much better results than a tired one.
Conclusion
A cabinet installation tool kit is one of the best investments you can make for a DIY cabinet project. It gives you the right tools, organized in one place, so you can focus on the work instead of hunting for equipment. From drills and levels to shims and clamps, a quality kit covers every aspect of the installation process.
Remember, the best kit is the one that matches your project size, skill level, and budget. Take time to research and choose wisely. Follow the steps outlined in this guide, avoid common mistakes, and take your time. With the right cabinet installation tool kit and a little patience, you can achieve professional-looking results that will last for years.
So grab your kit, clear your workspace, and get started. Your dream kitchen or bathroom is closer than you think. Happy installing!
Frequently Asked Questions
What is the best cabinet installation tool kit for beginners?
The best kit for beginners includes a power drill, level, stud finder, measuring tape, screwdriver set, clamps, shims, and safety gear. Look for kits from trusted brands that offer a good balance of quality and affordability. A mid-range kit typically provides everything you need without overwhelming you with advanced tools you may not use yet.
How much does a cabinet installation tool kit cost?
Prices range from around $50 for basic kits to $300 or more for premium options. Most beginners will do well with a kit in the $100 to $150 range. This price range offers reliable tools and good value without unnecessary extras. Investing a bit more upfront saves money on replacement tools later.
Can I use a general tool kit instead of a cabinet installation tool kit?
You can, but a dedicated cabinet installation tool kit is designed specifically for this purpose. It includes specialty tools like pocket hole jigs, cabinet jacks, and shims that general kits often lack. While a general kit can work, having the right specialized tools makes the job faster and easier.
Do I need professional training to use a cabinet installation tool kit?
No, most kits are designed for DIYers of all skill levels. They come with instructions and the tools are straightforward to use. That said, watching a few tutorial videos beforehand can boost your confidence. Start with a small project if you are new to cabinet work before tackling a full kitchen installation.
How long does it take to install cabinets with a tool kit?
For a beginner, installing a standard kitchen set of cabinets takes about one to two days. Having the right cabinet installation tools speeds up the process significantly. Experienced DIYers can often finish in a single day. Planning and preparation before you start is the biggest time-saver of all.
What should I do if my walls are not level?
This is very common in older homes. Use shims to compensate for uneven walls and floors. Always measure up from the highest point of the floor to establish your reference line. A good spirit level helps you adjust each cabinet individually until everything is perfectly aligned.
=== CONCLUSION ===
A quality cabinet installation tool kit is essential for any beginner tackling a cabinet project. It provides all the right tools in one convenient package, saving you time and frustration. Choose a kit that matches your project size and skill level, follow the steps carefully, and do not skip safety precautions. With the right preparation and tools, you can install cabinets that look professional and last for years. Start your project today with confidence and enjoy the satisfaction of a job well done.