What Removes Rust From Tools And Brings Them Back To Life
Rust doesn’t have to be the end of your favorite tools. Whether you have surface rust or deep corrosion, several effective methods can bring your rusty tools back to life. From household items like vinegar and lemon juice to powerful chemical rust dissolvers and electrolysis, what removes rust from tools is simpler than you think. This guide covers every method, product, and prevention tip you need.
Rust is the silent killer of every workshop. You pull out a trusty wrench or a beloved hand saw, and there it is — that ugly orange-brown coating that makes your tool look ancient and worn out. But here is the good news. What removes rust from tools is not some secret only pros know. With the right approach, you can strip away rust and restore your tools to working condition.
Whether you are a weekend DIYer or a seasoned contractor, rusty tools are a frustrating reality. Moisture, humidity, and simple neglect cause metal to corrode over time. The good part? Most rust removal methods are cheap, easy, and use items you probably already have at home. This guide walks you through every effective method, the best products to use, and how to keep your tools rust free for good.
Let us bring those forgotten tools back to life. You will learn proven techniques that range from simple kitchen remedies to powerful professional solutions. By the end, you will know exactly which method works best for your situation and how to prevent rust from ever coming back.
Key Takeaways
- White vinegar and citric acid are affordable, household rust removers that work well on surface rust.
- Chemical rust dissolvers and converters tackle heavy rust without harsh scrubbing.
- Electrolysis is a powerful DIY method for deeply rusted tools.
- Mechanical methods like sanding and wire brushing work great for targeted rust spots.
- Prevention is key — proper storage and lubrication keep tools rust free for years.
- WD-40 and penetrating oils serve double duty as rust removers and protectants.
- Restoring old tools is rewarding and saves money compared to buying new ones.
📑 Table of Contents
Why Rust Forms On Tools
Before you learn how to remove rust, it helps to understand what causes it. Rust is technically called iron oxide. It forms when iron or steel tools come into contact with oxygen and moisture. This chemical reaction is called oxidation. Even a small amount of humidity in your workshop can start the process.
Tools left outdoors or stored in damp areas are especially vulnerable. Hand tools like wrenches, pliers, and screwdrivers are common victims. Power tools with metal parts also rust when exposed to moisture over time. Understanding the root cause helps you choose the right rust removal method and prevents future damage.
Types Of Rust You Will Encounter
Not all rust is the same. Recognizing the type of rust on your tools helps you pick the best treatment.
- Surface rust — This is a thin, light coating on the metal. It is the easiest to remove and usually does not damage the tool’s functionality.
- Moderate rust — This covers larger areas and starts to eat into the metal surface. You will need stronger treatment for this level.
- Deep rust and pitting — This is severe corrosion that has eaten deep into the metal. It may require aggressive methods or professional restoration.
What Removes Rust From Tools — Top Methods
Now for the part you have been waiting for. Here are the most effective ways to remove rust from tools. Each method has its strengths, and some work better for specific types of rust.
Vinegar Soak Method
White vinegar is one of the most popular and affordable rust removers. The acetic acid in vinegar dissolves rust effectively. This method works great for surface rust and moderate rust on small to medium sized tools.
To use this method, simply submerge the rusted tool in a container filled with white vinegar. Let it soak for 12 to 24 hours. After soaking, scrub the rust away with steel wool, a wire brush, or even an old toothbrush. Rinse the tool thoroughly with water and dry it completely.
Quick tip: Add a tablespoon of salt to the vinegar for extra rust fighting power. The salt increases the acidity and speeds up the process. This is one of the simplest and most accessible rust treatment methods you can try at home.
Citric Acid And Lemon Juice
If you do not have vinegar on hand, lemon juice or citric acid works just as well. The citric acid breaks down rust naturally. Squeeze fresh lemons directly onto the rusted area and let it sit for a few hours. For a stronger solution, dissolve citric acid powder in warm water and soak the tool.
This method is especially great for tools with intricate parts where vinegar soaking might not reach every spot. The acid gently lifts rust without damaging the underlying metal too aggressively.
Chemical Rust Dissolvers
For heavy rust that refuses to budge, commercial rust dissolvers are your best bet. Products like naval jelly and phosphoric acid based cleaners are designed specifically for tough rust removal. These chemicals convert rust into a stable compound that you can easily wipe or scrub away.
Naval jelly is a thick gel that clings to vertical surfaces, making it ideal for tools with complex shapes. Apply it to the rusted area, wait the recommended time (usually 15 to 30 minutes), and then scrub with a brush. Rinse and dry thoroughly after.
Expert insight: Always wear gloves and work in a ventilated area when using chemical rust removers. These products are effective but can be harsh on skin and lungs. Read the label instructions carefully before use.
Electrolysis Rust Removal
Electrolysis is a fascinating and incredibly effective method for tool restoration. It uses electrical current to reverse the oxidation process and pull rust away from the metal. This method is perfect for deeply rusted tools that other methods struggle with.
You will need a plastic container, water, washing soda (sodium carbonate), a piece of steel or iron as the anode, and a battery charger. Submerge the rusted tool and the anode in the solution, connect the charger, and let the electrical current do the work. Within hours, the rust will loosen and detach from the tool.
This method is safe for the tool’s base metal and does not remove any material. It is a favorite among collectors and hobbyists who restore old, valuable tools. If you want to learn more about maintaining your workshop equipment, check out what causes compressor short cycling to keep your air tools running smoothly during restoration projects.
Mechanical Rust Removal
Sometimes old fashioned elbow grease is all you need. Mechanical methods include sanding, grinding, wire brushing, and scraping. These techniques physically strip rust away from the metal surface.
A wire brush attachment on a drill makes quick work of moderate rust. For smaller tools or precision areas, sandpaper in various grits works well. Start with coarse grit (around 80) and finish with fine grit (220 or higher) for a smooth surface.
Quick tip: Use a rotary tool with a rust removal attachment for tight spaces and detailed areas. This gives you precision control and avoids damaging surrounding surfaces. Mechanical removal is also a great way to remove surface rust quickly before applying a protective coating.
Best Products For Rust Removal
While homemade remedies work well for light rust, some products are specifically designed for heavy duty rust removal. Here is a comparison of the top products on the market.
| Product | Type | Best For | Price Range |
|---|---|---|---|
| Naval Jelly | Chemical converter | Heavy surface rust | $5 – $10 |
| WD-40 Specialist Rust Remover | Spray solvent | Moderate rust on tools | $8 – $12 |
| Evapo-Rust | Natural rust remover | All rust levels, safe for tools | $15 – $25 |
| Phosphoric Acid Gel | Chemical gel | Deep rust and pitting | $6 – $14 |
| Wire Brush Kit | Mechanical tool | Surface rust and cleanup | $10 – $20 |
Evapo-Rust stands out as one of the best overall products. It is non-toxic, reusable, and safe for all metal types. You can soak tools overnight and watch the rust dissolve without any scrubbing. It is a go-to choice for serious tool collectors and professionals who want gentle yet effective metal restoration.
WD-40 is another household name that does double duty. Beyond being a lubricant, WD-40 can penetrate and loosen rust. Spray it on the rusted area, let it sit for a few minutes, and scrub away. It is especially useful for tools that need both rust removal and protection afterward.
If you are working with air-powered tools in your workshop, proper maintenance matters. Learn how to get more CFM from your air compressor to ensure your pneumatic tools stay in top shape during and after the rust removal process.
How To Prevent Rust On Tools
Removing rust is only half the battle. The real victory is keeping it from coming back. Rust prevention saves you time, money, and frustration in the long run. Here are the best strategies to protect your tools.
Store Tools Properly
Moisture is the number one enemy of metal tools. Store them in a dry, climate controlled environment. A dehumidifier in your workshop can make a huge difference. Toolboxes with rubber seals help keep humidity out. Never leave tools sitting on concrete floors, as concrete traps moisture and accelerates rust.
Apply Protective Coatings
After removing rust, apply a thin layer of oil or protective coating to the tool surface. WD-40, camellia oil, and tool wax all create a barrier against moisture. For hand tools, a light coat of mineral oil works well. For power tools, use a silicone based spray to protect both metal and plastic parts.
Quick tip: Wipe down your tools with an oily rag after every use. This simple habit removes moisture and fingerprints that start the rusting process. It takes just a few seconds and extends tool life significantly.
Use Silica Gel And VCI Bags
Silica gel packets absorb moisture inside toolboxes and storage containers. VCI (Vapor Corrosion Inhibitor) bags release a protective vapor that coats metal surfaces. These are excellent options for long term tool storage, especially for seasonal tools that sit unused for months.
Proper tool maintenance also includes regular inspection. Check your tools every few months for early signs of rust. Catching surface rust early makes removal much easier and prevents deep corrosion from setting in.
Restoring Old Tools — A Step By Step Guide
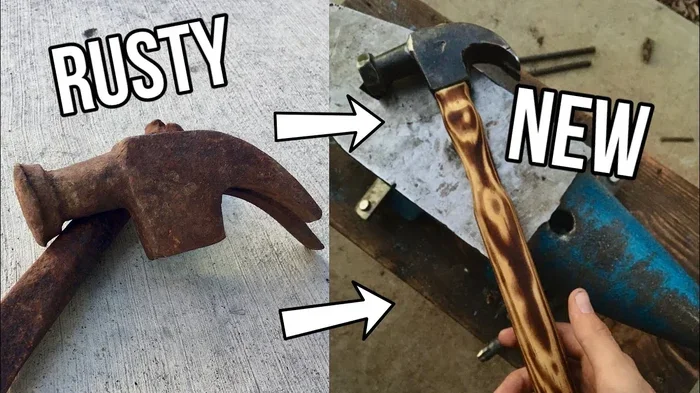
Restoring old, rusty tools is one of the most satisfying projects you can do. Whether you found a beat up set of wrenches at a garage sale or unearthed your grandfather’s toolbox, here is a step by step process to bring them back to life.
Step 1: Assess The Damage
Examine each tool carefully. Identify the type and severity of rust. Surface rust is easy to treat. Deep pitting may require more aggressive methods or acceptance that some cosmetic damage will remain.
Step 2: Choose Your Method
Match your rust removal method to the type of rust. For light rust, try vinegar soaking or citric acid. For heavy rust, use a chemical dissolver or electrolysis. For stubborn spots, combine methods — start with a chemical treatment and finish with mechanical smoothing.
Step 3: Remove The Rust
Follow the instructions for your chosen method. Soak, apply, scrub, and repeat as needed. Patience is key. Heavy rust may require multiple treatment rounds.
Step 4: Clean And Dry
After removing all rust, wash the tool with soapy water to remove any chemical residue. Dry it completely with a clean cloth. Even a tiny bit of moisture left behind can restart the rusting process.
Step 5: Protect And Store
Apply a protective oil or coating to the clean, dry tool. Store it in a dry place with proper ventilation. Your restored tool should now look and function like new.
If you use air compressors in your workshop for cleaning or powering pneumatic tools, make sure yours is properly maintained. Find out what oil your air compressor takes to keep it running efficiently during your restoration sessions.
Common Mistakes To Avoid When Removing Rust
Even with the best intentions, people make mistakes that can damage their tools or make rust removal harder than it needs to be. Here are the most common errors to avoid.
- Using steel wool on finished surfaces — Steel wool can scratch and damage polished or coated tool surfaces. Use a softer brush or nylon abrasive instead.
- Leaving tools wet after cleaning — Always dry tools thoroughly after any rust removal method. Moisture left behind guarantees rust will return quickly.
- Using too much acid — While acids like vinegar work well, leaving tools in acid too long can pit and damage the metal. Follow recommended soak times.
- Skipping the protective coating — Removing rust is only the first step. Without a protective layer, your tool will rust again within days.
- Using abrasive power tools carelessly — Grinding or sanding too aggressively can remove too much material and alter the tool’s shape or dimensions.
Avoiding these mistakes ensures your tool restoration efforts produce lasting results. Take your time, follow each step carefully, and your tools will thank you for years to come.
Final Thoughts
What removes rust from tools has a wide range of answers, from simple kitchen ingredients to powerful chemical treatments and electrical methods. The best approach depends on the type and severity of rust, the tool material, and your personal preference. The beauty of these methods is that most are affordable and easy to do at home.
Start with the simplest method for light rust and work your way up to more advanced techniques for heavy corrosion. Always remember that prevention is your greatest tool. Regular maintenance, proper storage, and protective coatings keep your tools in excellent condition and reduce the need for frequent rust removal.
Restoring old tools is not just about saving money. It is about preserving quality craftsmanship and giving new life to items that deserve a second chance. Grab your supplies, pick your favorite method, and start bringing those rusty tools back to life today.
Frequently Asked Questions
Can I use Coca Cola to remove rust from tools?
Yes, Coca Cola contains phosphoric acid which can dissolve light to moderate rust. Soak the rusted tool in the soda for 24 hours, then scrub with a wire brush. This is a quirky but surprisingly effective household rust removal trick that works on surface rust and light corrosion.
Is rust on tools dangerous to handle?
Surface rust is generally not dangerous but can weaken tools over time. Deep rust that pits the metal can compromise tool integrity and make them unsafe under heavy use. Always remove rust completely and inspect the tool for structural damage before using it for demanding tasks.
How long does electrolysis take to remove rust?
Electrolysis typically takes 4 to 12 hours depending on the severity of the rust. Light surface rust may come off in just a few hours, while heavily rusted tools may need a full overnight soak. The process is hands off once you set it up, making it a convenient option for busy workshops.
Can WD-40 remove rust from tools?
WD-40 can remove light surface rust and penetrate loosened rust effectively. Spray it on the rusted area, let it sit for several minutes, and scrub with a brush. It works best as a rust remover for light corrosion and as a protective coating after removal to prevent future rust.
What is the fastest way to remove rust from tools?
Chemical rust dissolvers like naval jelly or phosphoric acid gel work the fastest for moderate to heavy rust. They can break down rust in 15 to 30 minutes without much scrubbing. For the fastest overall process, combine a chemical treatment with mechanical brushing for complete rust removal in under an hour.
Should I remove rust from antique tools or leave some patina?
This depends on your goal. If the tool is a collectible, light surface rust removal while preserving some patina maintains its character and value. For functional tools, remove all rust to ensure proper performance and longevity. Always research the tool’s history before deciding how aggressively to restore it.