Windshield Repair Tool Kit for Quick Crack Fixes at Home
A windshield repair tool kit lets you fix small cracks and chips at home in minutes. These kits include resin, an injector, a curing light, and everything you need for a strong, clear repair. Learn how to choose the right kit, avoid common mistakes, and save hundreds on auto glass repair costs.
A cracked or chipped windshield is more than just an eyesore. It is a safety issue that can get worse fast if you ignore it. A windshield repair tool kit gives you the power to fix small damage right at home. You do not need to be a mechanic or a glass expert. With the right auto glass repair kit, you can make a crack disappear in under 30 minutes.
Why spend hundreds of dollars on a shop visit when a DIY windshield repair kit does the job? Whether you have a tiny stone chip from highway driving or a small crack from a sudden temperature change, a good resin injection kit can save the day. In this guide, we will walk you through everything you need to know. We will cover how these kits work, which ones to buy, and how to get the best results.
Let us be real. Nobody wants a cracked windshield. It makes your car look bad. It weakens the structure of your vehicle. And in many states, driving with a damaged car window repair situation can even get you a ticket. The good news is that a windshield crack repair kit puts professional-level tools right in your hands. Let us dive in and show you how to use one.
Key Takeaways
- Saves Money: A windshield repair tool kit costs a fraction of what a professional auto glass repair or full windshield replacement would cost.
- Quick and Easy: Most repairs take 15 to 30 minutes, and you can do them in your driveway or garage.
- Prevents Further Damage: Fixing a chip or crack early stops it from spreading and avoids costly windshield replacement later.
- Complete Kits Available: The best kits include resin, injector, curing light, adhesive bridge, and all necessary glass repair tools.
- Works on Small to Medium Damage: DIY repair works great for chips, stone chips, and cracks under three inches long.
- UV Curing is Key: Always use the included UV curing light or a compatible curing lamp for a strong, clear bond.
- Know When to Call a Pro: Large cracks, damage in the driver’s line of sight, or multiple damage points need professional attention.
📑 Table of Contents
- What Is a Windshield Repair Tool Kit?
- How Does a Windshield Repair Tool Kit Work?
- Best Windshield Repair Tool Kits Compared
- Step-by-Step Guide to Repairing Windshields at Home
- Quick Tips for a Flawless Repair
- Common Mistakes and Expert Tips for DIY Auto Glass Repair
- When to Call a Professional Instead of DIY Repair
- Final Thoughts on Windshield Repair Tool Kits
What Is a Windshield Repair Tool Kit?
What Can It Fix?
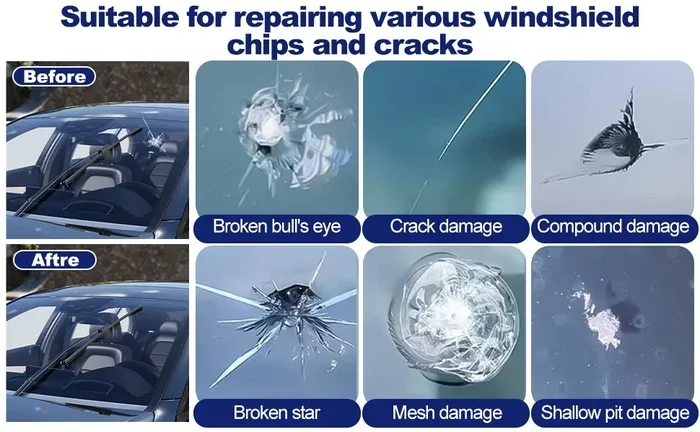
A windshield repair tool kit is a collection of tools and materials designed to fix minor damage to your auto glass. Most kits handle what the industry calls “bullseye chips,” “star breaks,” and short cracks. These are the common types of windshield damage caused by flying rocks, gravel, and road debris.
Here is what a typical kit can repair:
- Stone chips: Small dings caused by rocks hitting your glass while driving.
- Bullseye cracks: Round damage with a dark center, usually from a small round object.
- Star breaks: Cracks that spread outward from a central point like a star.
- Short cracks: Cracks under three inches long that have not spread too far.
- Combination breaks: Damage that looks like a mix of chip and crack patterns.
If the damage is larger than a quarter or the crack is longer than three inches, a windshield repair tool kit may not be enough. You will likely need a full windshield replacement. Always assess the damage before you start.
What Is Inside the Kit?
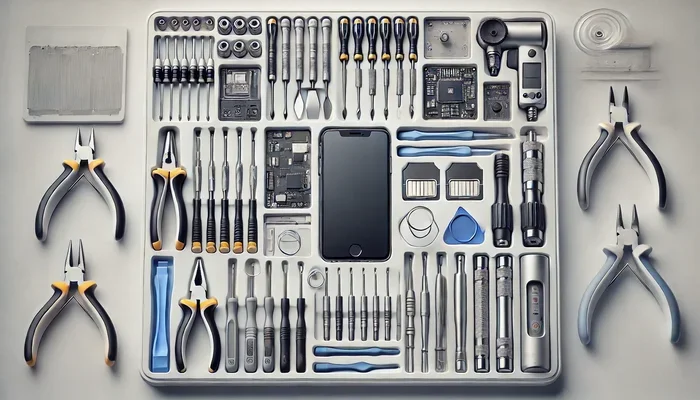
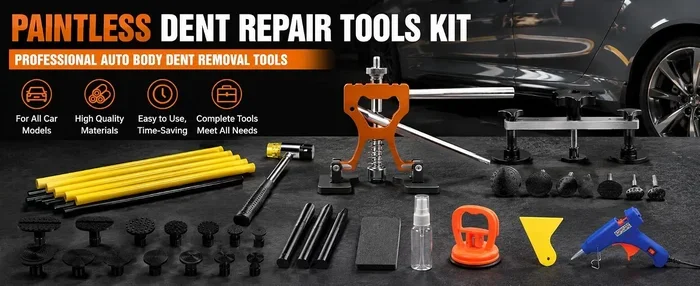
Every auto glass repair kit comes with a few essential components. The exact items vary by brand and price point, but here is what you can expect:
- Resin: This is the clear adhesive that fills the crack or chip. It bonds to the glass and restores structural strength.
- Injection system: A syringe or injector that pushes the resin into the damaged area.
- Adhesive bridge or suction cup: This applies pressure to hold the injector in place over the crack.
- UV curing light: A special light that hardens the resin quickly so it stays clear and strong.
- Preparation tools: These include a glass cleaner, scraping blade, and drying strips to prep the surface.
- Level and backing plate: Helps keep the repair area flat and stable during the process.
The quality of these components matters a lot. Cheap kits may include low-grade glass repair resin that leaves bubbles or a cloudy finish. Spending a little more on a reputable windshield repair tool kit pays off in the long run.
How Does a Windshield Repair Tool Kit Work?
The Science Behind the Repair
Understanding how a windshield crack repair works helps you get better results. Your windshield is made of two layers of glass with a plastic layer in between. When a rock or debris hits the glass, it chips away a small piece and creates a crack. Air gets inside the crack, which makes it visible and weakens the glass.
The windshield repair tool kit works by replacing the air inside the crack with a special resin. This resin is designed to bond strongly with glass. Once it fills the crack, a UV curing light hardens it. The result is a clear, strong repair that restores much of the original glass integrity.
Now, the repair will not make the crack completely invisible every single time. Small star breaks and chips usually look almost brand new after repair. Longer cracks may leave a faint line. But the structural strength comes back, and the crack stops from spreading. That is the real goal of DIY windshield repair.
Step-by-Step Repair Process
Here is a quick overview of how a windshield repair tool kit works in practice:
- Clean the area: Use the included glass cleaner and drying strips to remove dirt and moisture from the crack.
- Apply the adhesive bridge: Place the suction cup or bridge over the crack to hold the injector steady.
- Inject the resin: Slowly push the resin into the crack using the injector syringe.
- Let it soak: Allow the resin to fill the crack completely. This usually takes a few minutes.
- Remove excess resin: Use the scraping tool to clean off any resin that sits on top of the glass.
- Cure with UV light: Shine the curing light over the repair for the recommended time, usually one to three minutes.
- Inspect and polish: Check the repair. Use the included polish pad to remove any remaining haze.
That is it. The entire process takes about 20 to 30 minutes. It sounds complicated, but once you do it once, it becomes second nature.
Best Windshield Repair Tool Kits Compared
Not all auto glass repair kits are created equal. Some are basic and affordable. Others come with premium tools and multiple resin options. Here is a comparison of popular windshield repair tool kits to help you choose.
| Kit Name | Price Range | Resin Type | Curing Method | Best For |
|---|---|---|---|---|
| Rain-X Glass Repair Kit | $10-$15 | Clear resin | Natural sunlight | Budget-friendly stone chip repair |
| Permatex Windshield Repair | $15-$25 | UV-cure resin | UV light included | Small to medium cracks |
| Devilbiss Windshield Repair | $25-$40 | Professional-grade resin | UV lamp included | Multiple repairs, serious chips |
| Spray & Go Windshield Repair | $12-$18 | Spray-on resin | Sunlight or UV light | Quick fixes, beginners |
| Black Box Windshield Repair | $30-$50 | Dual resin system | UV curing light | Professional-level DIY repairs |
When choosing a windshield repair tool kit, look for one that includes a UV curing light. Kits that rely only on sunlight can be unreliable on cloudy days or in shaded areas. Also, check if the resin is UV-stable, meaning it will not yellow over time.
For most people, a mid-range kit in the $20 to $30 range offers the best value. You get a quality resin injection system, a reliable curing light, and enough resin for several repairs. If you live in an area with lots of road debris or harsh weather, keeping a spare kit in your trunk is a smart move.
Step-by-Step Guide to Repairing Windshields at Home
Preparing the Windshield
The most important step in any windshield crack repair is preparation. If you skip this step, the repair will not look good or last long. Start by cleaning the damaged area thoroughly. Use the glass cleaner that comes with your windshield repair tool kit. Do not use household glass cleaners with ammonia, as they can interfere with the resin bonding.
Next, dry the area completely. Use the included drying strips or a clean microfiber cloth. Moisture inside the crack will prevent the resin from bonding properly. If the crack has been exposed to rain or you are repairing it on a wet day, use a hair dryer on a low setting to gently dry the area.
Here are some quick preparation tips:
- Work in a shaded area. Direct sunlight can cause the resin to cure too fast.
- Make sure the car is parked on a flat surface.
- Avoid repairing in temperatures below 50°F or above 90°F.
- Remove any loose glass fragments carefully with a thin scraping tool.
Injecting the Resin
Once the area is clean and dry, it is time to inject the resin. Attach the injector to the adhesive bridge and place it over the crack. Make sure it is centered and sealed tightly. Use the syringe to slowly push resin into the crack. Go slow. You want the resin to fill the crack from the inside out.
Watch for air bubbles. If you see bubbles forming, stop injecting and gently tap the bridge to release them. Continue adding resin until the crack is completely filled. The resin should sit slightly above the surface of the glass. Do not worry about the excess. You will clean that up in the next step.
Pro tip: If your kit comes with multiple resin colors or tints, choose the one closest to your windshield shade. Most auto glass repair kits include clear resin, which works for nearly all situations.
Curing and Finishing the Repair
After the resin has filled the crack, it is time to cure it. Place the UV curing light over the repair area and turn it on. Most kits recommend curing for one to three minutes. Follow the instructions that come with your specific windshield repair tool kit.
Once the resin is cured, use the scraping tool to gently remove any excess resin from the glass surface. Work slowly to avoid scratching the glass. Then, use the polishing pad to buff the repair area until it is smooth and clear.
Inspect your work in good lighting. A successful repair should be nearly invisible. There may be a faint line or slight haze, but the crack should not be visible from a normal viewing distance. If the repair looks cloudy, you can repeat the process with a thin layer of additional resin and another curing session.
Quick Tips for a Flawless Repair
Getting a perfect windshield crack repair takes a little practice. Here are some quick tips that make a big difference:
- Start with a clean surface: Dirt and moisture are the enemies of a good repair. Take your time preparing the area.
- Use the right amount of resin: Too little resin leaves gaps. Too much resin creates a blob that is hard to clean. Find the sweet spot.
- Apply steady pressure: When injecting resin, use slow, even pressure. Rushing causes air bubbles and uneven filling.
- Check the curing light: Make sure your UV curing light is working properly before you start. A weak light means incomplete curing.
- Repair early: The sooner you fix a chip or crack, the better the result. Damage gets worse over time, especially with temperature changes and driving vibrations.
- Keep the kit sealed: Store your auto glass repair kit in a cool, dry place. Resin can thicken or dry out if exposed to heat or air.
Common Mistakes and Expert Tips for DIY Auto Glass Repair
Common Mistakes to Avoid
Even with a great windshield repair tool kit, mistakes can happen. Here are the most common ones and how to avoid them:
- Skipping the cleaning step: This is the number one mistake people make. Dirty glass means the resin will not bond correctly. Always clean and dry the area before you start.
- Injecting resin too fast: Pouring resin in quickly creates air pockets and overflows. Slow and steady wins the race.
- Not using enough pressure: The adhesive bridge needs to create a tight seal. If it is loose, resin leaks out and the crack does not fill properly.
- Using the kit in direct sunlight: Heat causes resin to cure too fast, which leads to bubbles and an uneven finish. Work in the shade whenever possible.
- Ignoring temperature guidelines: Most glass repair resin works best between 60°F and 80°F. Extremely cold or hot conditions affect bonding quality.
- Not curing long enough: Rushing the UV curing step weakens the repair. Follow the recommended curing time exactly.
Expert Insights for Better Results
Professional auto glass technicians share a few insights that can elevate your DIY repairs:
- Use a secondary curing light: Some experts recommend using both the included UV light and a handheld curing lamp for a stronger bond. The extra UV exposure ensures the resin cures completely.
- Apply a thin top coat: After curing, a thin layer of clear resin on top of the repair can fill any remaining tiny gaps. Cure it again with the UV light for a seamless finish.
- Inspect with a flashlight: Shine a flashlight at an angle across the repair. This reveals any missed spots or bubbles that are hard to see in normal light.
- Keep a repair log: If you repair multiple chips or cracks, note the date and location. This helps you track any new damage and plan future repairs.
When to Call a Professional Instead of DIY Repair
A windshield repair tool kit is fantastic for small to medium damage. But there are times when you should leave it to the professionals. Knowing the difference saves you time, money, and frustration.
Call a professional auto glass repair service if:
- The crack is longer than three inches.
- The damage is in the driver’s direct line of sight.
- There are multiple cracks or chips spread across the windshield.
- The crack extends to the edge of the windshield.
- The damage is deep enough that you can feel it with your fingernail.
- The windshield has been previously repaired and is now cracking again.
In these situations, a windshield replacement is usually the safer and more effective option. Driving with a poorly repaired windshield can compromise your safety. A professional technician has the training and equipment to assess the damage correctly and make the right call.
Also, keep in mind that some insurance policies cover auto glass repair at no cost to you. Check with your insurance provider before you decide between DIY and professional repair. You might be surprised to find that a professional repair is free under your comprehensive coverage.
Final Thoughts on Windshield Repair Tool Kits
A windshield repair tool kit is one of the most practical and cost-effective tools you can keep in your car or garage. It empowers you to handle common windshield damage quickly and affordably. Whether you are dealing with a fresh stone chip or an old crack that has been nagging you, a quality resin injection kit can make a real difference.
The key to success is choosing the right kit, preparing the surface properly, and following the steps carefully. Do not rush the process. Take your time, and you will get results that look professional and last for years. Remember to fix damage as soon as you notice it. A small chip today can become a big crack tomorrow, and that is when windshield replacement becomes the only option.
With the tips and guidance in this article, you are now equipped to tackle most common windshield damage on your own. Grab your windshield repair tool kit, find a shaded spot, and get to work. Your wallet and your safety will thank you.
Frequently Asked Questions
Can a windshield repair tool kit fix a crack in the driver’s line of sight?
Technically yes, but it is not recommended. A repair in the driver’s direct line of sight can create a slight distortion that affects visibility. Most professionals advise replacing the windshield for any damage in this critical area to ensure safe driving.
How long does a windshield repair with a tool kit last?
A properly done repair with a quality windshield repair tool kit can last for years. The resin bonds strongly with the glass and is designed to withstand normal driving conditions, temperature changes, and vibrations. However, the repair may become more visible over time if exposed to harsh UV light without proper UV-resistant resin.
Is it safe to drive after repairing a windshield at home?
Yes, it is generally safe to drive after a DIY windshield repair once the resin has fully cured. Most auto glass repair kits recommend waiting at least 30 minutes to one hour before driving. The curing light speeds up this process significantly compared to sunlight-only methods.
What size of damage can a windshield repair tool kit handle?
Most kits work well for chips and cracks up to three inches long. Bullseye chips up to one inch in diameter and star breaks up to two inches are ideal candidates. Damage larger than these limits usually requires a full windshield replacement for safety reasons.
Can I use a windshield repair tool kit on a tinted windshield?
Yes, you can repair chips and cracks on tinted windshields. However, the tint may make the repair slightly more visible. Use the clear resin included in your glass repair resin kit and follow the same preparation steps. If the tint is damaged during the repair, a professional can address the tint issue separately.
Will insurance cover a windshield repair done with a DIY kit?
Most insurance companies cover professional auto glass repair but may not reimburse for DIY repairs. However, many policies cover windshield repair at zero cost to you with no deductible. Check with your insurance provider first. They may even send a technician to your location for free.