Simple Steps to Test Your Ac Compressor Like a Pro
Knowing how to test your ac compressor can save you hundreds in repair costs and extend the life of your cooling system. This guide gives you simple, safe steps to diagnose compressor problems yourself. You’ll learn what tools you need, what to look for, and how to spot early warning signs. Whether your ac compressor is not starting, making strange noises, or short cycling, we’ll walk you through it. By the end, you’ll feel confident tackling basic compressor diagnostics like a pro.
Key Takeaways
- Always disconnect power first: Safety comes before any diagnostic work on your ac compressor.
- Use the right tools: A multimeter, capacitor tester, and manifold gauge set are essential for accurate compressor testing.
- Check the capacitor and relay first: These are the most common and cheapest reasons a compressor fails to start.
- Listen and feel: Unusual noises, overheating, or weak airflow often point to compressor problems you can catch early.
- Refrigerant pressure tells a story: Low or high readings can reveal leaks, blockages, or compressor wear.
- Know when to call a pro: Complex electrical faults, refrigerant leaks, or compressor burnout need a licensed HVAC technician.
📑 Table of Contents
Why Testing Your AC Compressor Matters
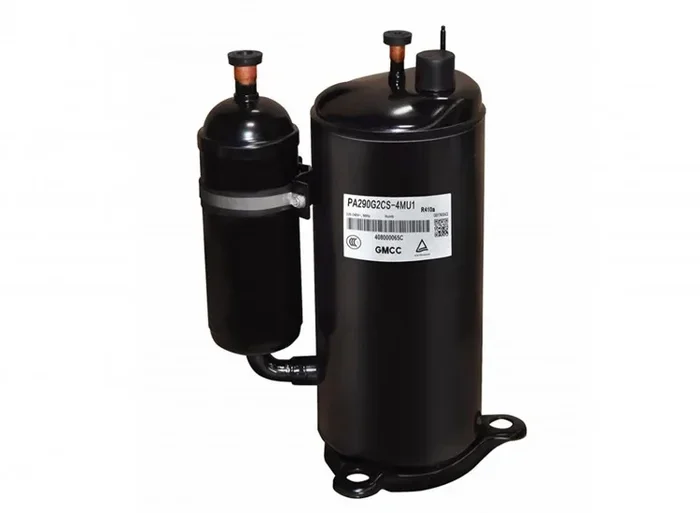
Your ac compressor is the heart of the cooling system. It pumps refrigerant through the coils, removing heat from your home. When it fails, the whole air conditioning system stops working. A broken compressor can leave you sweating in summer and facing a big repair bill.
Testing the compressor early can prevent a small problem from becoming a disaster. Many compressor failures start with subtle signs. A little clicking, a warm air blow, or a tripped breaker can all be early warnings. If you know how to test ac compressor basics, you can catch these signs before the unit dies completely.
Testing also helps you decide whether to repair or replace. Sometimes a simple capacitor swap brings the compressor back to life. Other times, the compressor is burned out and needs full replacement. Either way, a quick test gives you the answers you need. You’ll avoid paying a technician just to tell you the obvious.
In this guide, we walk you through every step. You’ll learn what tools to use, what measurements to take, and what results mean. We also cover safety tips and common mistakes to avoid. By the end, you’ll have the confidence to test your ac compressor like a pro.
Signs Your Compressor Needs Testing
Don’t wait until the house is hot. Look for these warning signs that your compressor may need testing:
- Warm air from vents: The AC runs but fails to cool. This often means the compressor is not pumping refrigerant.
- Strange noises: Clicking, buzzing, or grinding sounds from the outdoor unit can indicate compressor motor trouble.
- Hard starting: The compressor struggles to start or trips the breaker immediately.
- Frequent short cycling: The unit turns on and off every few minutes instead of running smoothly.
- Ice on refrigerant lines: Low refrigerant flow caused by a failing compressor can freeze the coils.
- Higher energy bills: A struggling compressor draws more electricity to do the same job.
If you notice any of these, it’s time to run through the test steps below. Early action keeps repair costs low and your home cool.
Safety First: Preparing to Test
Working on an ac compressor involves electricity and refrigerant. Always put safety first. A single mistake can cause injury or damage the unit. Take a few minutes to prepare, and you’ll work with confidence.
Tools You’ll Need
Gather these tools before you start. Having everything ready prevents mid-test trips to the garage:
- Multimeter: To test voltage, resistance, and continuity.
- Capacitor tester: To check the start and run capacitors safely.
- Manifold gauge set: To measure refrigerant pressure on the suction and discharge lines.
- Screwdrivers and nut drivers: For access panels and electrical connections.
- Safety glasses and gloves: Protect your eyes and hands from refrigerant and sharp edges.
- Flashlight: For a clear view inside the unit.
- Notebook or phone: To record readings and compare them later.
Pro tip: If you’re using a portable generator to power your AC during testing, make sure the generator can handle the compressor’s starting wattage. Check our guide on what size generator to run a refrigerator and freezer for sizing help. A compressor is similar to a refrigerator compressor, so the same rules apply.
Safety Precautions
Follow these precautions every single time:
- Turn off the power at the breaker: Switch off the AC breaker and the outdoor unit disconnect. Verify power is off with your multimeter.
- Discharge capacitors: Capacitors hold a dangerous charge even when the power is off. Use an insulated screwdriver to discharge them carefully.
- Wear gloves and eye protection: Refrigerant can cause frostbite. Never touch refrigerant lines with bare hands.
- Work on a dry surface: Avoid testing in rain or on wet ground to prevent electrical shock.
- Never open the refrigerant system: Releasing refrigerant is illegal and harmful to the environment. Leave refrigerant handling to licensed pros.
Once you’re geared up and the power is off, you’re ready to begin the actual test.
Step-by-Step: How to Test AC Compressor
Now for the core of the guide. Follow these steps in order. Each one builds on the last and gives you a clearer picture of compressor health.
Step 1: Visual Inspection
Start with a good look. Many compressor problems are visible without any tools. Remove the outer access panel and inspect these areas:
- Wiring and connections: Look for burnt, corroded, or loose wires. A bad connection can prevent the compressor from starting.
- Capacitor shape: A bulging or leaking capacitor is a dead giveaway. Replace it before testing further.
- Refrigerant lines: Check for oil stains or frost. These can signal a refrigerant leak or a restriction.
- Fan blade and coil fins: A damaged fan or dirty coil can cause the compressor to overheat.
- Mounting bolts: Loose mounting can cause vibration, which strains the compressor motor.
If everything looks clean and tight, move to the electrical tests. If you spot damage, address it first. Sometimes a simple wire repair solves the problem.
Step 2: Electrical Tests
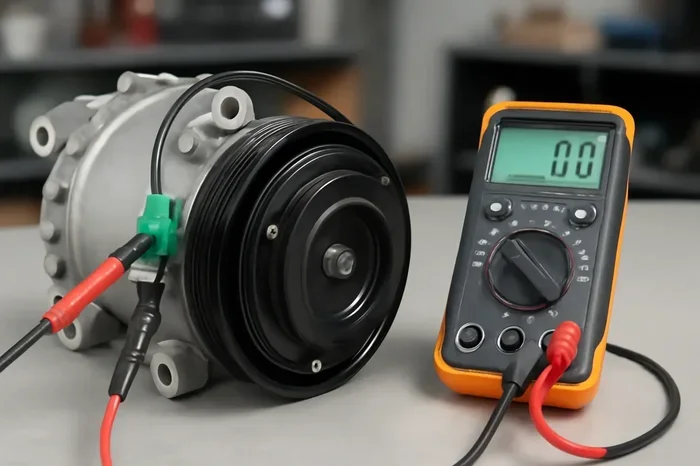
With the power still off, you’ll test the compressor motor windings. This tells you if the motor has shorted or open circuits.
- Identify the terminals: Most compressors have three terminals: Common (C), Start (S), and Run (R).
- Set your multimeter to resistance (ohms): Measure resistance between each pair of terminals.
- Record the readings: You should get low resistance (typically 1 to 5 ohms) between C-S and C-R. The resistance between S-R should equal the sum of the other two.
- Check for a short to ground: Measure resistance from each terminal to the compressor body. It should read infinity (OL). Any low reading means a grounded winding, and the compressor needs replacement.
If the readings are way off or show a short, the compressor motor is bad. No amount of capacitor swapping will fix this. You’ll need a replacement compressor or a professional evaluation.
Step 3: Capacitor Check
The capacitor gives the compressor motor a boost to start. A weak capacitor is one of the most common reasons an ac compressor won’t start. Testing it is quick and easy.
- Disconnect the capacitor wires: Label them first so you know which goes where.
- Discharge the capacitor: Use an insulated screwdriver to short the terminals.
- Use a capacitor tester: Set it to the correct capacitance range. Compare the reading to the rating on the capacitor label.
- Acceptable range: A reading within +/- 10% of the rated value is good. A significantly lower reading means a weak capacitor that needs replacing.
Pro tip: Always replace the capacitor with the same microfarad and voltage rating. A mismatched capacitor can damage the compressor motor over time.
Step 4: Refrigerant Pressure Test
This step requires a manifold gauge set. Connect the gauges to the service ports: the low side (suction line) and the high side (discharge line). Then turn the AC power back on and let it run for a few minutes.
- Normal suction pressure: Depends on the outdoor temperature, but it should be lower than the high side. A typical low-side reading in warm weather is around 70 to 80 PSI.
- Normal discharge pressure: Usually 2 to 2.5 times the suction pressure. A high reading can indicate a restricted condenser or overcharge.
- Low pressure on both sides: Often means low refrigerant due to a leak or a compressor that is not pumping.
- High pressure on the low side: Can point to a blocked accumulator or a failing compressor that is not pulling refrigerant.
Pressure readings alone don’t tell the whole story. Combine them with the electrical and visual checks. If the pressures look wrong and the compressor shows electrical faults, the compressor itself is likely the problem.
Step 5: Running the Compressor and Listening
Now that you’ve checked the basics, run the compressor and pay attention. This is where your ears and senses do the final work.
- Start it up: Turn the power on at the breaker and the disconnect. The compressor should start smoothly within a few seconds.
- Listen for normal sounds: A steady humming and the rush of airflow are normal.
- Listen for bad sounds: Clicking, grinding, or loud banging means mechanical trouble inside the compressor.
- Check the discharge line: It should feel warm to hot. A cold discharge line means the compressor is not compressing refrigerant.
- Feel the vibration: Mild vibration is normal. Excessive shaking can mean loose mounting or internal mechanical failure.
If the compressor starts but then trips the breaker, there’s likely a short circuit or an overload. If it hums but never starts, the capacitor or motor windings are probably bad. In both cases, you’ve gathered valuable diagnostic data.
Common Compressor Problems You Can Diagnose
Not every compressor issue requires a full replacement. Many common problems have simple fixes you can identify with your new testing skills.
Compressor Won’t Start
This is the most frequent complaint. The usual suspects are the capacitor, the relay, or a grounded winding. Start with the capacitor test. If it’s weak, replace it. If that doesn’t work, check the relay and the electrical readings. If the windings show a short to ground, the compressor is done.
Compressor Overheating
An overheating compressor often shuts down on a thermal protector. Causes include dirty coils, low refrigerant, or a failing fan. Check the airflow across the condenser coil first. Clean any debris. Then verify the fan spins freely. If the compressor still overheats, the refrigerant charge may be low, or the compressor may be mechanically worn.
Short Cycling
Short cycling means the compressor turns on and off too quickly. This wastes energy and wears out the motor. Common causes are a dirty air filter, low refrigerant, or a faulty thermostat. Check the filter and the refrigerant pressures first. If those are fine, the compressor’s thermal switch may be malfunctioning.
When to Call a Professional
DIY testing is empowering, but some jobs are best left to the experts. Call a licensed HVAC technician if you encounter any of the following:
- Refrigerant leaks: You cannot legally or safely repair a refrigerant leak yourself. A pro has the tools to recover, repair, and recharge the system.
- Complex electrical faults: If you find a grounded winding but are unsure about the repair, a technician can safely replace the compressor or the entire unit.
- Compressor burnout: A burnt compressor often releases debris into the refrigerant lines. A pro must flush the system before installing a new compressor.
- You need to run a generator for extended testing: If you’re using a generator to power the AC for a long test, check how long a generator can run continuously. You also need to know how much gas a generator uses during that time to avoid running out of fuel mid-test.
A professional has the experience to handle complex situations safely. Don’t hesitate to call one when the problem goes beyond basic diagnostics.
Wiring a Generator Safely for Testing
If you decide to use a generator to power your AC during compressor testing, proper wiring is critical. Never backfeed your home’s electrical panel without a transfer switch. Follow the instructions in our article on how to wire a generator to a breaker box to set up a safe connection. This keeps your home and the technician safe from electrical hazards.
Keeping Your AC Compressor in Top Shape
Testing is one thing. Maintenance is what keeps the compressor healthy for years. A little prevention goes a long way toward avoiding unexpected breakdowns.
- Change the air filter regularly: A clogged filter makes the compressor work harder and can cause overheating.
- Clean the condenser coil: Debris on the coil reduces airflow and raises discharge pressure.
- Check refrigerant levels annually: Low refrigerant is a top cause of compressor failure. Have a pro check the charge each spring.
- Inspect the capacitor yearly: A weak capacitor stresses the motor. Replace it as a precaution if it’s more than 5 years old.
- Keep the area around the outdoor unit clear: At least 2 feet of clearance ensures proper airflow and cooling.
These simple habits can double the life of your ac compressor. They also keep your energy bills low and your home comfortable all summer long.
Quick Tips for Successful Compressor Testing
- Always write down your readings: You’ll forget them otherwise, and comparison over time is valuable.
- Test on a mild day: Extreme heat or cold can skew pressure readings. An 80°F day gives the most consistent results.
- Never open the refrigerant circuit: Even a small leak releases harmful gas and is illegal.
- Use the right tools: A cheap multimeter can give false readings. Invest in a quality digital multimeter and capacitor tester.
- Take your time: Rushing leads to mistakes. Follow each step carefully and you’ll get accurate results.
Common Mistakes to Avoid
- Skipping the capacitor test: Many people jump straight to the compressor motor and miss a simple fix.
- Testing with a weak generator: If your generator can’t handle the compressor’s surge wattage, you’ll get false results or damage the unit. Refer to what size generator to run a refrigerator and freezer for proper sizing.
- Ignoring refrigerant pressure: Electrical tests can look normal even when the compressor is mechanically failing. Pressure data gives you the full picture.
- Forgetting to discharge capacitors: A charged capacitor can give you a painful shock. Always discharge before touching the terminals.
Expert Insight: What the Readings Really Mean
HVAC techs often say, “The compressor tells you the truth.” If your electrical readings are good but the pressures are off, the compressor is struggling mechanically. If the pressures are normal but the compressor won’t start, the problem is electrical. Trust the data. Let the numbers guide your decision, not guesswork.
Conclusion
Testing your ac compressor doesn’t have to be scary. With the right tools, a little patience, and the steps in this guide, you can diagnose most common compressor problems. You’ll know when it’s a simple capacitor fix and when it’s time to call a pro. Remember to always put safety first, discharge your capacitors, and never open the refrigerant system.
Learning how to test ac compressor gives you control over your home comfort and your wallet. You’ll catch problems early, avoid unnecessary repairs, and keep your cooling system running smoothly. So grab your multimeter, gather your tools, and give your ac compressor the checkup it deserves. You’ll be glad you did.
Frequently Asked Questions
Can I test my AC compressor without a multimeter?
You can do a visual inspection and listen for unusual noises without one. However, a multimeter is essential for checking electrical windings and voltage. Without it, you can’t fully diagnose motor or capacitor issues. A basic digital multimeter costs under $30 and is worth the investment.
What is the average cost to replace an AC compressor?
Replacement costs typically range from $1,000 to $2,500, including parts and labor. The exact price depends on your AC unit size, compressor type, and local labor rates. Sometimes it’s more cost-effective to replace the entire outdoor unit if it’s older than 10 years.
How long does a compressor test take?
A full diagnostic test takes about 30 to 60 minutes. The visual inspection takes 10 minutes. Electrical and pressure tests add another 20 to 30 minutes. If you’re using a generator to power the AC, add time for setup and fuel monitoring.
Is it safe to test the compressor myself?
Yes, as long as you follow safety precautions. Always disconnect power, discharge capacitors, and wear protective gear. Never open the refrigerant lines. If you’re uncomfortable with electrical work, call a licensed HVAC technician for help.
What causes an AC compressor to fail prematurely?
Common causes include low refrigerant, dirty coils, electrical surges, and worn capacitors. Lack of regular maintenance is the biggest factor. Running the compressor with low refrigerant causes overheating and eventual motor burnout.
Can a weak capacitor damage the compressor?
Yes. A weak capacitor forces the compressor motor to draw more current during startup. Over time, this extra strain overheats the motor windings and shortens the compressor’s lifespan. Replacing a failing capacitor early can prevent a much larger compressor repair.
=== END OF FAQS ===