How to Adjust Air Compressor Pressure Switch Like a Pro
Adjusting your air compressor pressure switch is essential for safe, efficient operation. This guide walks you through every step, from understanding how the switch works to setting the right cut-in and cut-out pressures. You will learn what tools you need, common mistakes to avoid, and when it is time to replace the switch instead of adjusting it.
Adjusting the pressure switch on your air compressor might seem intimidating at first. But here is the good news. It is actually one of the simplest maintenance tasks you can do at home. Whether you run a garage workshop or a small business, getting the pressure switch dialed in right makes a huge difference. Your compressor runs smoother, lasts longer, and uses less energy. In this guide, we will walk you through every single step. You will learn what the pressure switch does, how to read your current settings, and exactly how to make the right adjustments. We will also cover safety tips, common mistakes, and when it is time to call in a professional or replace the switch entirely.
The pressure switch is the brain of your air compressor. It tells the motor when to start and when to stop based on the air pressure inside the tank. If the switch is set wrong, your compressor either runs constantly or shuts off too early. Both situations cause problems. Constant running wastes electricity and wears out the motor. Shutting off too early means your tools do not get enough air pressure. That is why learning how to adjust air compressor pressure switch the right way matters so much. Let us dive in and make sure your compressor is running at its best.
Key Takeaways
- Know Your Settings: Understanding cut-in and cut-out pressure is the foundation of proper adjustment.
- Use the Right Tools: A pressure gauge, screwdriver, and multimeter make the job safe and accurate.
- Follow Safety First: Always disconnect power and release tank pressure before touching any components.
- Small Adjustments Matter: Turn the adjustment screw in small increments and test between each change.
- Know When to Replace: A damaged or worn switch cannot be fixed by adjustment alone.
- Match Pressure to Your Tools: Your settings should align with the air tools you use most often.
📑 Table of Contents
- Understanding How the Air Compressor Pressure Switch Works
- Tools and Safety Gear You Will Need
- Step-by-Step Guide to Adjusting the Pressure Switch
- Setting the Right Pressure Levels for Your Needs
- Common Mistakes People Make When Adjusting the Pressure Switch
- When to Replace the Pressure Switch Instead of Adjusting
- Maintenance Tips to Keep Your Pressure Switch Working Well
- Final Thoughts
Understanding How the Air Compressor Pressure Switch Works
Before you touch any screws or dials, it helps to understand what the pressure switch actually does. Think of it as the traffic controller for your compressor. It monitors the air pressure inside the tank and sends signals to the motor. When the pressure drops below a certain level, the switch tells the motor to start. When the pressure reaches the top level, the switch tells the motor to stop. These two points are called the cut-in pressure and the cut-out pressure.
What Is Cut-In Pressure?
Cut-in pressure is the lower limit. This is when the compressor kicks on. Most home compressors have a cut-in pressure around 60 to 80 PSI. When your tank pressure falls below this point, the switch closes the electrical circuit and the motor starts running. The compressor then pumps air into the tank until it reaches the cut-out pressure.
What Is Cut-Out Pressure?
Cut-out pressure is the upper limit. This is when the compressor shuts off. For most home models, this sits around 120 to 150 PSI. The difference between cut-in and cut-out is called the pressure differential. A typical differential is about 20 to 40 PSI. Understanding this spread helps you set the switch correctly. If the differential is too narrow, the compressor cycles on and off too often. That puts extra strain on the motor.
The Role of the Unloader Valve
Here is something many people overlook. The unloader valve works hand in hand with the pressure switch. When the compressor shuts off, the unloader valve releases the trapped air from the pump. This makes it easier for the motor to start the next cycle. If the unloader valve is faulty, the pressure switch may not work properly even after a perfect adjustment. So always check both components when troubleshooting.
Tools and Safety Gear You Will Need
Gathering your tools before you start saves time and keeps you safe. You do not need anything fancy. Most of what you need, you probably already have in your garage. Here is a simple checklist.
- Flathead and Phillips screwdrivers for adjusting the switch screws
- A reliable pressure gauge to verify tank pressure accurately
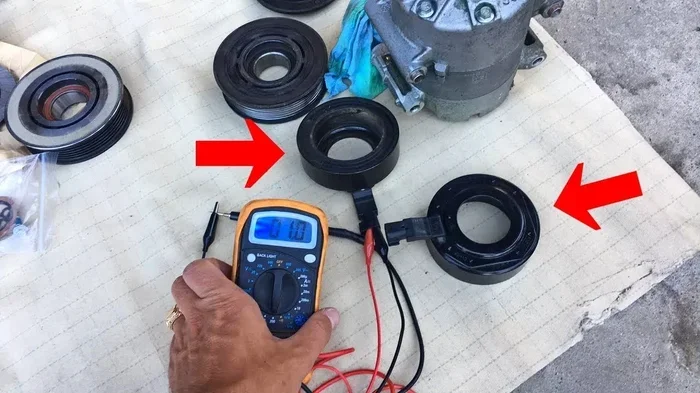
- A multimeter to check electrical connections if needed
- Safety glasses and gloves to protect from accidental releases
- A rag or towel for wiping down components
- The compressor manual for your specific model details
Safety should always come first. Before you do anything, unplug the compressor from the power outlet. If you have a gas-powered unit, turn off the fuel valve. Then release all the pressure from the tank by opening the drain valve. You do not want any surprise air bursts while you are working. Taking these simple precautions keeps you safe and protects your equipment.
Step-by-Step Guide to Adjusting the Pressure Switch
Now for the part you have been waiting for. Here is the actual process of adjusting the pressure switch. Follow each step carefully and do not rush. Precision here pays off in the long run.
Step 1: Locate the Pressure Switch
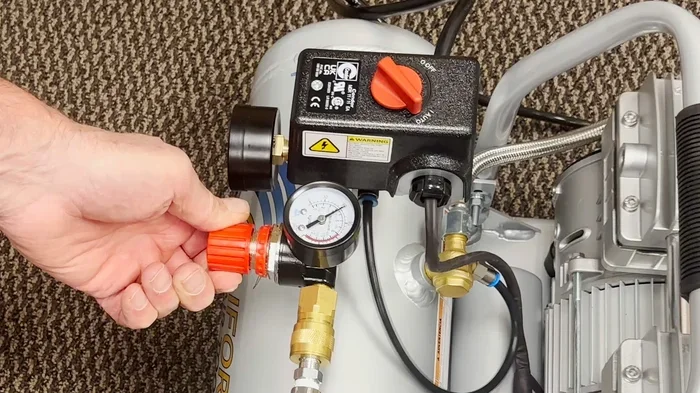
The pressure switch is usually mounted on the side or top of the compressor tank. It is a small box with wires coming out of it and one or two adjustment screws on top. On most models, the larger screw controls the cut-out pressure, and the smaller screw controls the cut-in pressure. If you are unsure, check your compressor manual. It will have a diagram showing exactly which screw does what.
Step 2: Check the Current Settings
Before making any changes, note the current pressure readings. Start the compressor and let it fill the tank. Watch the pressure gauge. Write down the PSI at which the compressor shuts off. Then let the air out slowly and note the PSI at which the compressor kicks back on. These are your baseline readings. Writing them down is important because you will want to compare them after making adjustments.
Step 3: Make Small Adjustments
Now it is time to turn the adjustment screws. Use the screwdriver to turn the cut-out screw clockwise if you want the compressor to shut off at a higher pressure. Turn it counterclockwise to lower the cut-out point. Do this in quarter-turn increments. After each turn, run the compressor and check the new pressure reading. Small changes are key. Turning the screw too much in one go can cause the compressor to run outside safe limits.
Next, adjust the cut-in screw the same way. Clockwise raises the cut-in pressure, meaning the compressor starts at a higher tank pressure. Counterclockwise lowers it. Again, work in small increments and test between each change.
Step 4: Test the New Settings
After making your adjustments, run the compressor through several full cycles. Watch how it behaves. Does it start and stop smoothly? Does it hold steady pressure? Let the compressor run for at least five to ten minutes. This gives you a good sense of how the new settings feel in real-world use. If something feels off, make minor tweaks until the compressor runs the way you want it to.
Pro Tip: If you use specific air tools, match your pressure settings to their requirements. Most tools list the needed PSI on the label or in the manual. Setting your cut-out pressure just slightly above that number gives you plenty of power without wasting energy.
Step 5: Secure the Adjustment
Once you are happy with the settings, make sure the adjustment screws are tight. Do not overtighten, as that can strip the threads. A firm hand is all you need. Then reconnect the power and let the compressor run one more time to confirm everything holds steady.
Setting the Right Pressure Levels for Your Needs
Not all compressors and all jobs need the same pressure. Setting the right levels depends on what you plan to use the compressor for. Here is a quick guide to help you decide.
- Light-duty tasks like inflating tires or blowing dust: Set cut-out around 90 to 100 PSI.
- General workshop use with nail guns and staplers: Aim for 100 to 120 PSI.
- Heavy-duty tasks with impact wrenches and sandblasters: You may need 120 to 150 PSI.
- Multiple tools running at once: Set a higher cut-out to maintain steady pressure across all tools.
Remember, the cut-in pressure should always be at least 20 PSI below the cut-out pressure. This gives the compressor enough room to breathe and prevents short cycling. Short cycling is when the compressor turns on and off too frequently. It causes wear on the motor and reduces the lifespan of the entire unit. If you notice your compressor cycling rapidly, your pressure differential may be too narrow.
Also, consider the size of your compressor tank. A larger tank holds more air and requires fewer cycles. This means less wear on the motor and more consistent pressure at the tools. If you are constantly running out of air, a bigger tank might be a better solution than cranking up the pressure settings.
Common Mistakes People Make When Adjusting the Pressure Switch
Even with the best instructions, mistakes happen. Here are the most common errors people make when adjusting their compressor pressure switch. Avoid these and you will save yourself a lot of headaches.
Turning the Screws Too Far
The biggest mistake is making large adjustments in one go. The pressure switch screws are sensitive. Turning them too far can push the cut-out pressure beyond safe limits. This stresses the motor and can even cause the tank to overpressurize. Always work in small increments and test between each turn.
Ignoring the Pressure Differential
Some people set the cut-in and cut-out pressures too close together. This causes the compressor to short cycle, which we mentioned earlier. The motor does not get enough rest between cycles, and that leads to overheating and premature failure. Keep a minimum 20 PSI gap between the two settings.
Forgetting to Check the Pressure Gauge
Do not adjust by feel or guesswork. Always use a reliable pressure gauge to verify your settings. A cheap or inaccurate gauge can give you false readings, leading to incorrect adjustments. If your gauge looks old or damaged, replace it before you start.
Skipping the Safety Steps
We cannot stress this enough. Never adjust the pressure switch while the compressor is running or while there is still pressure in the tank. Always disconnect power, release tank pressure, and wear safety gear. Skipping these steps can lead to serious injury.
When to Replace the Pressure Switch Instead of Adjusting
Sometimes adjustment is not enough. If your pressure switch is damaged, corroded, or simply old, no amount of tweaking will fix it. Here are signs that you need a replacement instead of an adjustment.
- The compressor will not start even after adjustment
- The switch clicks but the motor does not respond
- You notice visible damage, corrosion, or burnt marks on the switch
- The compressor cycles erratically no matter how you adjust the screws
- The pressure gauge shows fluctuating readings that do not stabilize
Replacing a pressure switch is a straightforward job for most homeowners. You can find replacement switches for most compressor brands online or at your local hardware store. Make sure you get the right model for your compressor. Check the manual or the label on the old switch for the part number. If you are unsure about electrical connections, it is always wise to consult a professional. For more information on electrical wiring and safety, you may want to check out our guide on how to wire a generator to a breaker box, which covers similar electrical safety principles.
Maintenance Tips to Keep Your Pressure Switch Working Well
Once you have your pressure switch dialed in perfectly, you want to keep it that way. Regular maintenance goes a long way. Here are a few simple habits that will extend the life of your pressure switch and your entire compressor.
- Drain the tank regularly: Moisture builds up inside the tank and can corrode internal components. Open the drain valve after every few uses.
- Check for air leaks: Listen for hissing sounds around the fittings and hoses. Even a small leak can cause the compressor to run more than it needs to.
- Keep the switch clean: Wipe down the pressure switch periodically to remove dust and debris. Buildup can interfere with the switch mechanism.
- Inspect the unloader valve: A stuck unloader valve puts extra strain on the pressure switch. Check it during routine maintenance.
- Replace worn gaskets: The gasket inside the pressure switch can wear out over time. Replacing it prevents air leaks and maintains consistent pressure.
Taking care of your compressor does not require a lot of time. A few minutes of attention after each use can prevent bigger problems down the road. Think of it like maintaining a vehicle. Regular oil changes and tire checks keep things running smoothly for years.
One more thing worth mentioning. The energy efficiency of your compressor depends heavily on proper pressure settings. An incorrectly set pressure switch can cause the compressor to consume more electricity than necessary. This is similar to how fuel consumption in a generator increases when the unit is not properly tuned. Proper settings save money on your energy bill and reduce wear on the motor at the same time.
Final Thoughts
Learning how to adjust air compressor pressure switch is a skill that pays for itself quickly. You save on energy costs, extend the life of your compressor, and get better performance from your air tools. The process is simpler than most people think. With the right tools, a little patience, and the steps outlined in this guide, you can handle the job confidently in under an hour.
Always remember to prioritize safety. Work with a powered-down and depressurized unit. Make small adjustments and test frequently. And do not be afraid to replace the switch if it shows signs of damage. A well-maintained compressor is a reliable compressor. Take the time to get it right, and your tools and projects will thank you for it.
Now that you know the ropes, go ahead and give your compressor the tune-up it deserves. Your next project will start with perfectly pressurized air and a motor that runs like it should. Happy adjusting!
Frequently Asked Questions
Can I adjust the pressure switch while the compressor is running?
No, you should never adjust the pressure switch while the compressor is running or while there is pressure in the tank. Always unplug the unit and release all tank pressure first. Working on a live or pressurized system is dangerous and can cause serious injury.
What is the normal pressure differential for an air compressor?
A normal pressure differential is usually between 20 and 40 PSI. This means if your cut-out pressure is set at 120 PSI, the cut-in pressure should be around 100 PSI. A narrow differential causes short cycling, while a wide differential means the compressor runs longer between cycles.
How often should I check my pressure switch settings?
It is a good idea to check your pressure switch settings every few months or whenever you notice a change in compressor performance. Regular checks help you catch small issues before they become big problems and keep your compressor running efficiently.
What happens if I set the cut-out pressure too high?
Setting the cut-out pressure too high puts extra stress on the motor and the tank. It can lead to overheating, increased energy consumption, and in worst cases, tank failure. Always stay within the PSI range recommended by the compressor manufacturer.
Do I need any special tools to adjust the pressure switch?
No special tools are needed. A standard flathead or Phillips screwdriver is usually all you need. However, having a reliable pressure gauge and a multimeter on hand helps you verify your settings accurately and safely.
Can a faulty pressure switch damage the compressor motor?
Yes, a faulty pressure switch can absolutely damage the motor. If the switch fails to shut off the compressor at the correct pressure, the motor can overheat and burn out. Similarly, if the switch fails to start the compressor, the motor may be subjected to repeated failed start attempts that cause damage over time.
=== SEO TITLE ===
How to Adjust Air Compressor Pressure Switch Like a Pro
=== URL SLUG ===
how-to-adjust-air-compressor-pressure-switch
=== META TITLE ===
How to Adjust Air Compressor Pressure Switch Like a Pro
=== INTERNAL LINKS USED ===
1. how to wire a generator to a breaker box
2. fuel consumption in a generator
=== LSI KEYWORDS USED ===
air compressor pressure switch, compressor cut-in pressure, compressor cut-out pressure, pressure switch calibration, air compressor maintenance, pressure gauge reading, compressor tank pressure, unloader valve, pressure switch replacement, compressor duty cycle, air compressor troubleshooting, compressor pressure settings, regulator adjustment, compressor motor protection, switch terminal wiring, compressor safety, air tool pressure requirements, compressor pump maintenance, pressure differential, compressor reset procedure