Here is How to Check AC Compressor With a Multimeter
Checking your AC compressor with a multimeter is a simple skill that saves money and prevents costly repairs. You will learn how to test compressor windings, check for continuity, and measure resistance like a pro. This guide walks you through every step with clear instructions and safety tips so you can diagnose compressor problems confidently.
Your AC compressor is the heart of your cooling system. When it stops working, your whole HVAC system suffers. Before you call an expensive repair technician, you can learn how to check AC compressor with a multimeter and figure out what is going wrong.
This guide breaks down the entire process into simple, easy-to-follow steps. You do not need to be an electrician to understand it. Whether you are a homeowner tackling AC unit troubleshooting for the first time or a DIY enthusiast looking to sharpen your skills, this article has you covered.
We will cover safety precautions, the right multimeter settings, and how to interpret your readings. By the end, you will know exactly what to do when your compressor starts acting up. Let us get started.
Key Takeaways
- Always disconnect power before testing: Safety comes first when working with electrical components.
- You need three key tests: resistance, continuity, and voltage checks to fully evaluate a compressor.
- Normal resistance values vary: Knowing what to expect helps you spot a failing compressor early.
- Common symptoms include humming, tripping breakers, and failure to start: These often point to electrical faults.
- Multimeter settings matter: Using the wrong mode can give false readings or damage your tool.
- Call a professional if you are unsure: Some compressor issues require licensed HVAC expertise.
📑 Table of Contents
- Understanding Your AC Compressor and Why Testing Matters
- Tools and Safety Precautions You Need
- How to Check AC Compressor With a Multimeter
- Reading Your Multimeter Results: What the Numbers Mean
- Common AC Compressor Problems Diagnosed With a Multimeter
- When to Call a Professional Instead of DIY Testing
- Maintaining Your AC Compressor for Longevity
- Conclusion
Understanding Your AC Compressor and Why Testing Matters
The AC compressor is responsible for pressurizing and circulating refrigerant through your system. Without it, your air conditioner cannot cool your home. When the compressor fails, you get warm air blowing from your vents, and your energy bills can spike.
Testing your compressor with a multimeter helps you identify electrical problems before they become expensive disasters. A compressor relay, start capacitor, or run capacitor can also cause similar symptoms. Testing lets you rule out these components and pinpoint the real issue.
Electrical testing of your compressor involves checking three main things: resistance, continuity, and voltage. Each test gives you a different piece of the puzzle. Together, they paint a clear picture of your compressor’s health.
Common Signs Your AC Compressor May Be Failing
Before you grab your multimeter, watch for these warning signs:
- Warm air from vents: The compressor is not pumping refrigerant properly.
- Humming noise without starting: The compressor clutch may be stuck or the windings are failing.
- Frequent breaker trips: An electrical short or ground fault could be present.
- Hard starting: The start capacitor may be weak, but the compressor itself could also be the problem.
- Burning smell: Winding insulation may be breaking down inside the compressor.
If you notice any of these symptoms, it is time to test your compressor. The good news is that a multimeter makes this process straightforward.
Tools and Safety Precautions You Need
Safety is the most important part of any electrical testing project. AC compressors operate at high voltages and can store electrical charge even when the power is off. Following these precautions protects you from injury.
What You Will Need
- A digital multimeter (auto-ranging is best for beginners)
- Screwdriver set for removing access panels
- Insulated gloves rated for electrical work
- Safety goggles
- A flashlight for seeing inside tight spaces
- Your AC unit’s wiring diagram (often found on the service panel door)
Critical Safety Steps
Before you touch anything inside the compressor terminals, follow these steps:
- Turn off the power at the breaker box. Do not rely on the thermostat alone. Flip the breaker for your AC unit and verify it is off.
- Discharge any stored energy. Capacitors can hold a dangerous charge long after power is disconnected. Use an insulated screwdriver to discharge the start capacitor and run capacitor carefully.
- Wear insulated gloves and goggles. Even with the power off, residual voltage can surprise you.
- Work on a dry surface. Never test electrical components in wet conditions.
- Keep one hand in your pocket. This reduces the risk of current traveling through your body if you accidentally touch a live wire.
Also, if you have been working around ozone generator equipment or any other electrical devices nearby, make sure you follow proper safety protocols for what to do if exposed to ozone generator scenarios. Electrical work around compressed gases or cooling systems requires extra caution. And remember, if you are running any backup generator during testing, ensure proper wiring distance and setup. You can refer to guides on how far should generator be from house and how to wire a generator to a breaker box for safe electrical practices.
How to Check AC Compressor With a Multimeter
Now for the main event. Testing your AC compressor with a multimeter involves three distinct tests. Each one checks a different electrical property. Let us walk through them one by one.
Step 1: Locate the Compressor Terminals
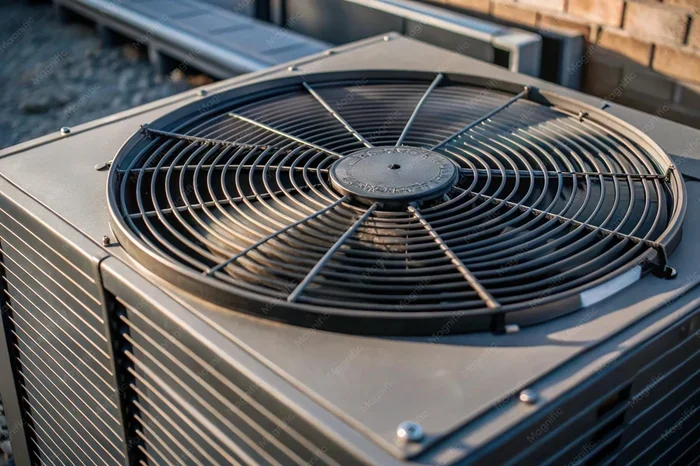
Open your outdoor AC unit’s access panel. You will see the compressor sitting in the center of the condensing unit. On top of the compressor, you will find three electrical terminals. These are labeled S (Start), R (Run), and C (Common).
Take a photo or make a sketch of the wiring before you disconnect anything. This will help you reconnect everything correctly later. If your compressor does not have clear labels, consult your unit’s wiring diagram or the contact information for the manufacturer.
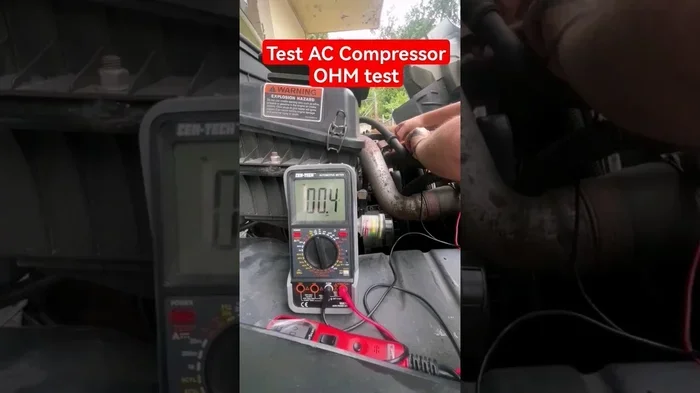
Step 2: Test Resistance (Ohm Test)
The resistance test tells you if the compressor windings are intact. Here is how to do it:
- Set your multimeter to the ohm (Ω) setting. Choose the lowest range if your meter is not auto-ranging.
- Disconnect the wires from the compressor terminals. This isolates the compressor from the rest of the system.
- Place one probe on the C terminal and the other on the R terminal. Write down the reading.
- Now place one probe on C and the other on S. Write down this reading too.
- Finally, place one probe on R and the other on S. This reading should equal the sum of the previous two.
If any reading shows infinite resistance (OL on your display), the winding is open and the compressor is bad. If the reading is zero or very close to zero, the winding is shorted. Normal resistance values typically range from 0.5 to 2 ohms, but this varies by compressor model.
Step 3: Test Continuity to Ground
This test checks if electricity is leaking from the compressor windings to the grounded metal body. A ground fault is a serious safety hazard.
- Keep your multimeter on the ohm setting.
- Place one probe on a compressor terminal (C, R, or S).
- Place the other probe on the compressor’s metal body or ground wire.
You should read infinite resistance (OL). Any reading at all means the compressor has a ground fault. This is a clear sign of compressor failure and the unit should not be powered on until the issue is resolved.
Step 4: Test Capacitor Values
The start capacitor and run capacitor help your compressor kick on and run smoothly. Testing them with a multimeter is essential because a bad capacitor often mimics compressor failure.
- For capacitance testing: Set your multimeter to the capacitance mode (indicated by a symbol that looks like two parallel lines). Discharge the capacitor first, then touch the probes to the capacitor terminals. Compare the reading to the capacitor’s rated value printed on its side.
- Acceptable range: Most capacitors should read within 10% of their rated microfarad (µF) value.
If the capacitor reads significantly lower than its rating, replace it. A weak capacitor puts extra strain on the compressor winding and can cause the unit to fail prematurely.
Step 5: Test Voltage (If the Compressor Is Running)
Voltage testing should only be done when the compressor is actively running. This test is more advanced and carries higher risk.
- Set your multimeter to AC voltage mode.
- Restore power at the breaker.
- Turn on the AC unit at the thermostat.
- Carefully place one probe on the C terminal and the other on a known ground.
- Read the voltage. It should match the rated voltage for your unit, typically 208V or 230V for residential systems.
Never touch exposed terminals while the system is energized. Use insulated tools and keep your hands dry. If you are uncomfortable with this step, skip it and let a professional handle the live voltage test.
Reading Your Multimeter Results: What the Numbers Mean
Understanding your readings is just as important as taking them. Here is a quick reference guide:
- Normal resistance between windings: 0.5 to 3 ohms, depending on the compressor size.
- Open winding: OL or infinite reading means the winding is broken.
- Shorted winding: Zero or near-zero resistance means the wires are touching inside the compressor.
- Ground fault: Any continuity between a terminal and the metal body means the compressor needs replacement.
- Bad capacitor: A capacitance reading more than 10% below the rated value means the capacitor is failing.
Keep in mind that external factors like refrigerant lines and ambient temperature can slightly affect your readings. However, dramatic deviations always point to a real problem. If your electrical testing shows any of the failure conditions above, the compressor likely needs to be replaced.
Quick Tips for Accurate Readings
- Always test on a dry day with low humidity.
- Wait at least 30 minutes after turning off the power before testing capacitors.
- Clean the terminal connections with a wire brush before testing.
- Take multiple readings and compare them for consistency.
- Use the same multimeter for all tests to avoid calibration differences.
Common AC Compressor Problems Diagnosed With a Multimeter
Now that you know how to test, let us look at the most common problems you might find:
Open Windings
An open winding means the wire inside the compressor has broken. This usually happens from overheating over time. The compressor winding literally burns through, creating a gap in the electrical circuit. Your multimeter will show OL on all terminal combinations. The fix is compressor replacement.
Shorted Windings
A short occurs when two winding wires touch each other inside the compressor. This creates a very low resistance path, often near zero ohms. Shorted windings cause the compressor to draw too much current, which trips the breaker or blows a fuse. This type of failure is almost always irreparable.
Ground Fault
A ground fault is the most dangerous problem. It means electricity is escaping from the windings into the metal housing. This can cause electric shock or fire. A ground fault is easy to detect with your multimeter and always requires compressor replacement.
Failed Capacitors
Sometimes the compressor itself is fine, but the start capacitor or run capacitor has failed. A failed capacitor prevents the compressor from starting or causes it to stall. Testing the capacitor separately can save you from replacing a perfectly good compressor.
When to Call a Professional Instead of DIY Testing
Testing your AC compressor with a multimeter is empowering, but it is not the right move in every situation. Here are times when you should call a licensed HVAC technician:
- You are uncomfortable working with electrical components.
- Your multimeter readings are inconsistent or confusing.
- The compressor has a refrigerant leak (this requires specialized tools and EPA certification to repair).
- You have tested all electrical components and the compressor still fails to start.
- Your unit is under warranty, and DIY repairs could void the coverage.
Always remember that your safety matters more than any repair bill. If something feels wrong, stop and call a professional. A good technician can also check your refrigerant lines and perform a full AC unit troubleshooting that goes beyond what a multimeter can tell you.
Maintaining Your AC Compressor for Longevity
Regular maintenance keeps your compressor healthy and reduces the need for frequent electrical testing. Here are simple steps you can take:
- Clean the condenser coils at least once a year to prevent overheating.
- Check the contactor regularly for signs of arcing or wear.
- Replace capacitors at the first sign of weakness before they damage the compressor.
- Keep the area around the outdoor unit clear of debris and vegetation.
- Schedule professional maintenance annually to catch small problems before they become big ones.
Taking care of your compressor extends its lifespan and keeps your energy bills low. A well-maintained HVAC system runs more efficiently and is less likely to leave you sweating in the summer heat.
Conclusion
Learning how to check AC compressor with a multimeter gives you real power over your home’s comfort and repair costs. You can test resistance, check for continuity, measure capacitance, and even verify voltage with a basic digital multimeter and the steps in this guide. Remember to always prioritize safety, disconnect power before testing, and take your time with each measurement.
If your readings point to a failing compressor, you now know what to look for and what the numbers mean. This knowledge helps you have smarter conversations with repair technicians and avoid being quoted unnecessary work. Share this guide with a friend who might benefit from it, and bookmark it for your next AC unit troubleshooting session.
Your compressor is a hardworking component. With regular care and the right testing approach, you can keep it running strong for years to come.
Frequently Asked Questions
Can I test an AC compressor with any multimeter?
Yes, a basic digital multimeter works for testing resistance, continuity, and capacitance. Auto-ranging multimeters are easier for beginners because they select the correct range automatically. Avoid using an analog multimeter for capacitance testing, as it does not measure capacitance accurately.
What should the resistance be on an AC compressor?
Most residential compressors show resistance readings between 0.5 and 3 ohms across the windings. The exact value depends on the compressor model and size. Check your unit’s manual for the specific expected range. Any reading of OL or zero ohms indicates a failed compressor winding.
Is it safe to test a compressor with the power on?
Voltage testing requires the power to be on, but it should only be done by experienced individuals. Resistance and continuity tests must always be performed with the power completely disconnected. Always wear insulated gloves and follow all safety precautions before working inside the unit.
What causes an AC compressor to fail electrically?
Common electrical causes include overheating, power surges, aging wiring, failed capacitors, and refrigerant leaks that force the compressor to work harder. Moisture inside the unit can also cause short circuits in the windings over time.
Can a bad capacitor damage the compressor?
Yes, a failing start capacitor or run capacitor puts extra strain on the compressor motor. This can cause overheating and premature winding failure. Replacing a weak capacitor early is much cheaper than replacing the entire compressor.
How often should I test my AC compressor?
You do not need to test your compressor regularly. However, testing is a good idea whenever you notice symptoms like warm air, strange noises, or frequent breaker trips. Annual HVAC maintenance by a professional is usually enough to catch problems before they require electrical testing.